Contents
3. Steps
Required tools
Refer to the "Resources" section for download.
- Blender
- SuperBMD
- j3dview
- Any text editor you like (Notepad++ is recommended)
- NeoKCLCreate
- Arc Convertor
- Whitehole
- Wiimm's ISO Tools (to get your SMG1 dump)
Required tutorials
- Custom model with an animated in-game material
Steps files used: tutorial6.zip
Just like the last tutorial (Let's make some ice!) I will show you how to make some nice looking water. The water effect that I am going to use here is found on SMG1 on the CocoTwinB object from EggStarGalaxy (Fig. 1).

(Fig. 1 - CocoTwinB object's water)
The DAE file created by SuperBMD after extracting the contents of the BDL file associated with the CocoTwinB model shows us that this water effect is composed by 3 objects (Fig. 2). The materials and textures for the 3 pieces are:
| Object | Material | Textures |
| External (mesh-0) | lambert30_v | - Water_chrome0 - Water_chrome0 |
| Intermediate (mesh-1) | lambert27_v | - grnd3 |
| Internal (mesh-2) | lambert31_v | - grnd3 - Water_chrome0 |
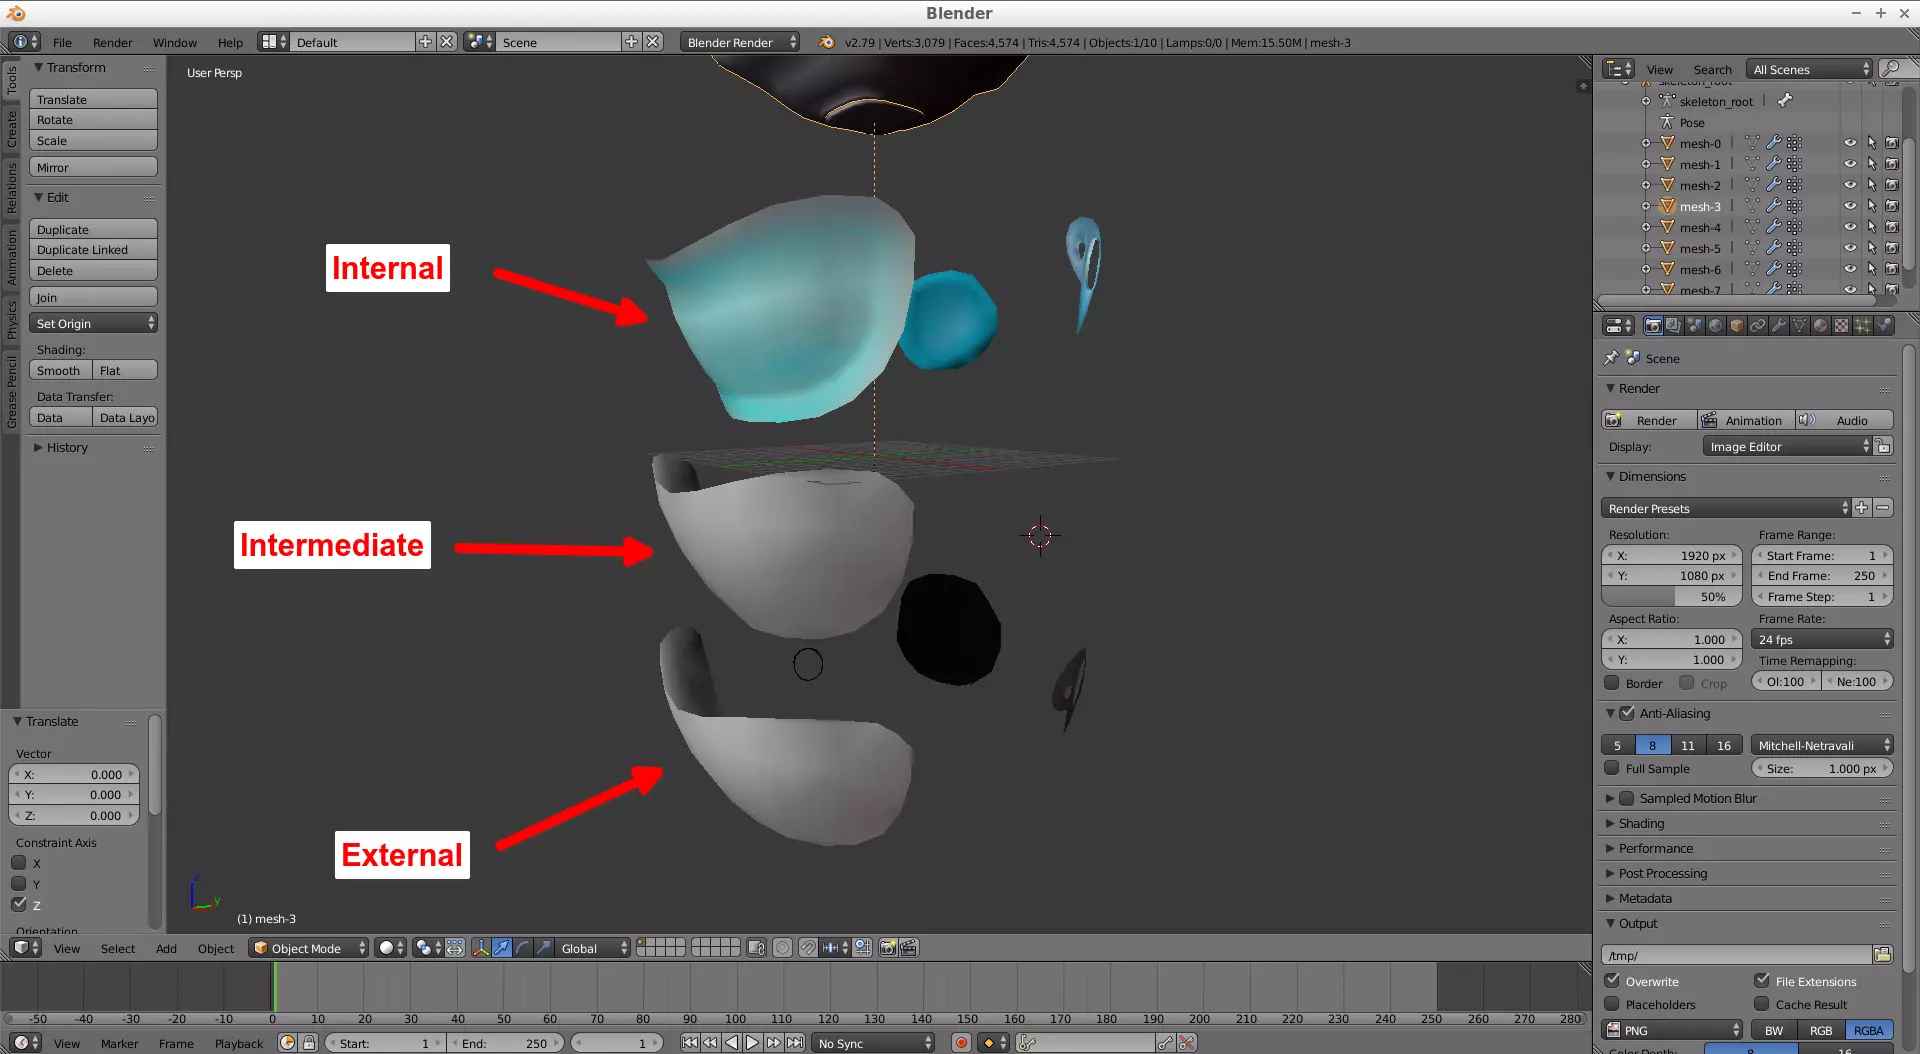
(Fig. 2 - CocoTwinB's DAE file opened in Blender)
I’ve decided to make with this effect a little water planet model, just to show how this water looks like. I choose 3 UV spheres on Blender (one inside another) and assigned the respective materials to each one of them, applied Shade Smooth and also the Sphere Projection unwrap option to all spheres (Fig. 3).
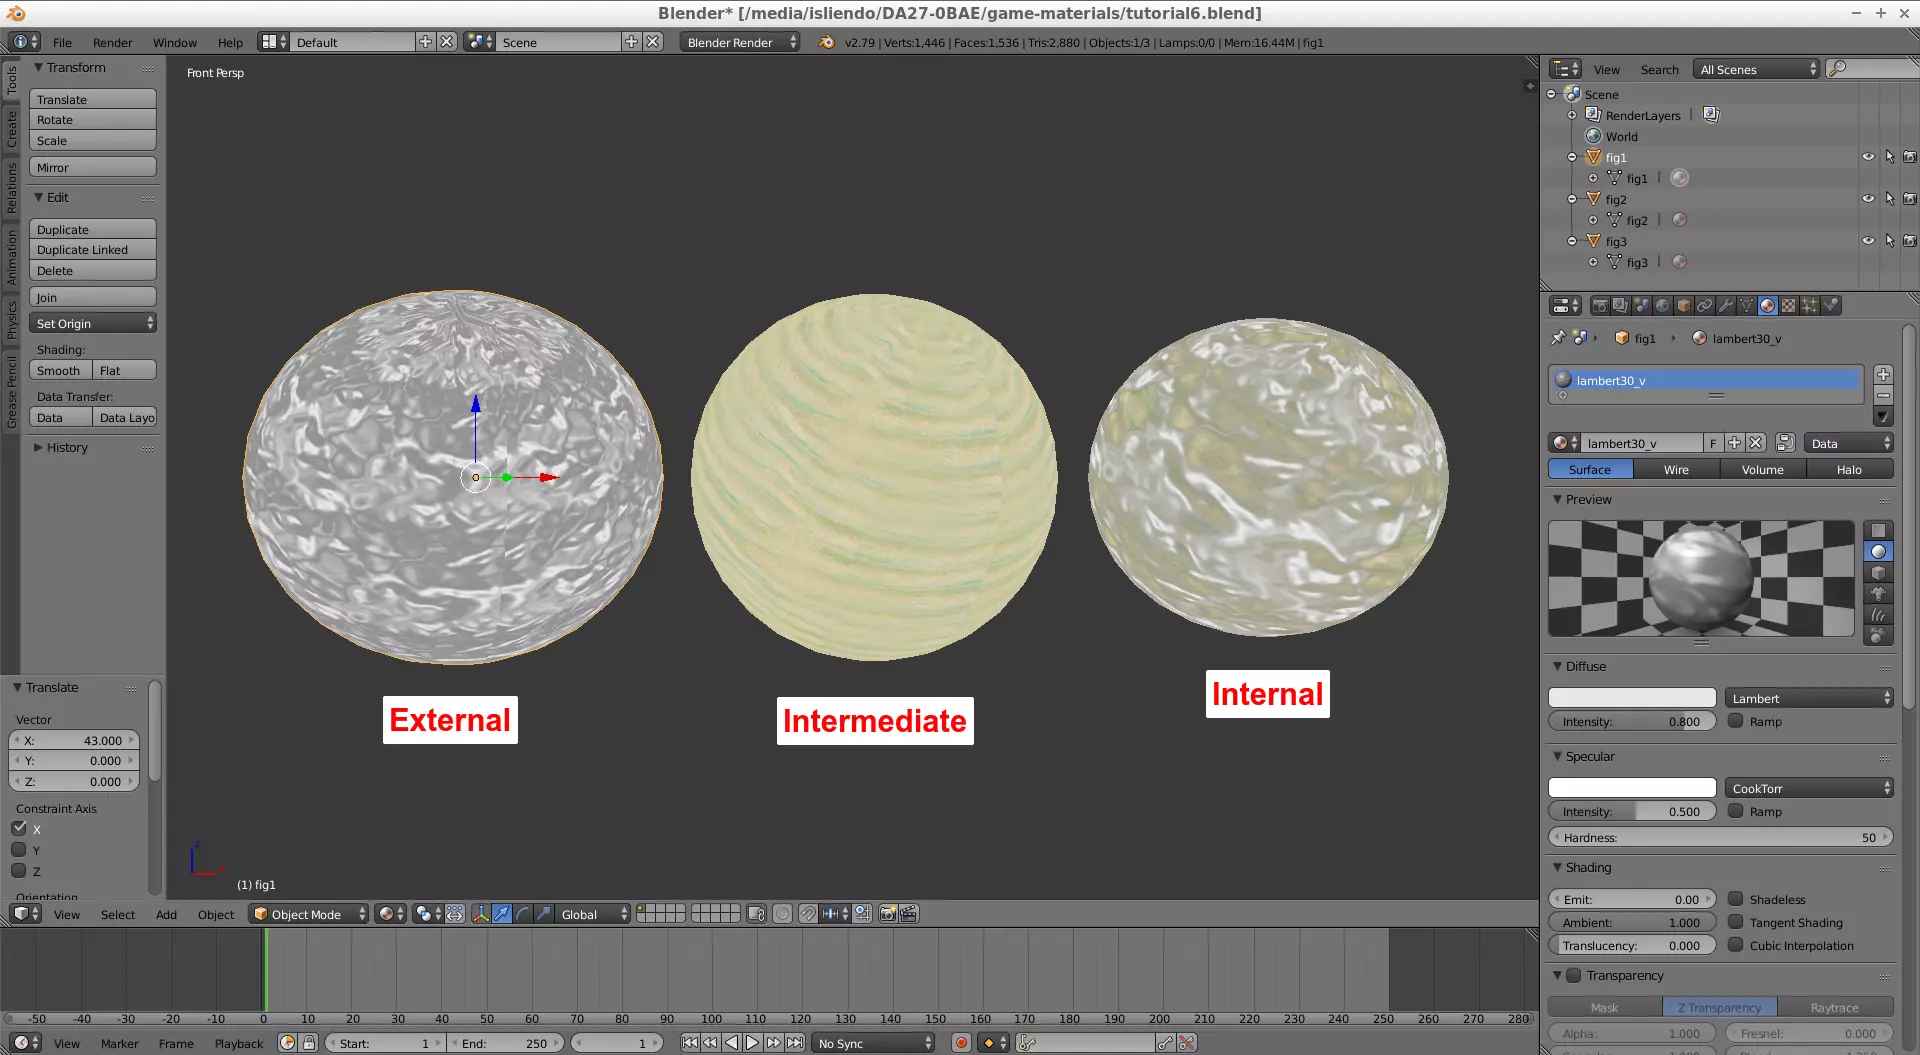
(Fig. 3 - Custom model setup for the water effect)
From the DAE file we can see that one of the objects (the internal one) composing this water effect has some blue vertex paint (go to Texture view) (Fig. 4). I need that vertex paint color on the internal part of my custom model. To transfer vertex paint from an object to another of your choice you can to use the Blender’s Data Transfer modifier. The process in this case goes as follows:

(Fig. 4 - Blue vertex paint on internal part of original DAE model)
1) Import the DAE file of the original model to your custom model project and locate the desired part of it that has the vertex paint you want to transfer to your target custom object (Fig. 5) (fig3 will receive the vertex paint of the mesh-2 object from the DAE file). Delete the skeleton_root of the DAE model so you can move the model’s pieces more freely).

(Fig. 5 - Original internal object imported in custom model project)
2) Create a Vertex Color for your target object in the Data tab (press the + button, Fig. 6). You need to do this before using the Data Transfer modifier.

(Fig. 6 - DAE internal object imported in custom model project)
3) Create a Data Transfer modifier for your target object, select a Source Object for this modifier (the object from which you want to extract the vertex paint), in this case mesh-2 (Fig. 7a and 7b), check the Face Corner Data box, select the VCol option, change the All Layers option at the right to the option related to the mesh-2 object (in my case it is meshId2-color0) and change the By name option to the Vertex Color created for our target object from before, Col (Fig. 7c). Finally, hit apply and now you can delete the mesh-2 object from the project.

(Fig. 7a - Data Transfer modifier)
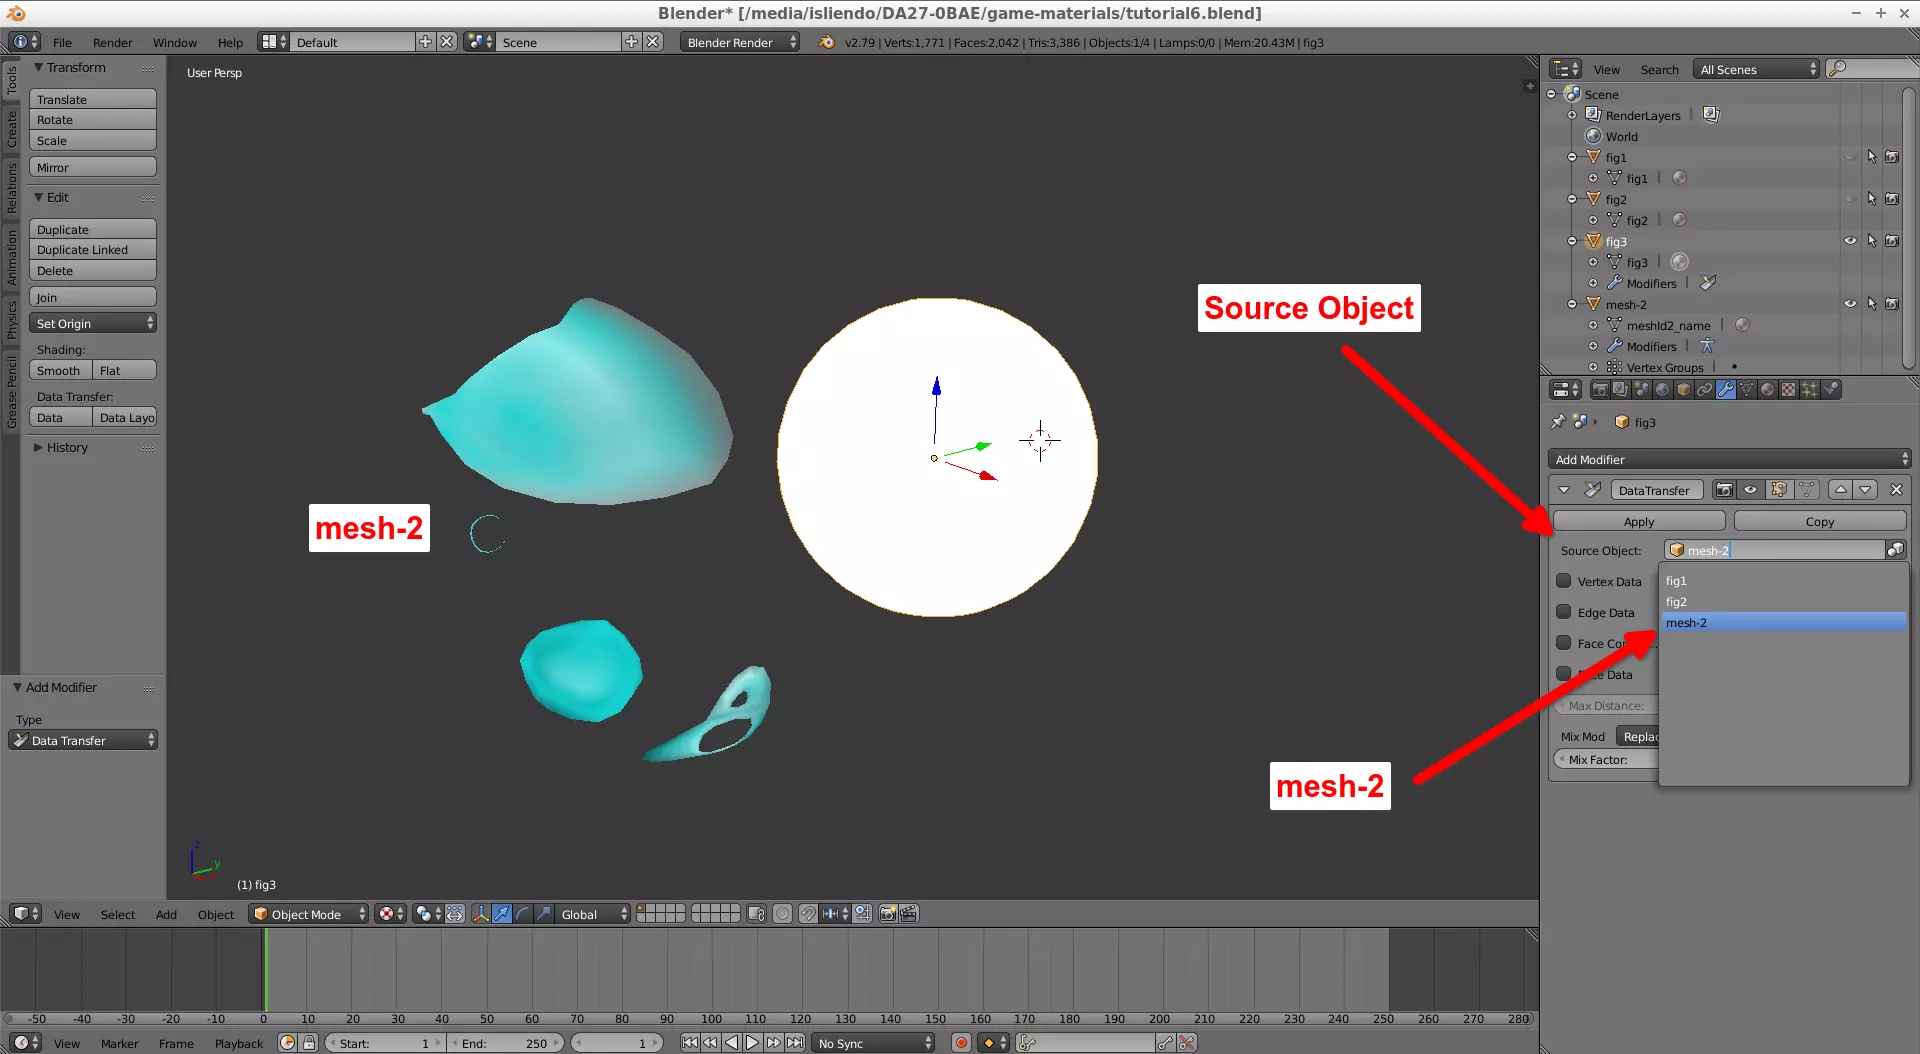
(Fig. 7b)

(Fig. 7c)
NOTE 1: it isn’t necessary to do this to all the objects of your model, I did it in this case because I just wanted some fast blue vertex paint to mimic the DAE model water effect. Vertex paint is something else that can be asigned to the faces of the objects that is not related to the materials.
NOTE 2: By changing the position, scale and rotations of the Source Object you can change how the vertex paint will be applied to the target object.
NOTE 3: If you add the vertex paint like this to your custom models using in-game materials, the converted model (BMD/BDL) will display correctly in j3dview and Whitehole. Weight paint also has this effect.
I exported the vertex paint from the remaining parts of the DAE file related to the parts of my custom model as well (just because I wanted to, Fig. 8).

(Fig. 8 - Vertex paint on the custom model)
The normals for all objects of our custom model need be facing outwards for this water effect.
After all that, you can export your model as and FBX (remember to scale it, reset the models properties with the Ctrl + A functions and order the meshes by name as in the DAE model) and convert it to BMD by using SuperBMD. You will have to use the --nosort option so that the materials on the model display correctly on j3dview/game. I don’t know yet how to explain how the sorting affects how the materials will show on game but always follow the order of meshes the DAE file has for complex material effects. Then, we can see the model on j3dview and finally on game (Vid. 1, Fig. 9).
(Vid. 1 - Water planet model with its animation in j3dview)

(Fig. 9 - Mario standing on a new water planet)
NOTE 4: Remember to include the BTK file of the original model on the ARC file of your custom model so that the water gets its animation!
NOTE 5: For this custom model to work in game as shown in Fig. 9, I used a custom collision, a water area object (spherical) and a spherical gravitational field. In future tutorials I will cover how to deal with those.