Contents
Required tools
Go to Resources for download links.
- Blender
- SuperBMD
- j3dview
- Any text editor you like (Notepad++ is recommended)
- Collision Creator
- Arc Convertor
- Whitehole
- Wiimm's ISO Tools (to get your SMG1 dump)
Required tutorials
Warnings
- I will be dealing with a SuperBMD bug that has not been corrected yet. It can be bypassed by using j3dview (I will explain this on the tutorial).
- This tutorial is only to import a model with 1 in-game material. The next tutorial will be for 2 and more. The reason I made this distinction is because I believe this is the fastest way to import a model with 1 in-game material only, when using 2 or more you have to be more organized.
Steps --- files used: tutorial2.zip
First we need to know the in-game material we want to extract. Open Whitehole and search around the galaxies for the object that has the material you want. I will choose the material this planet has as grass. It is located in Good Egg Galaxy (Fig. 1).
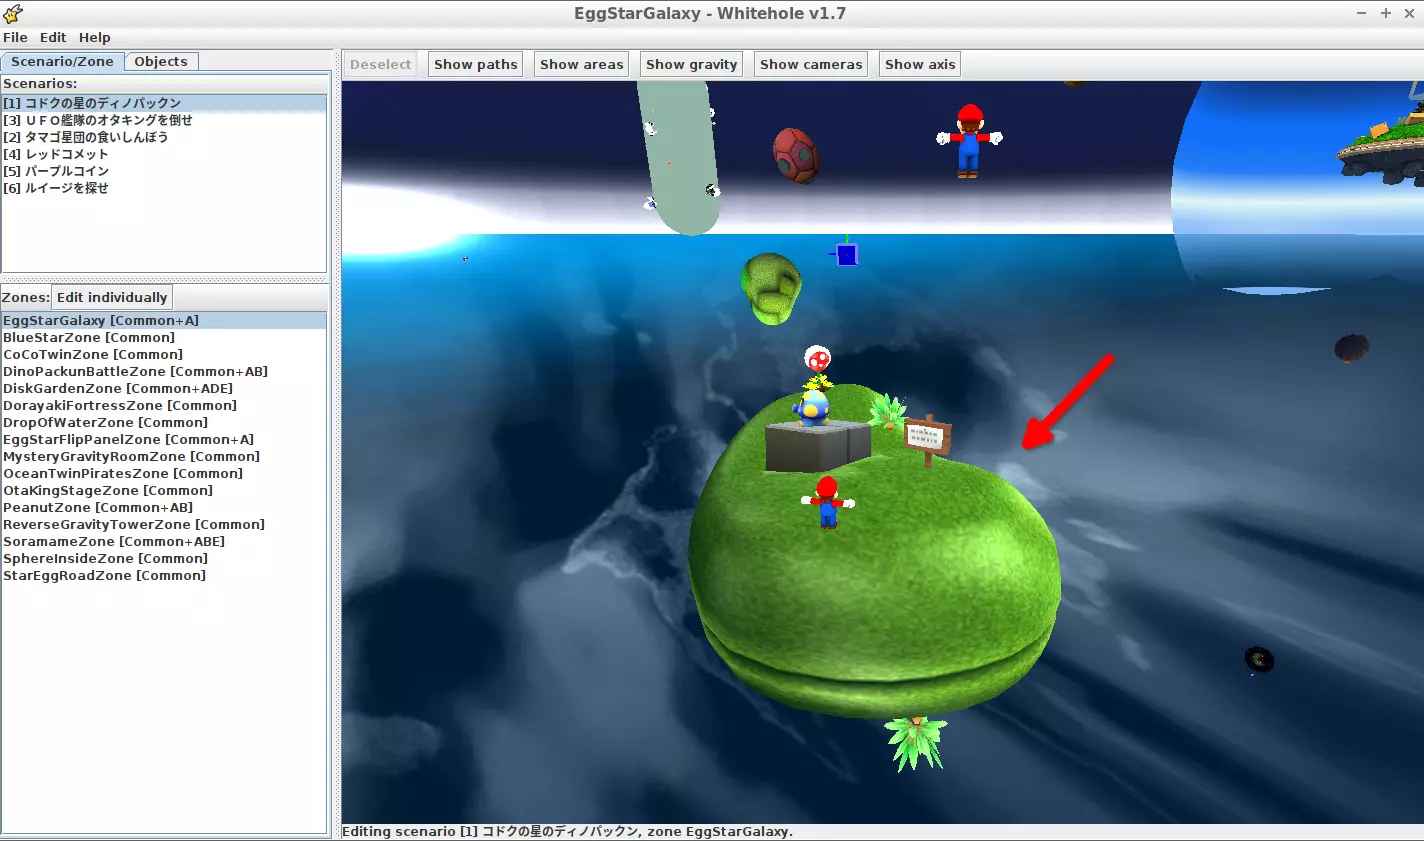
(Fig. 1 - Whitehole search for model containing desired material)
Click on the desired object and look for its Object property (you will need this value), in my case the Object is BroadBeanPlanetB (Fig. 2). You can now close Whitehole and go to the ObjectData folder of your SMG1 dump. In there you will look for an ARC file named exactly as the Object value you got from before, in my case that would be the BroadBeanPlanetB.arc file (Fig. 3). This is the file that contains the planet model from Fig. 1. Just to keep things organized, create a folder named game-materials on your SMG working environment and place the ARC file inside a folder that has the same name as the ARC file (subject to personal preference, Fig. 4).
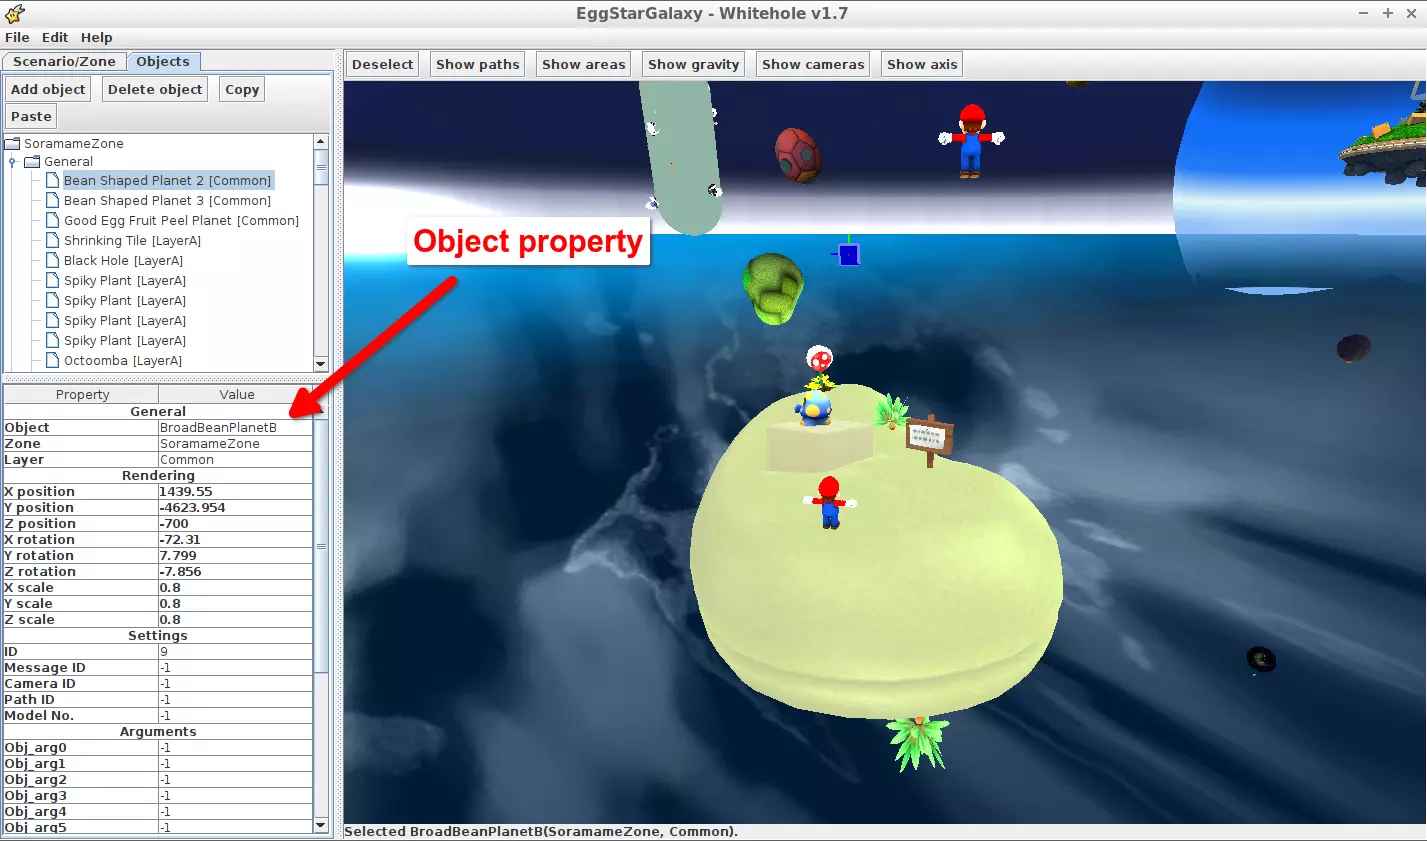
(Fig. 2 - Model's object property)
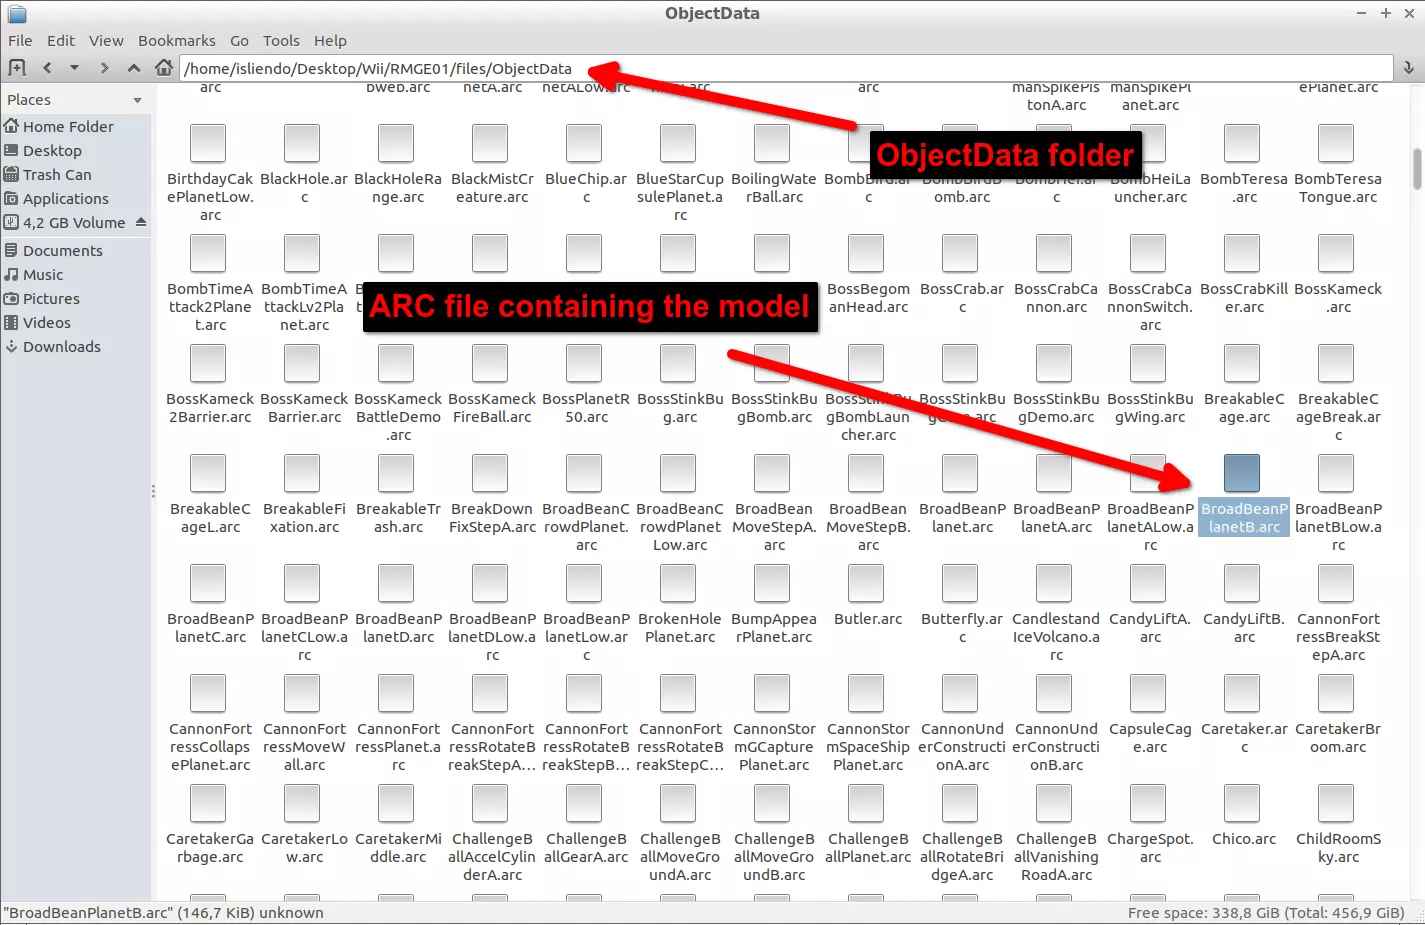
(Fig. 3 - ARC file in ObjectData folder containing desired model)
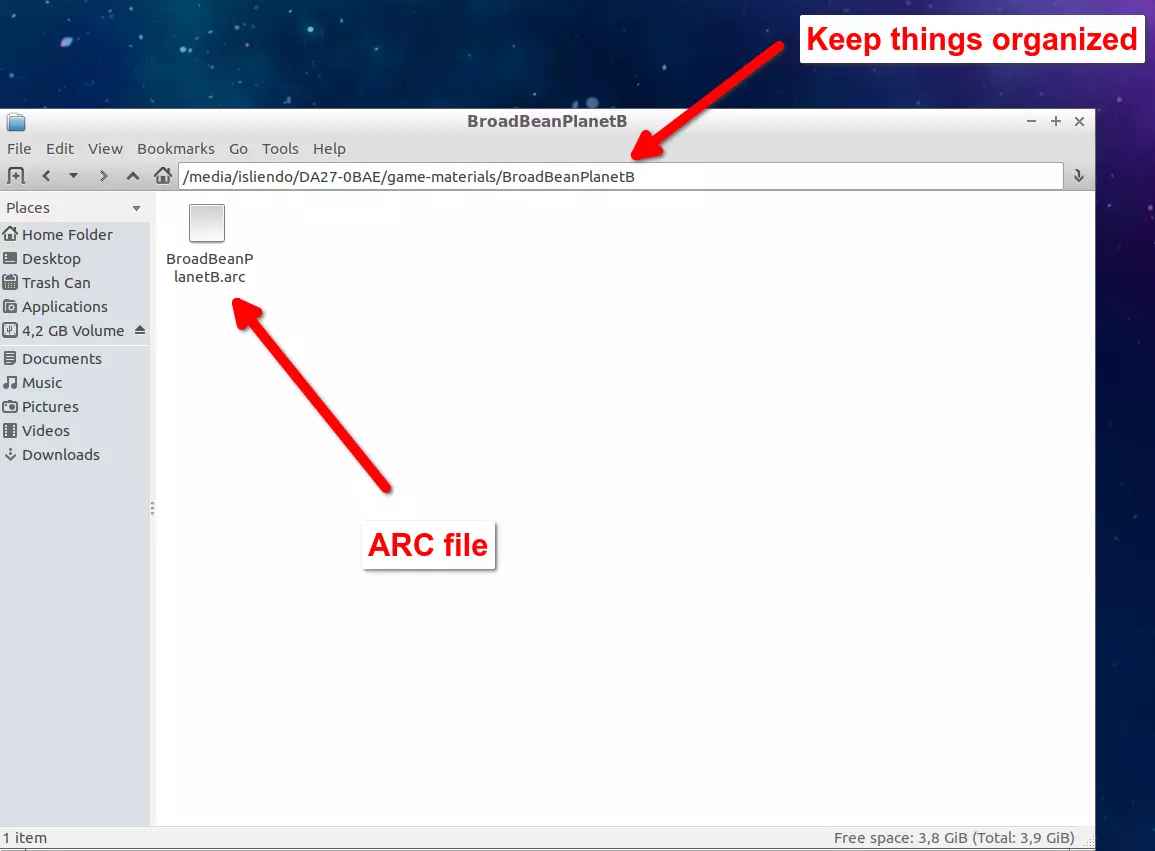
(Fig. 4 - Optional organization method)
Now create a new window, locate the Arc Convertor tool and drag and drop the ARC file extracted into to the arcExtract.exe file. A few new files will appear in the same location as the ARC file (depending on the object there will be more or less files, Fig. 5).
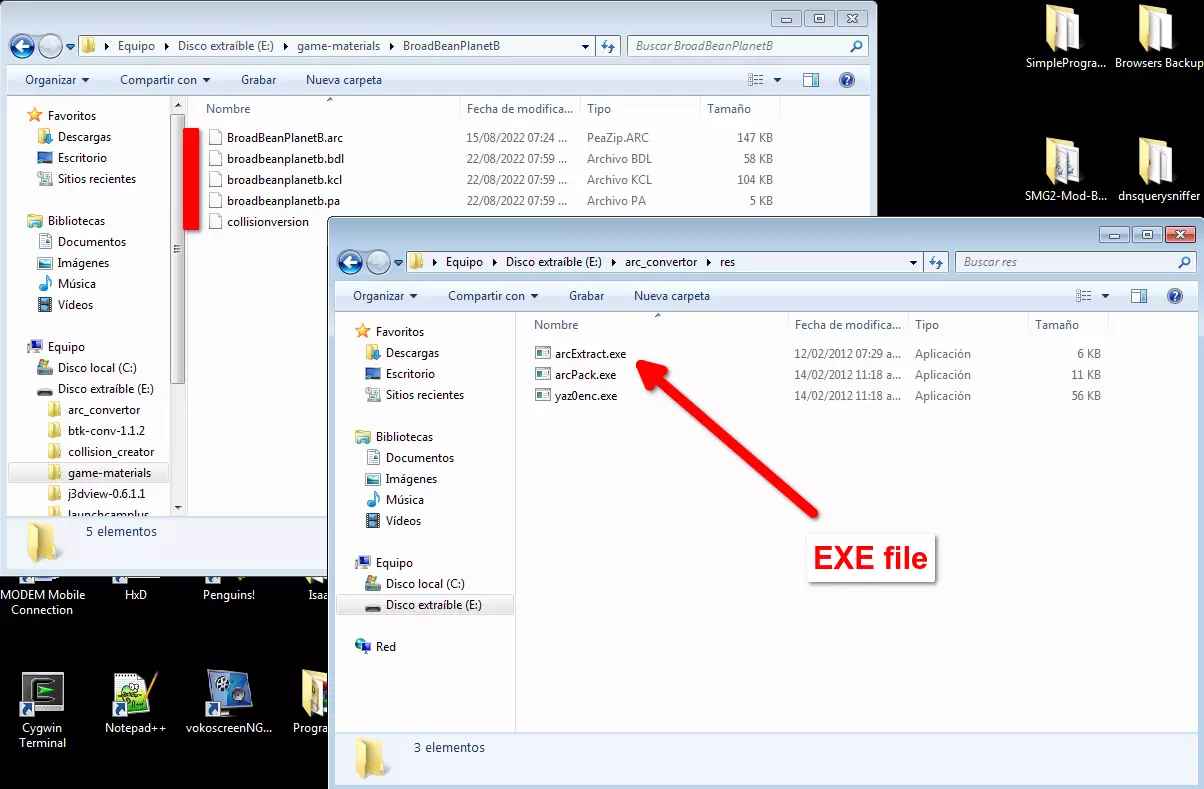
(Fig. 5 - Extract ARC file contents)
Locate the BDL/BMD file (file containing the 3D model of the object) and in the other window search for the SuperBMD tool. Drag and drop the BDL file into the SuperBMD.exe file. Several more files will appear on the same location as the BDL/BMD file (Fig. 6).
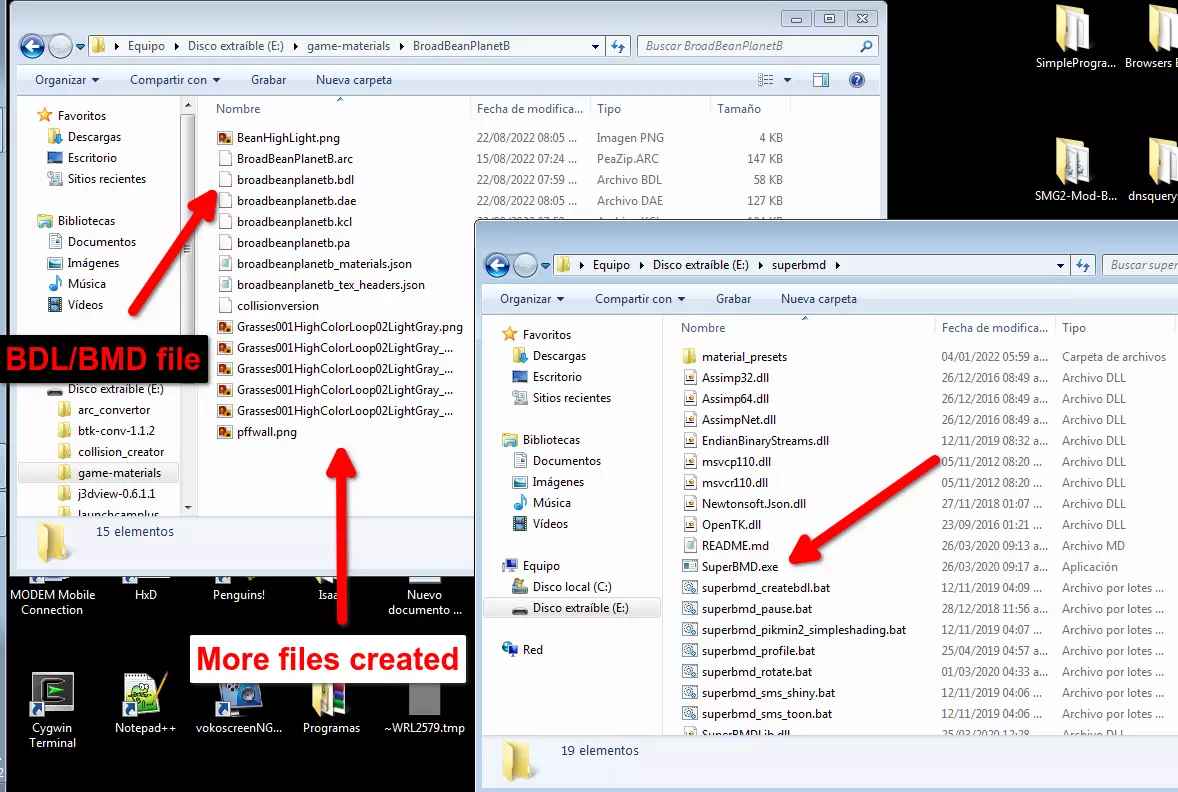
(Fig. 6 - Extract BDL/BMD file contents)
The file we want to get right now is the DAE file created by SuperBMD. This is the 3D model of the object containing our desired material in a file format that can be opened on Blender. Open Blender, go to File > Import > Collada (Default) (.dae) (Fig. 7) and search for the DAE file from before. After selecting it, the model will show up on Blender. It will show very big so scale it down to a reasonable size (Fig. 8).
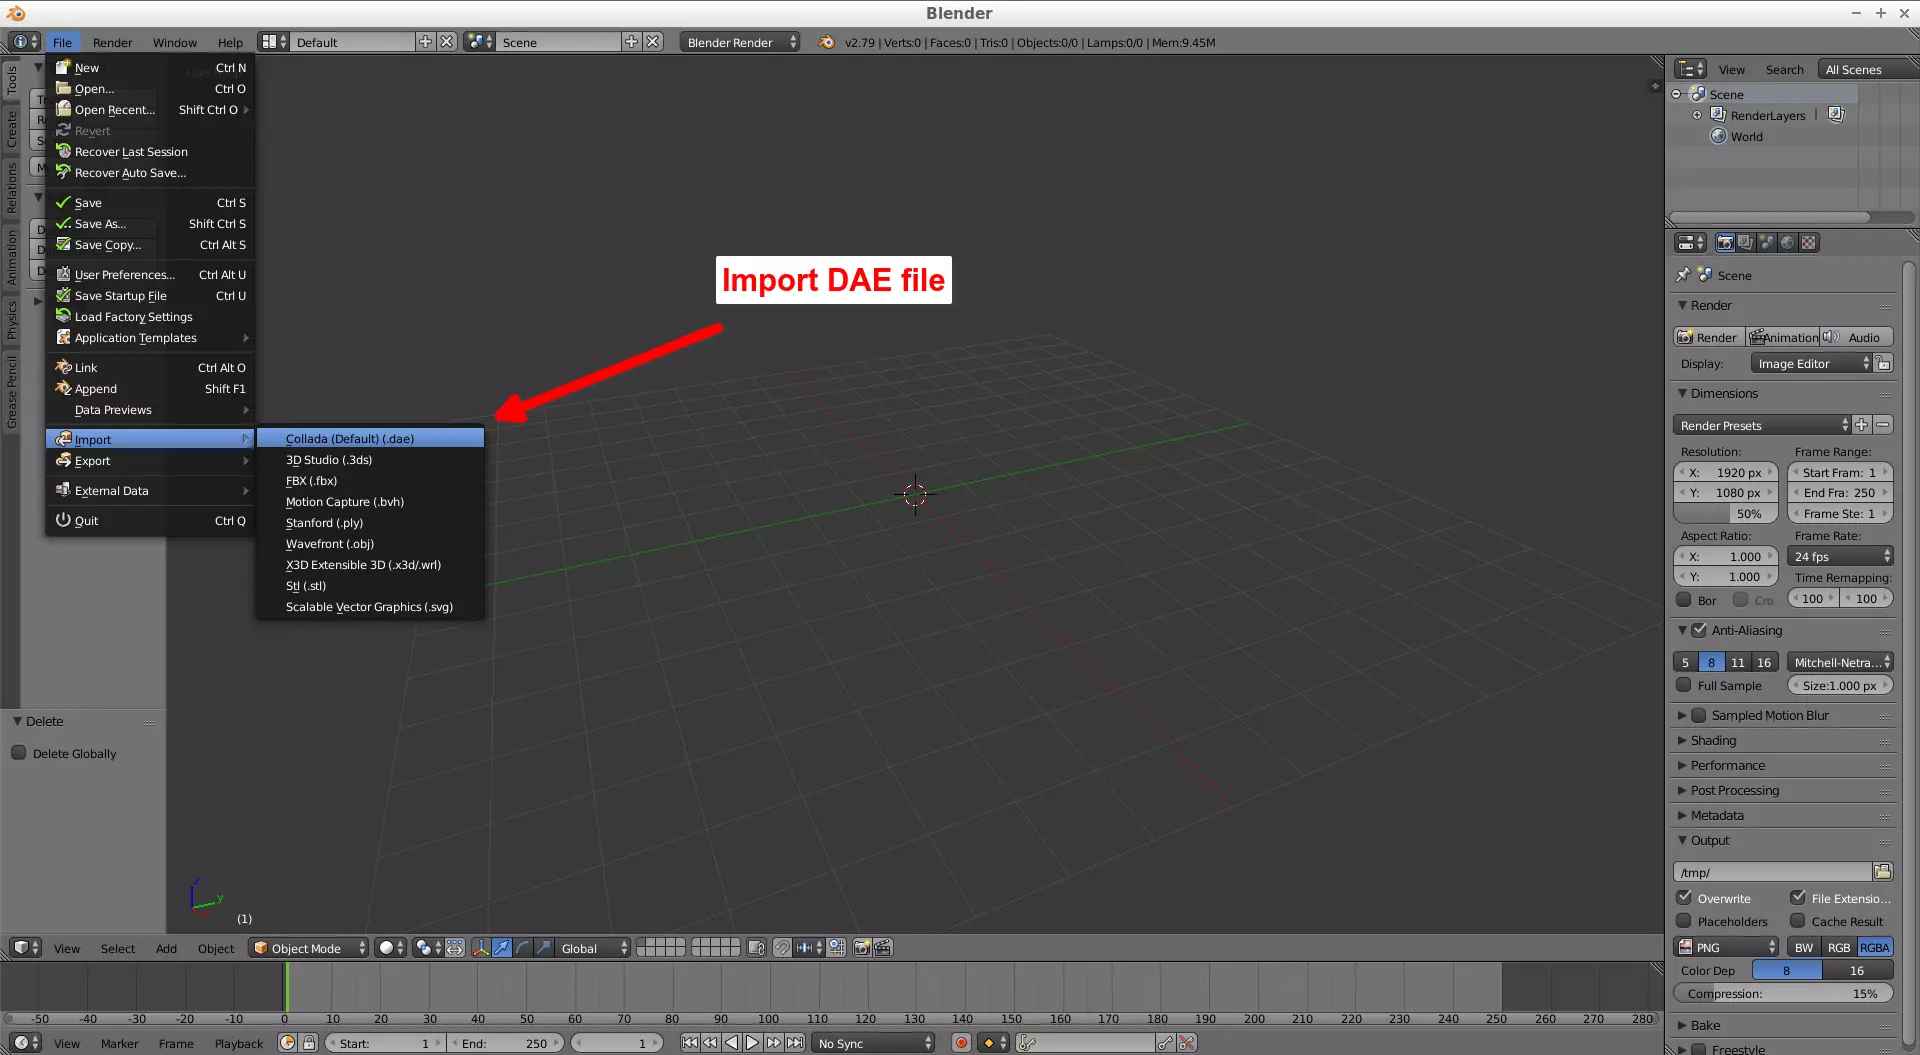
(Fig. 7 - Import DAE file to Blender)
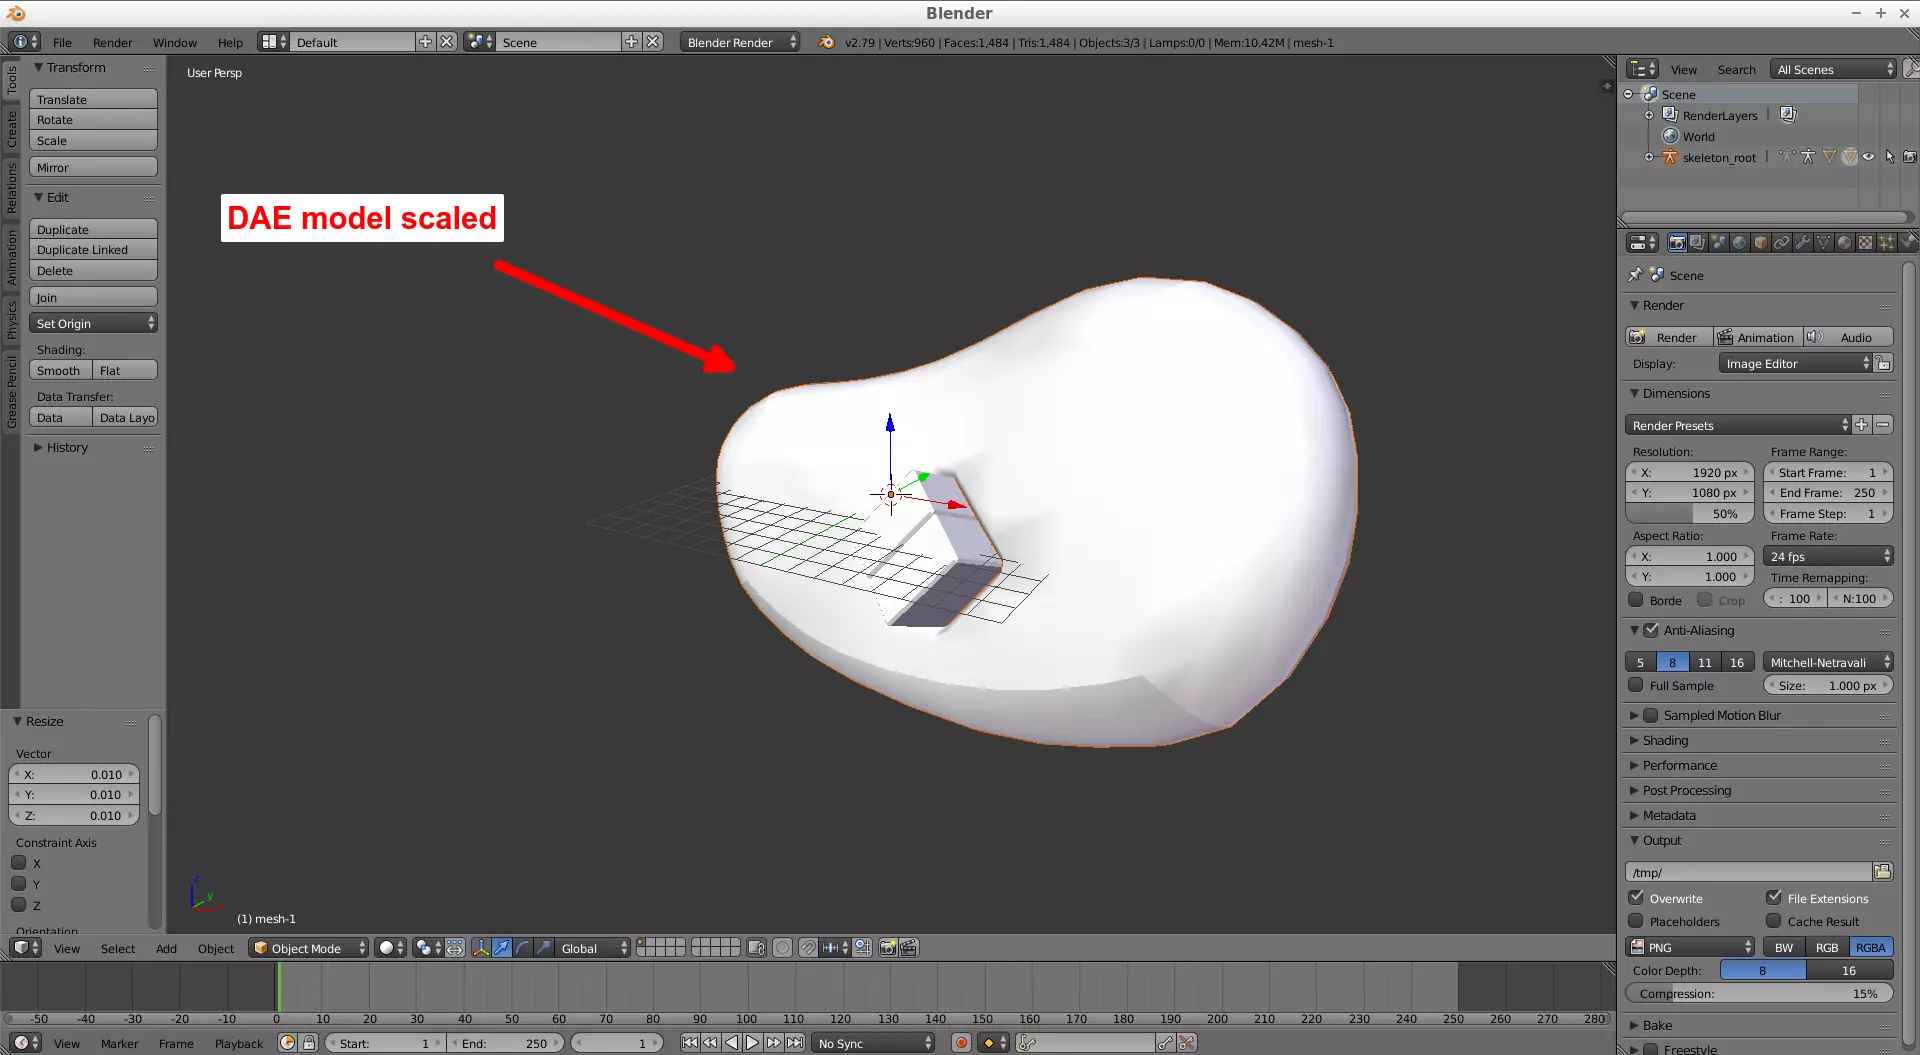
(Fig. 8 - Imported DAE model scaled to 0.01)
With the object file in Blender we can now see the materials that are assigned to this object. Go to the Materials tab and right-click on the face you know your material is present. In this case the object is simple and is only composed by 2 fragments (the cube and the planet, Fig. 9). The material we want for our model is called m0BeanFace_v (Fig. 9). Until now, this was only to get the name of the material we wanted. You can now close Blender.
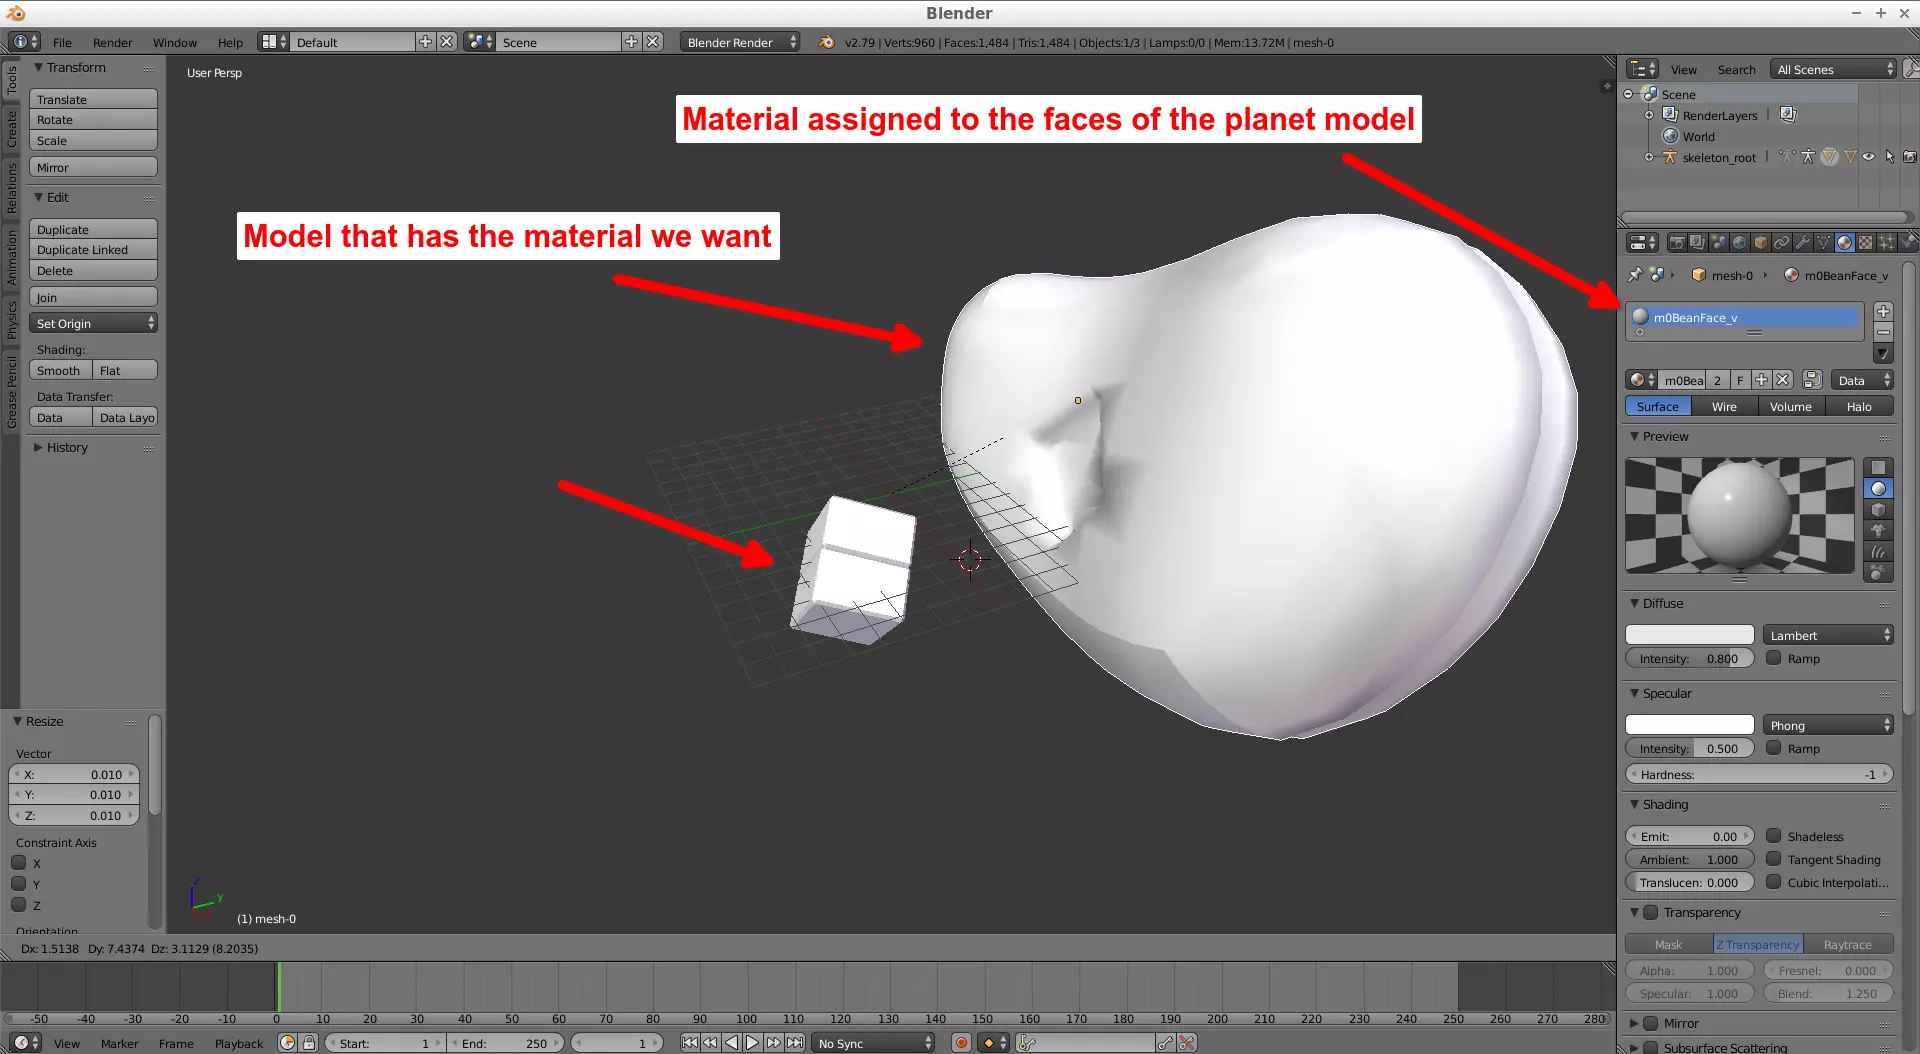
(Fig. 9 - Watching materials assigned of imported model)
NOTE 1: In some cases the material we want won’t be exactly on the place we think it is so you have to search its texture associated to see if it is actually the material you want.
Now, go and open with your favorite text editor the [ARC filename]_materials.json file located in the same place as the DAE file (I will use Notepad++ on Windows). This is the file containing the information of all the materials coded into the BDL file from before (Figs. 10 and 11).
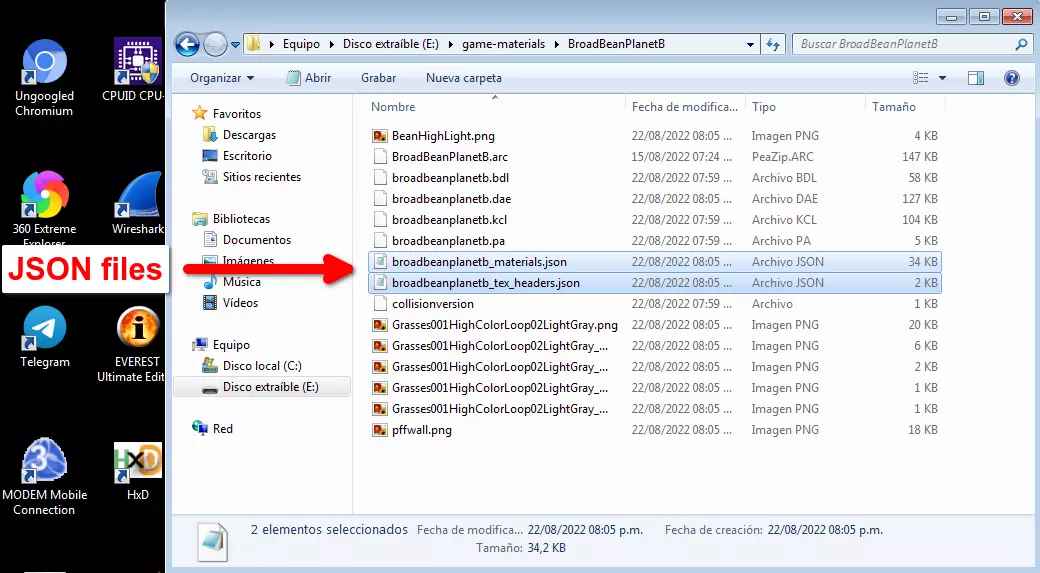
(Fig. 10 - JSON files)
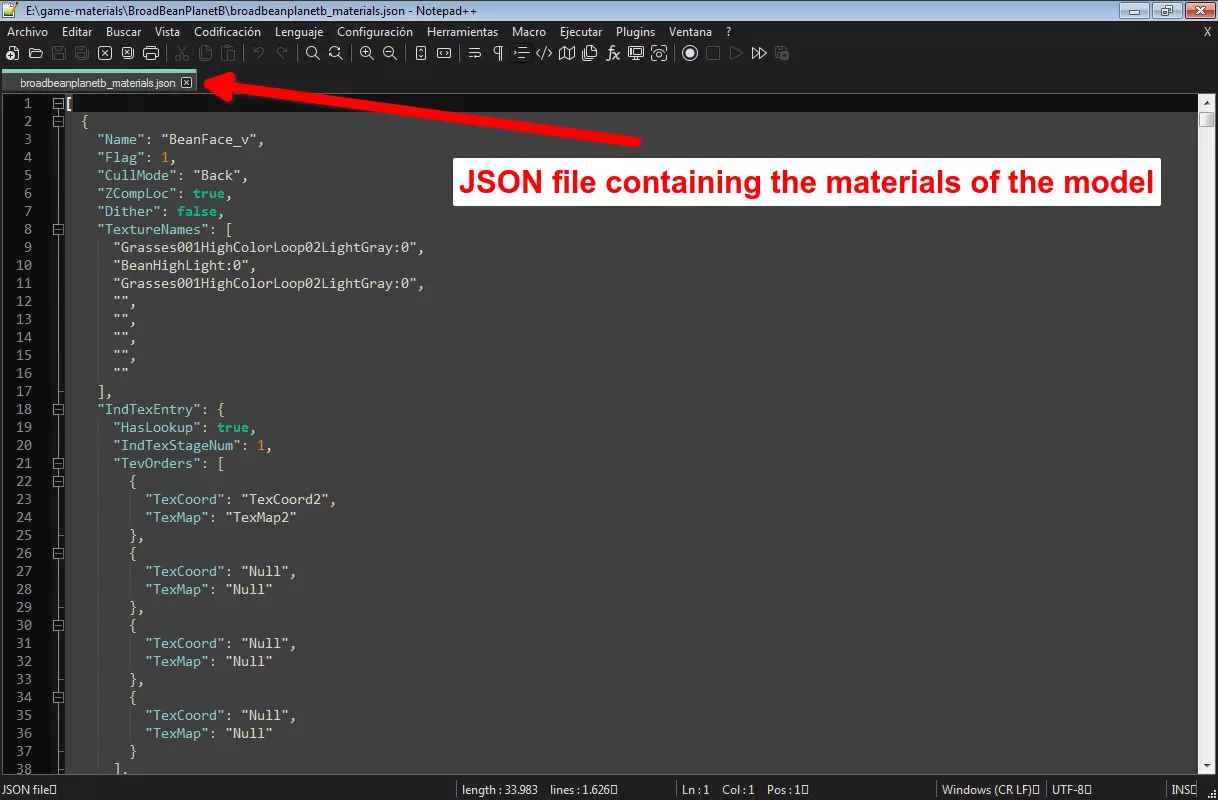
(Fig. 11 - Material JSON file opened on Notepad++)
NOTE 2: the [ARC filename]_tex_headers.json file contains the information about the textures assigned to the materials from the [ARC filename]_materials.json file.
Remove the first 2 or 3 letters from the material’s name extracted from Blender (the actual material name is the one after those letters) and search for that name on the text editor (in my case it is named BeanFace_v, Fig. 12).
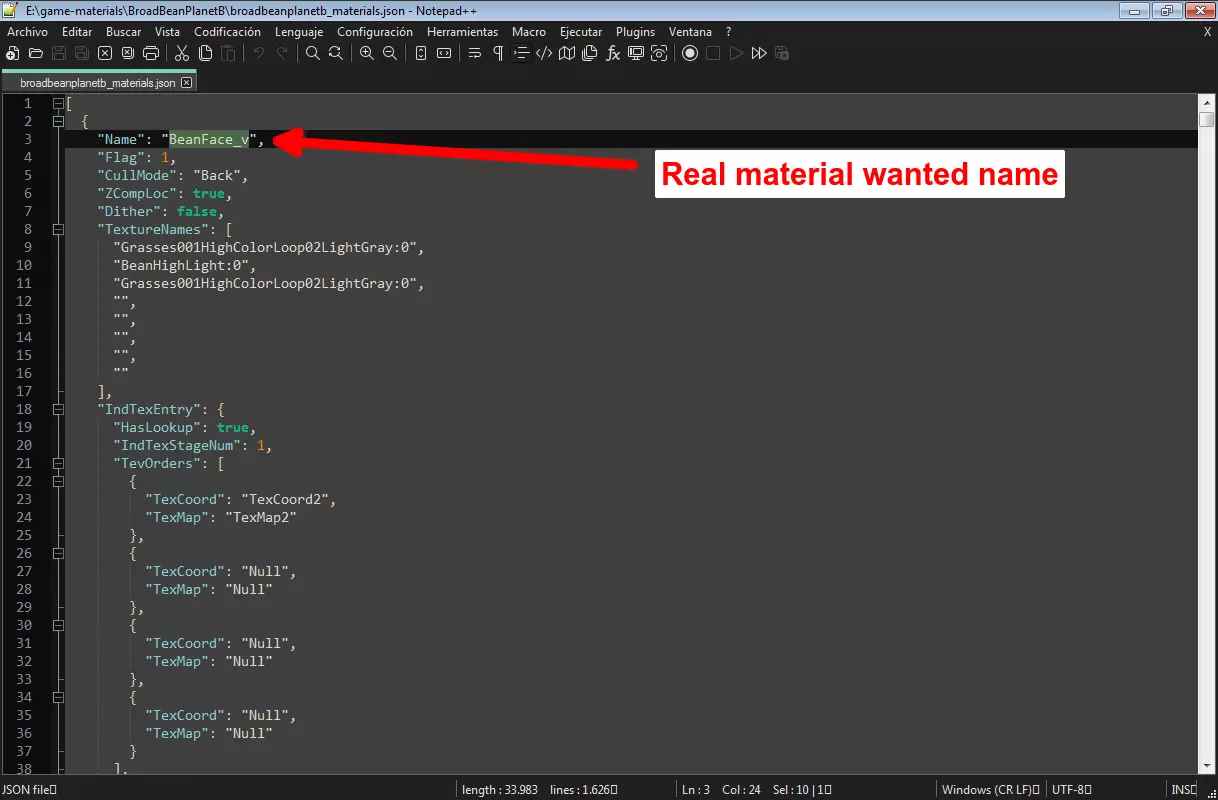
(Fig. 12 - Real material name)
The Name property is the name of the material, and what exists in the TextureNames property are the textures used by that material (Fig. 13).
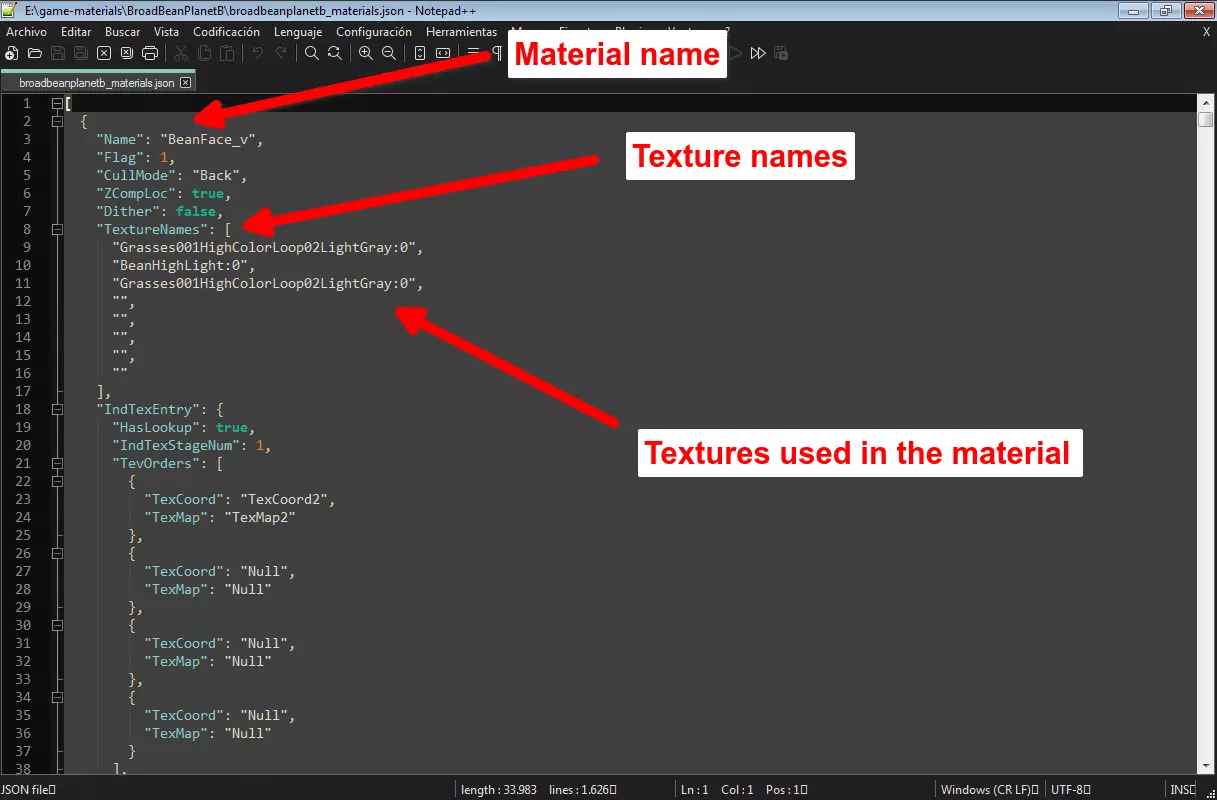
(Fig. 13 - Watching a material and the textures assigned to it)
As we can see (Fig. 13) the textures used by the material are Grasses001HighColorLoop02LightGray:0, BeanHighLight:0 and Grasses001HighColorLoop02LightGray:0. By removing the :0 at the end of each entry you will find on the same directory the ARC file is, PNG files that carry those names, those are the textures (Fig. 14). You may have thought, a texture repeats twice? yes, they can repeat several times and we will use that later.
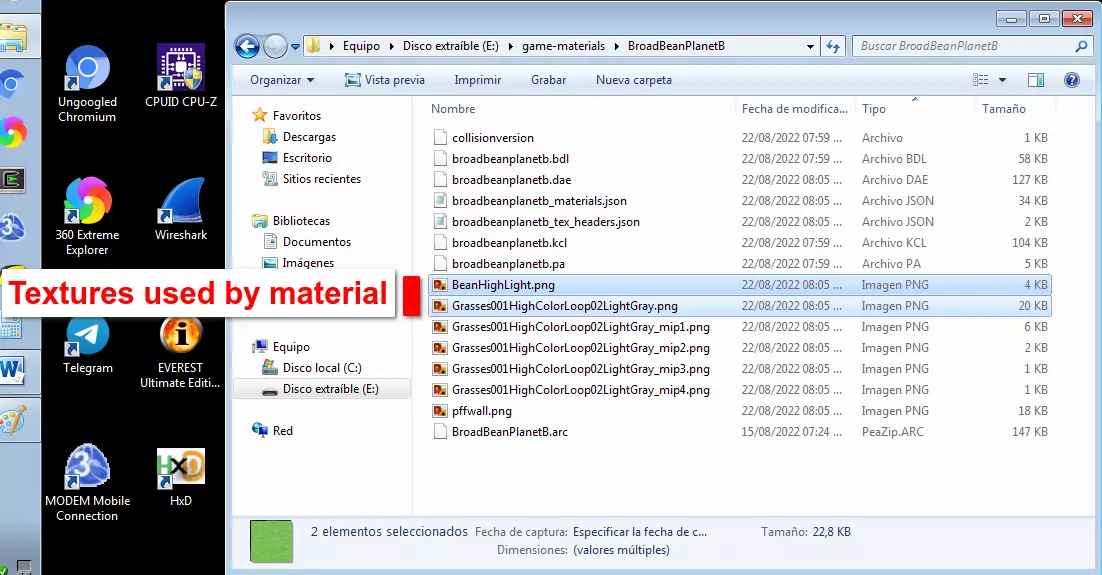
(Fig. 14 - Textures used by the material we want)
NOTE 3: the PNGs with the mip string in their name are mipmaps of a specific PNG file and they have always a lower resolution than the main PNG file.
Now let’s go and open our model to apply those textures on (I will apply the material to an UV sphere, Fig. 15).
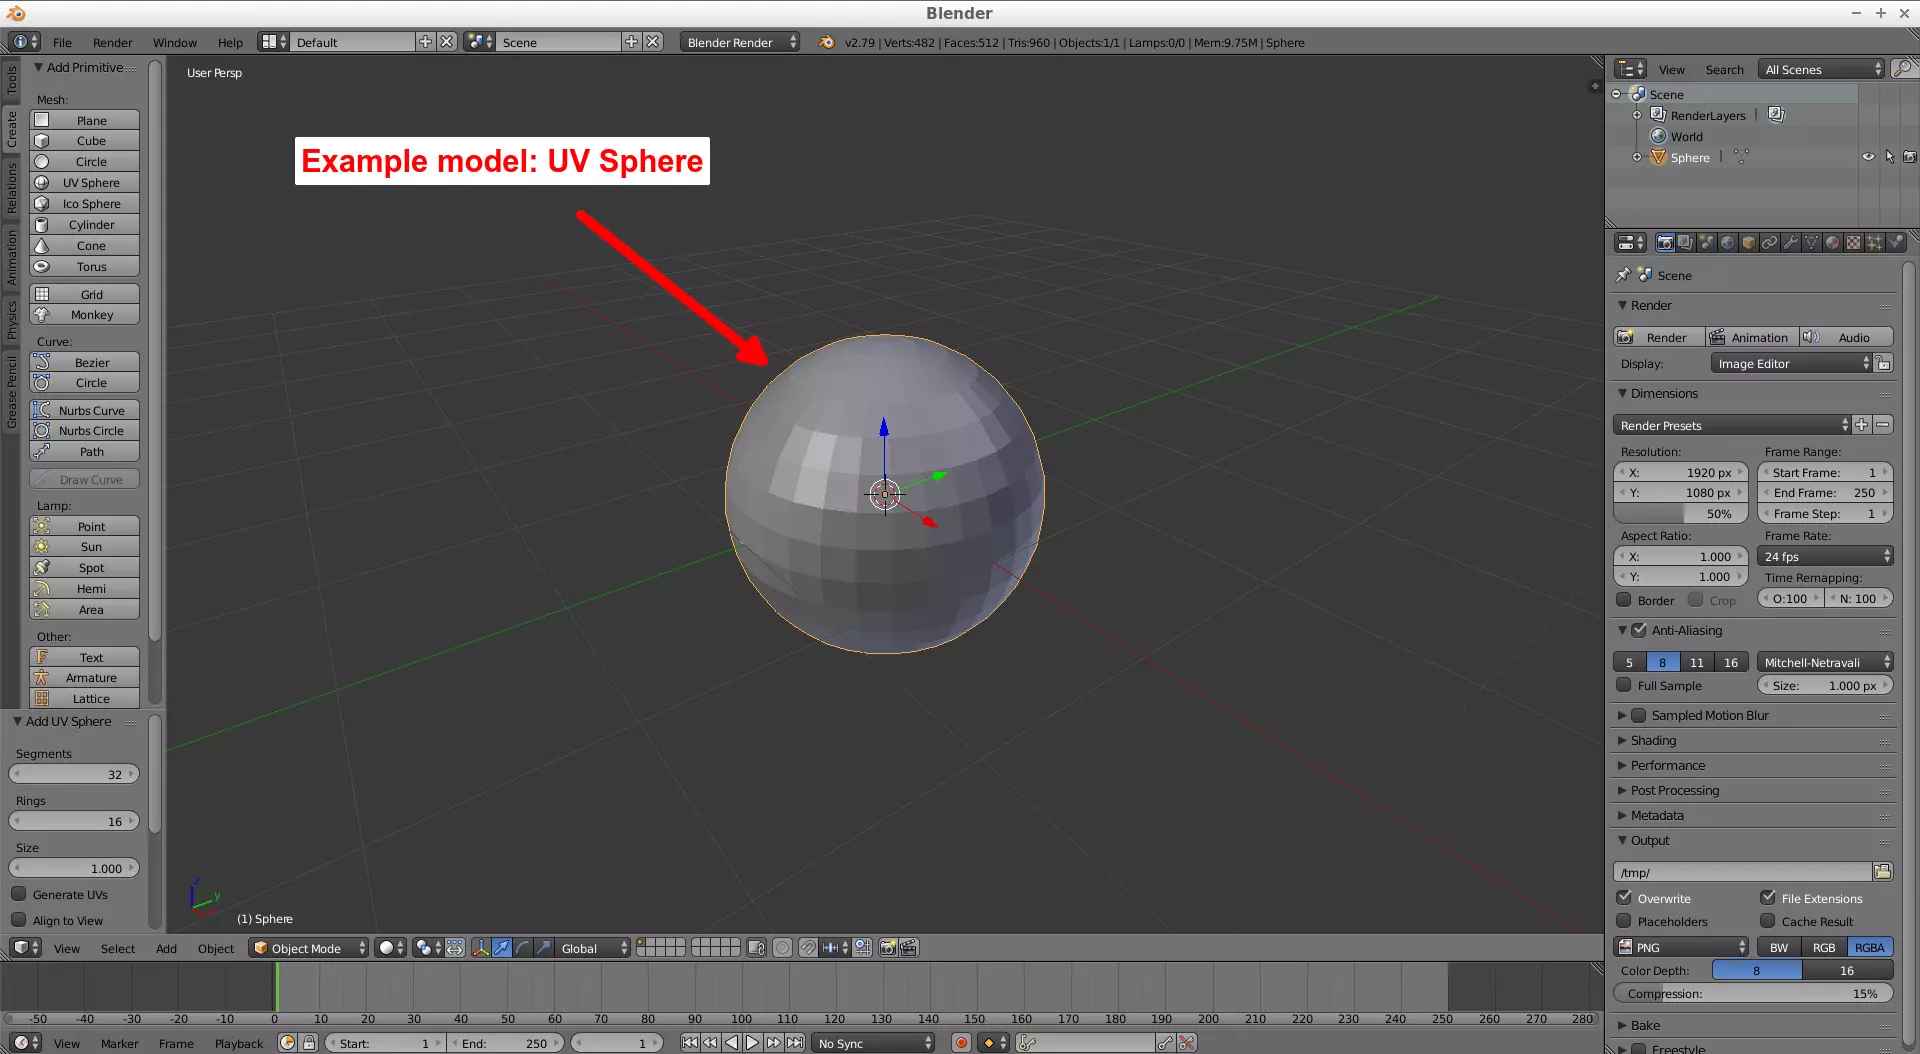
(Fig. 15 - Example model)
Set a material in Blender and assign it to the faces of the object you want. Change its name to the name of the material extracted from before (in my case it will be named BeanFace_v, Fig. 16).
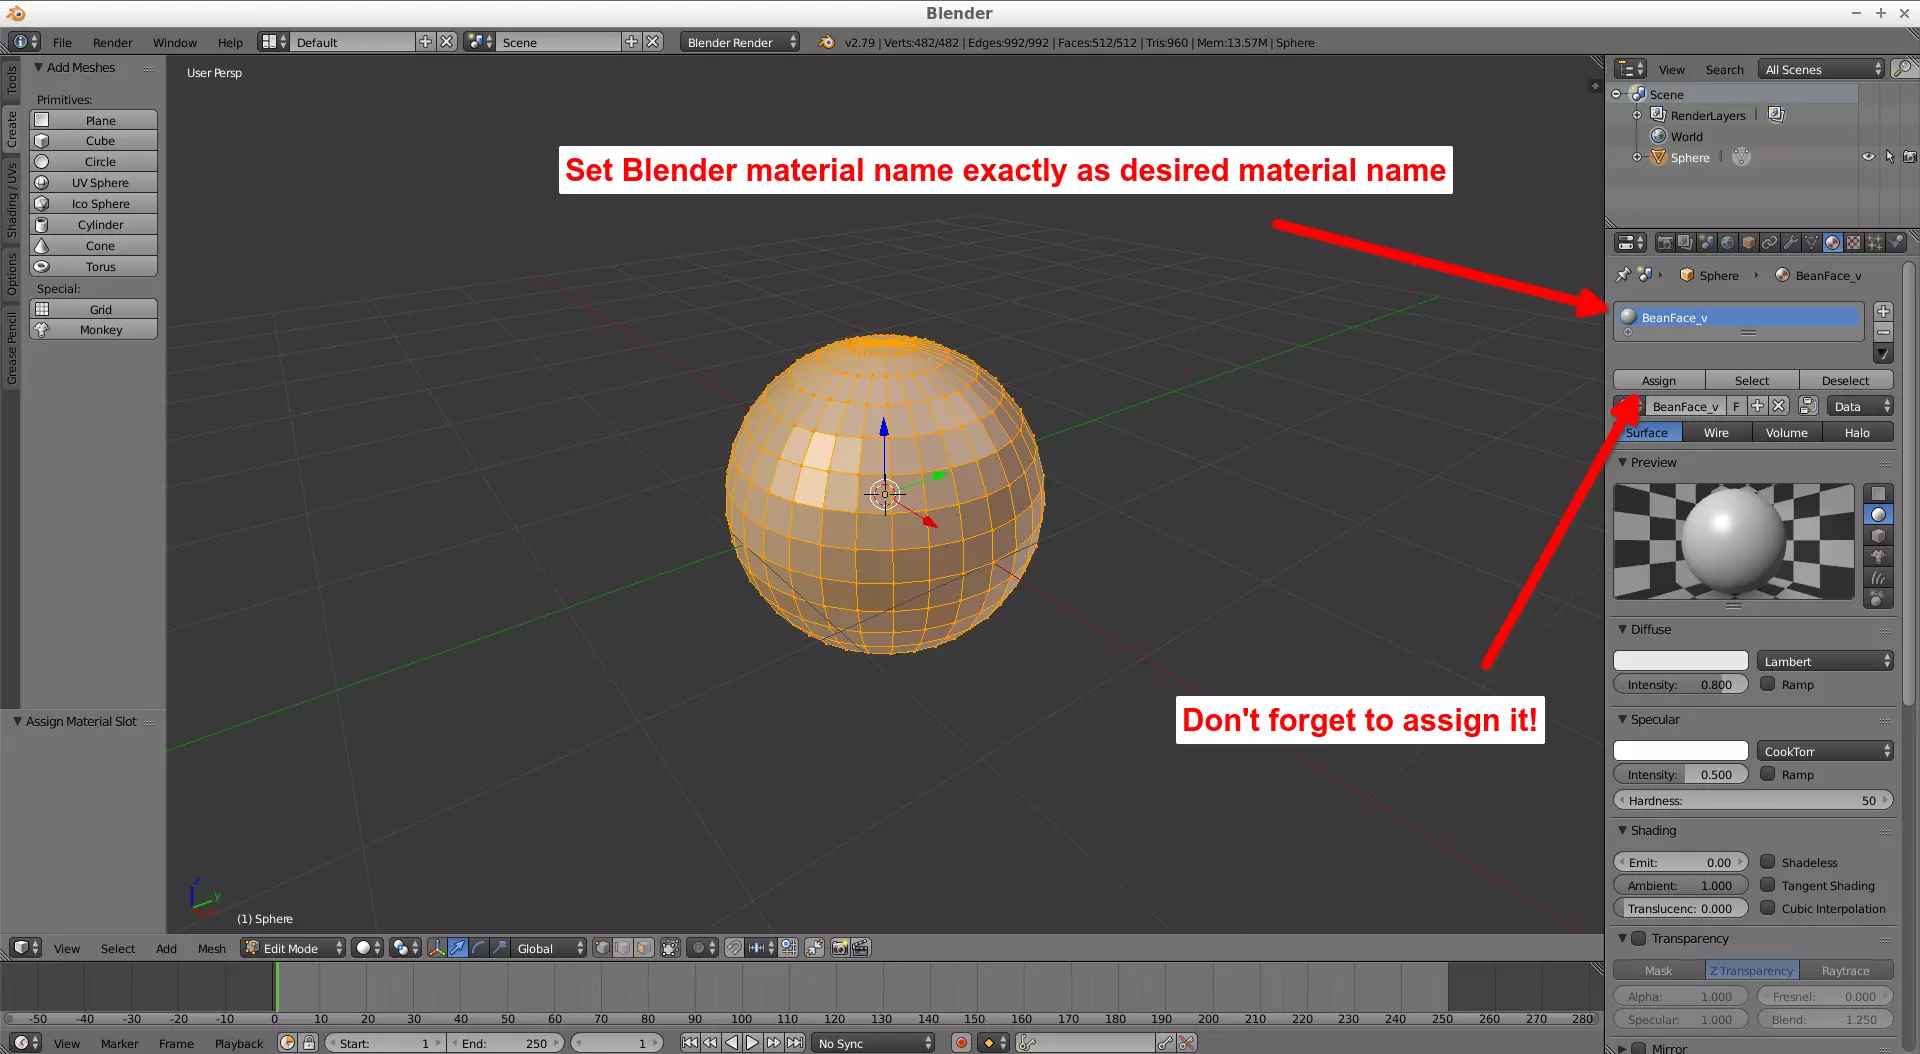
(Fig. 16 - Example model)
Now set the respective textures to that material keeping the order and the repetition of the texture list of the material in the material JSON file (you don’t need to apply specific names to the textures, Fig. 17 and 13).
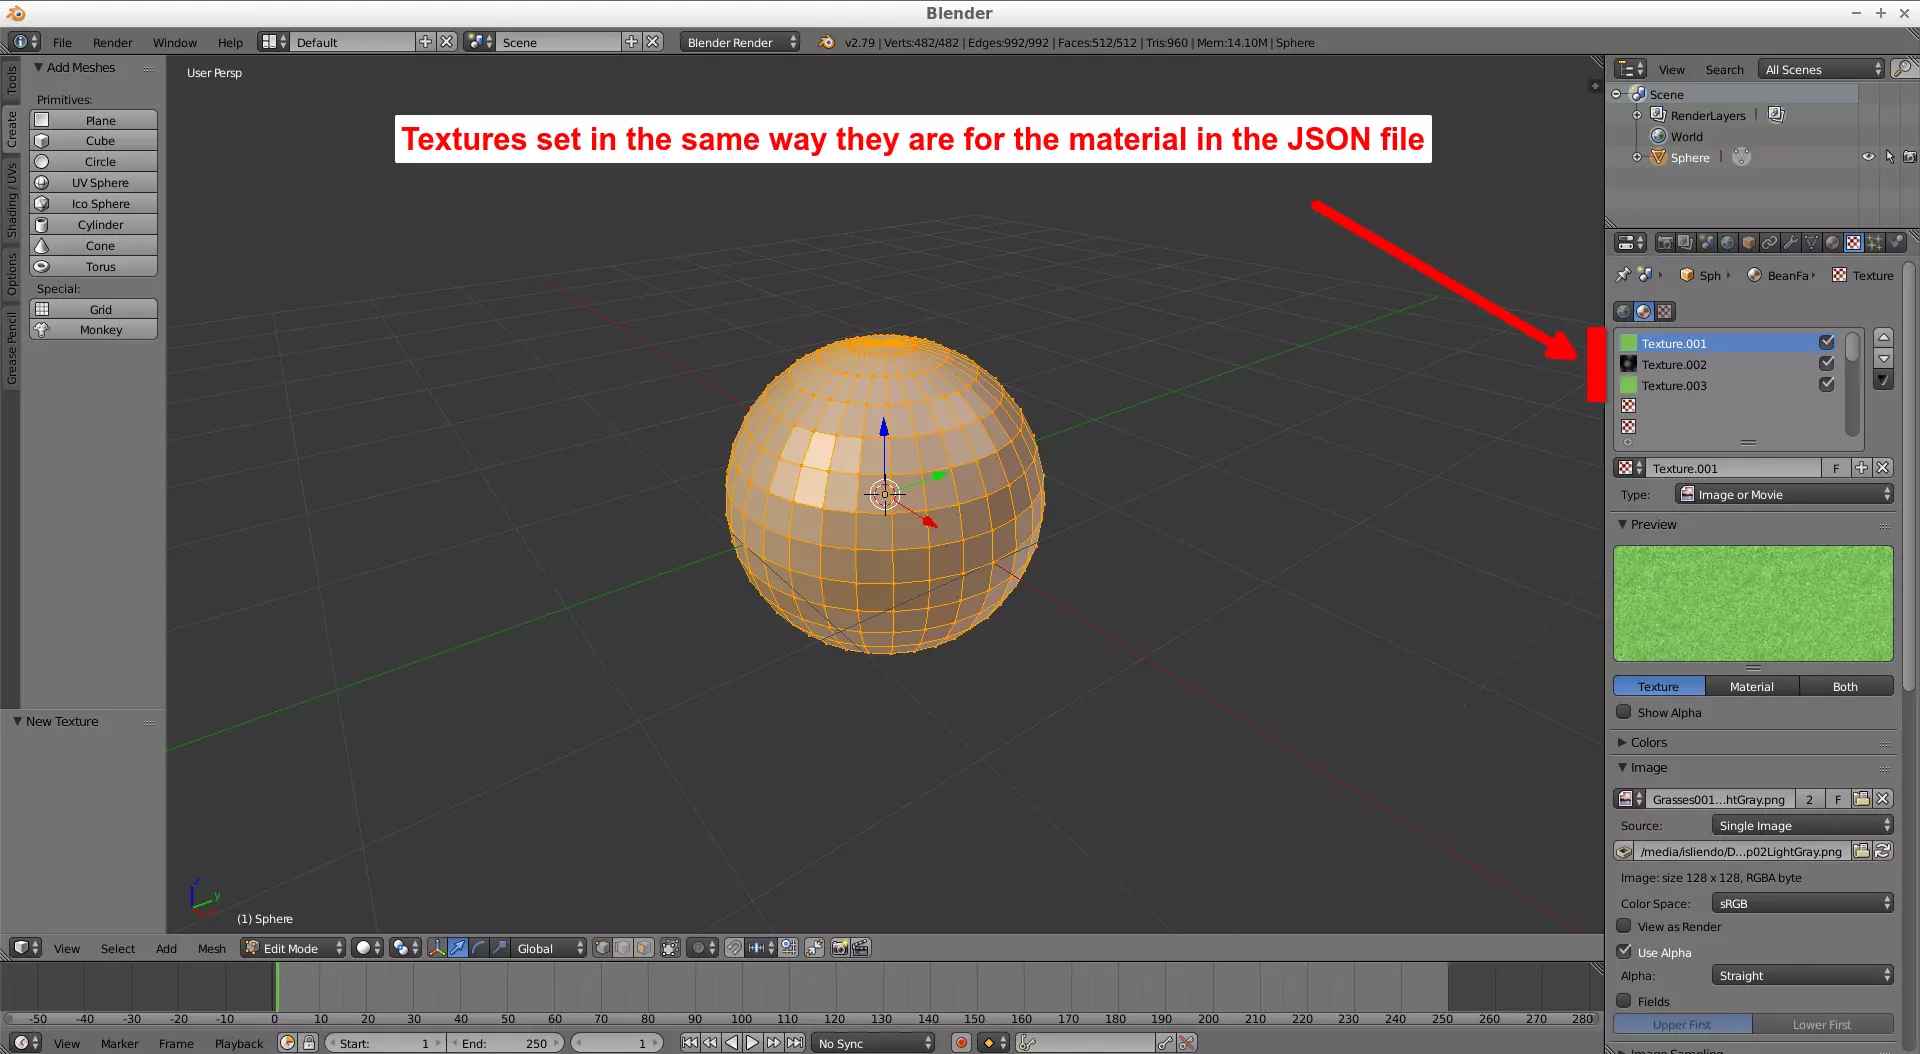
(Fig. 17 - Assigning the textures from the material)
Unwrap or apply a Smart UV Project and modify the looks of your textures as you wish (apply vertex paint for example or smooth shading), triangulate, scale and export your model into FBX and OBJ to a known path (place your textures in the same place the exported files are) and then locate your exports to continue with the tutorial (Fig. 18).
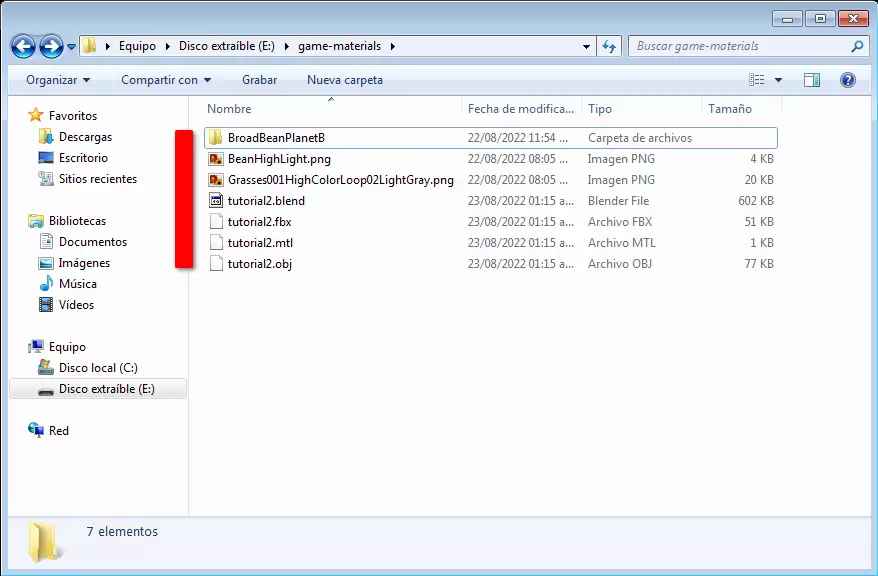
(Fig. 18 - Exported files from Blender with the texture files used)
Copy both JSON files in the same place the exported files are (Fig. 19).
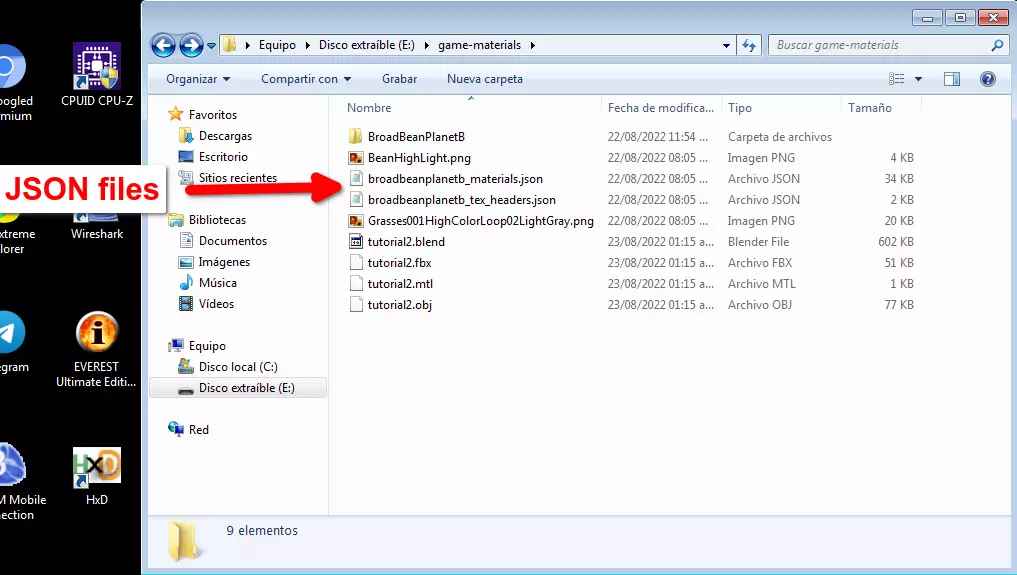
(Fig. 19 - JSON files copied)
Remove the textures from the copied [ARC filename]_tex_headers.json file that you aren’t using (Fig. 20) and save the document (if you don’t do this SuperBMD will crash). And then open a CMD in that folder.
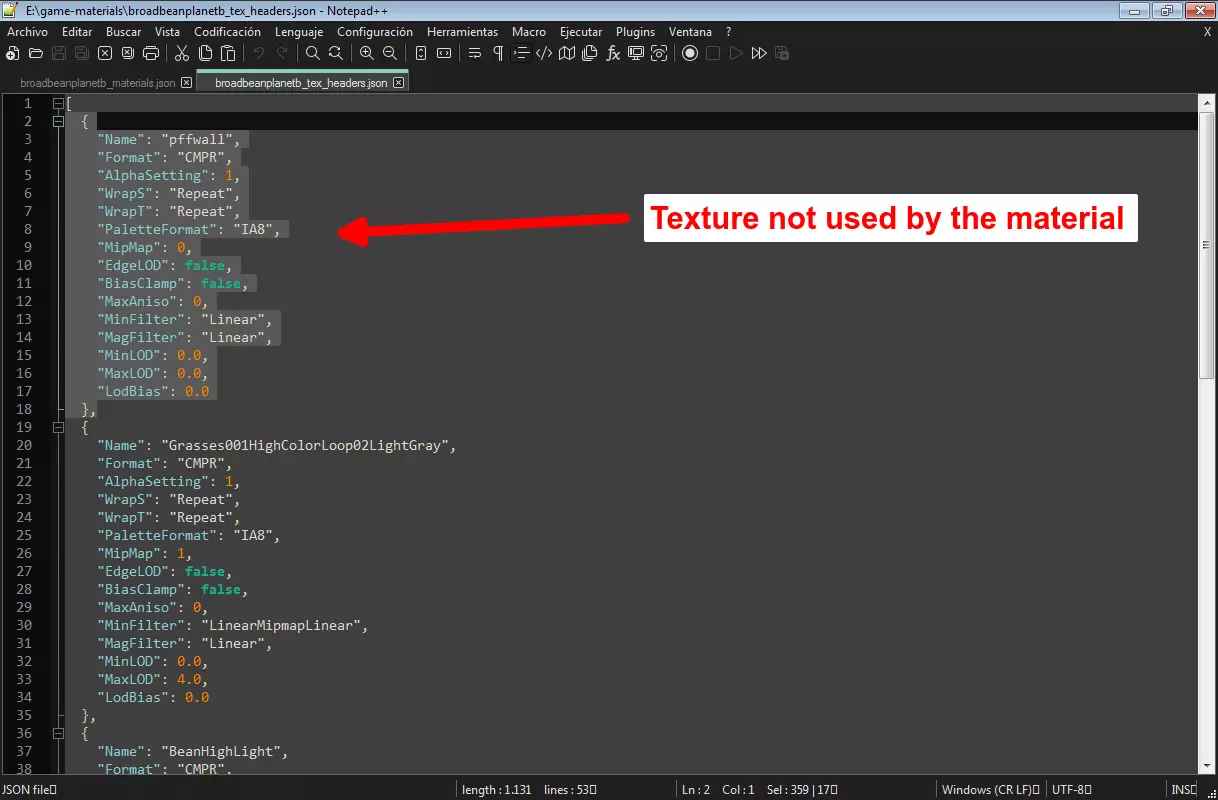
(Fig. 20 - Erasing unused textures from JSON file)
Type the following command into the CMD were [your_object].fbx is the FBX model, the [ARC filename]_materials.json the material JSON cointaning our desired material data and the [ARC filename]_tex_headers.json the texture JSON cointaning the texture data.
path\to\SuperBMD.exe [your_object].fbx --mat [ARC filename]_materials.json --texheader [ARC filename]_tex_headers.json --rotate --nosort"
NOTE 4: Linux users, remember to use a forward slash instead of a backslash for paths!
What this does is to link the materials in the JSON file with the materials you added on your FBX object (you had to name the material in Blender the same as the material from the in-game object to be able to make this link here).
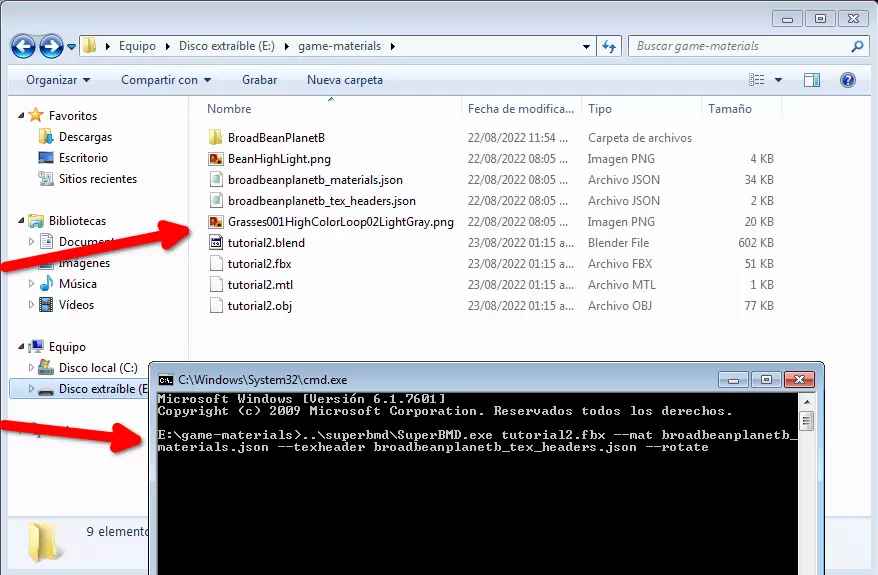
(Fig. 21 - Using SuperBMD on CMD to apply materials to model)
If everything was done correctly a BMD file will be created in the same directory as FBX file (Fig. 22).
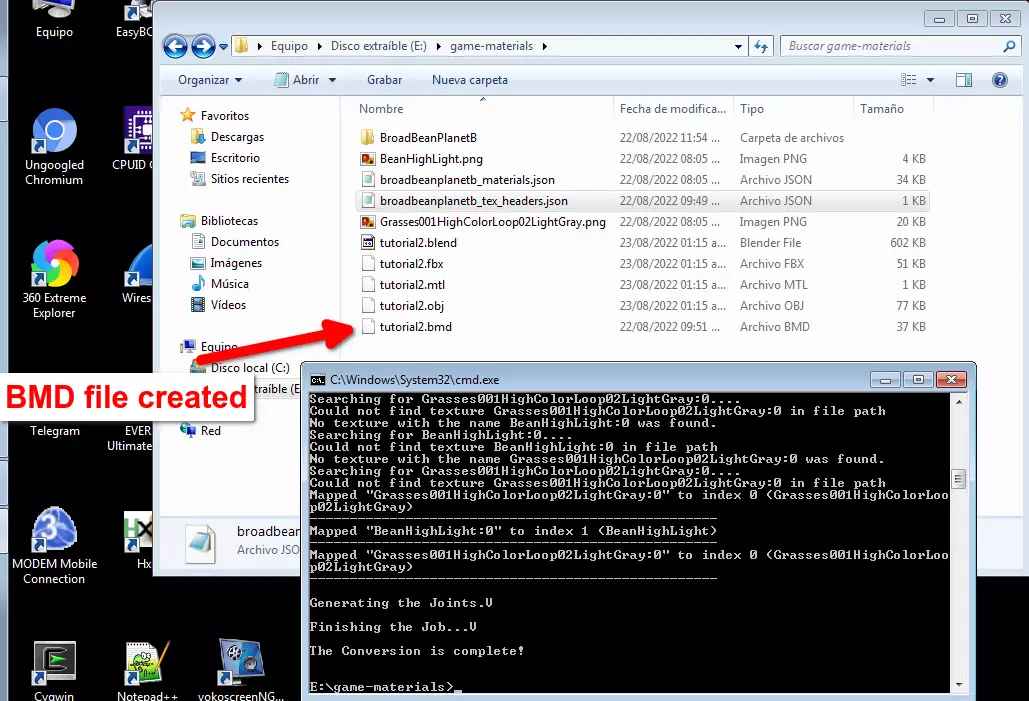
(Fig. 22 - BMD file creation)
Go and open the BMD file with j3dview and save it as a BDL (File > Save Model As..., Fig. 23). This is done because SuperBMD has a bug that when an in-game material is applied to an object, the material applied on the imported model will look extremely strong on game. When opening it and saving it with j3dview this error is corrected and the material will show as intended in game.
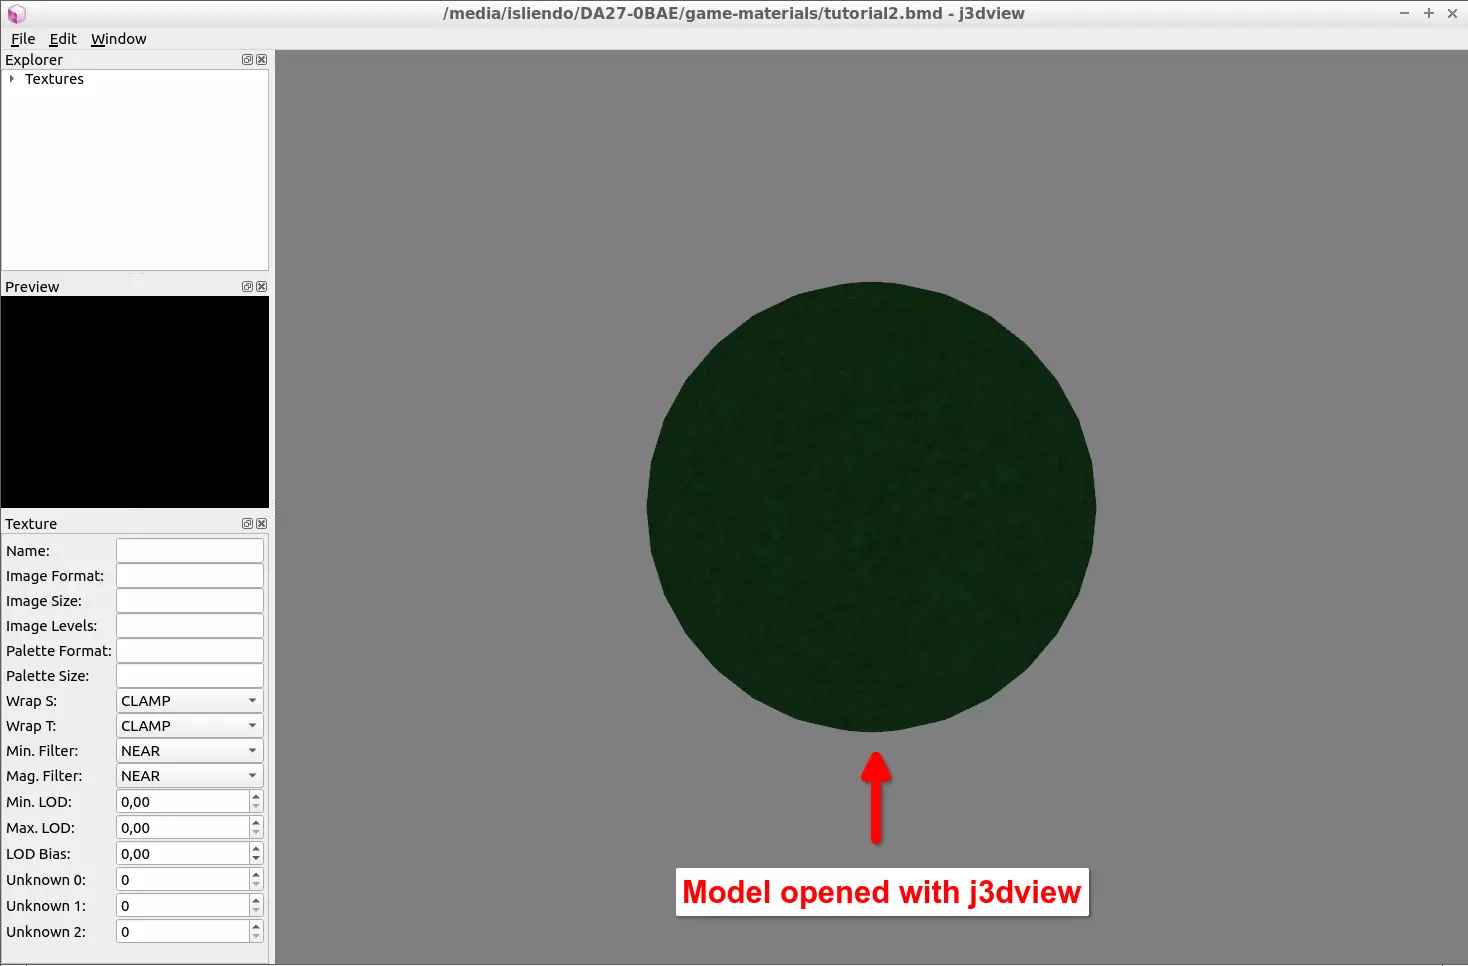
(Fig. 23 - BMD file opened and saved as BDL with j3dview)
That BDL file will be the one that you will put on a folder with the collision files of your model, pack it as an ARC file and finally introduce the model on the game (Fig. 24). (if scaling down the UV mapping on the model on Blender the model looks better).
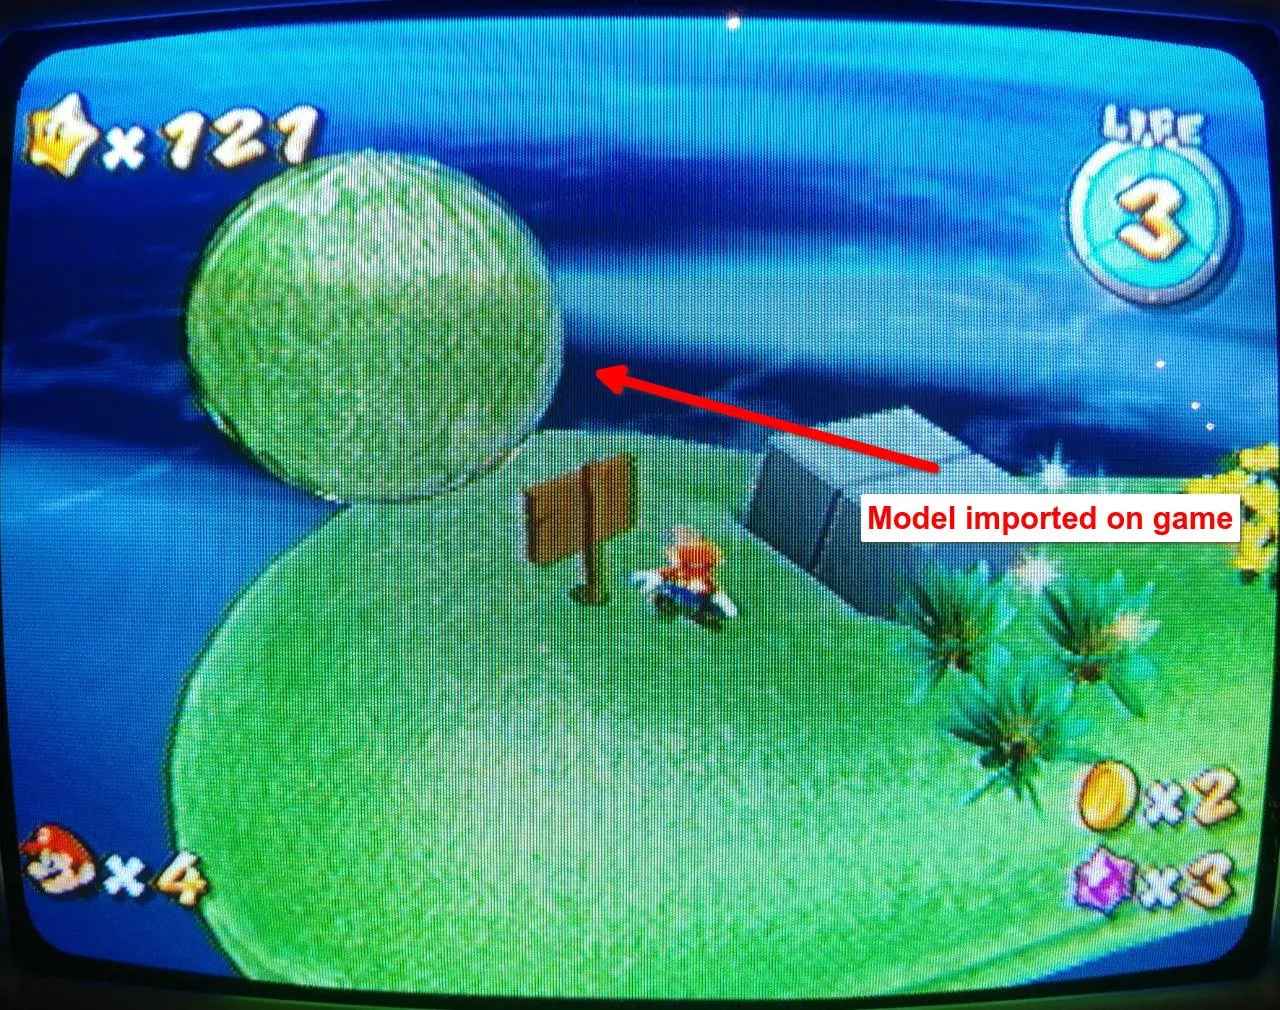
(Fig. 24 - Custom model with in-game material imported to SMG1)
Some extra explanations
1) The materials might not work exactly as intended because as they were created for the model from which they have been extracted, only models similar to the original one will fit the material correctly. With some modifications to the model on Blender you can get the material to look better (you have to learn a little more how to use Blender).
2) As we are using only one material I did not explain properly the JSON file setup. This tutorial is more intended to be a preparation to the next being with 2 or more in game materials.
3) I wasn’t aware of the SuperBMD error, it wasn’t documented on any website I’ve found about SMG modding, so I had to ask on the Luma’s Workshop Discord server. Thanks to an user, I was able to finish this tutorial correctly (many thanks). Hopefully this error will be fixed soon.
4) It is best practice to save the model in j3dview as a BDL since as a BMD it might not look correct on the game all times.