Contents
3. Steps
Required tools
Refer to the "Resources" section for download.
- Blender
- SuperBMD
- j3dview
- j3d animation editor
- Any text editor you like (Notepad++ is recommended)
- Arc Convertor
- Whitehole
- Wiimm's ISO Tools (to get your SMG1 dump)
Required tutorials
- Basically all of the ones before this one.
Steps files used: tutorial9.zip
I will assume you already have a model to which you want to apply an animation (Fig. 1).
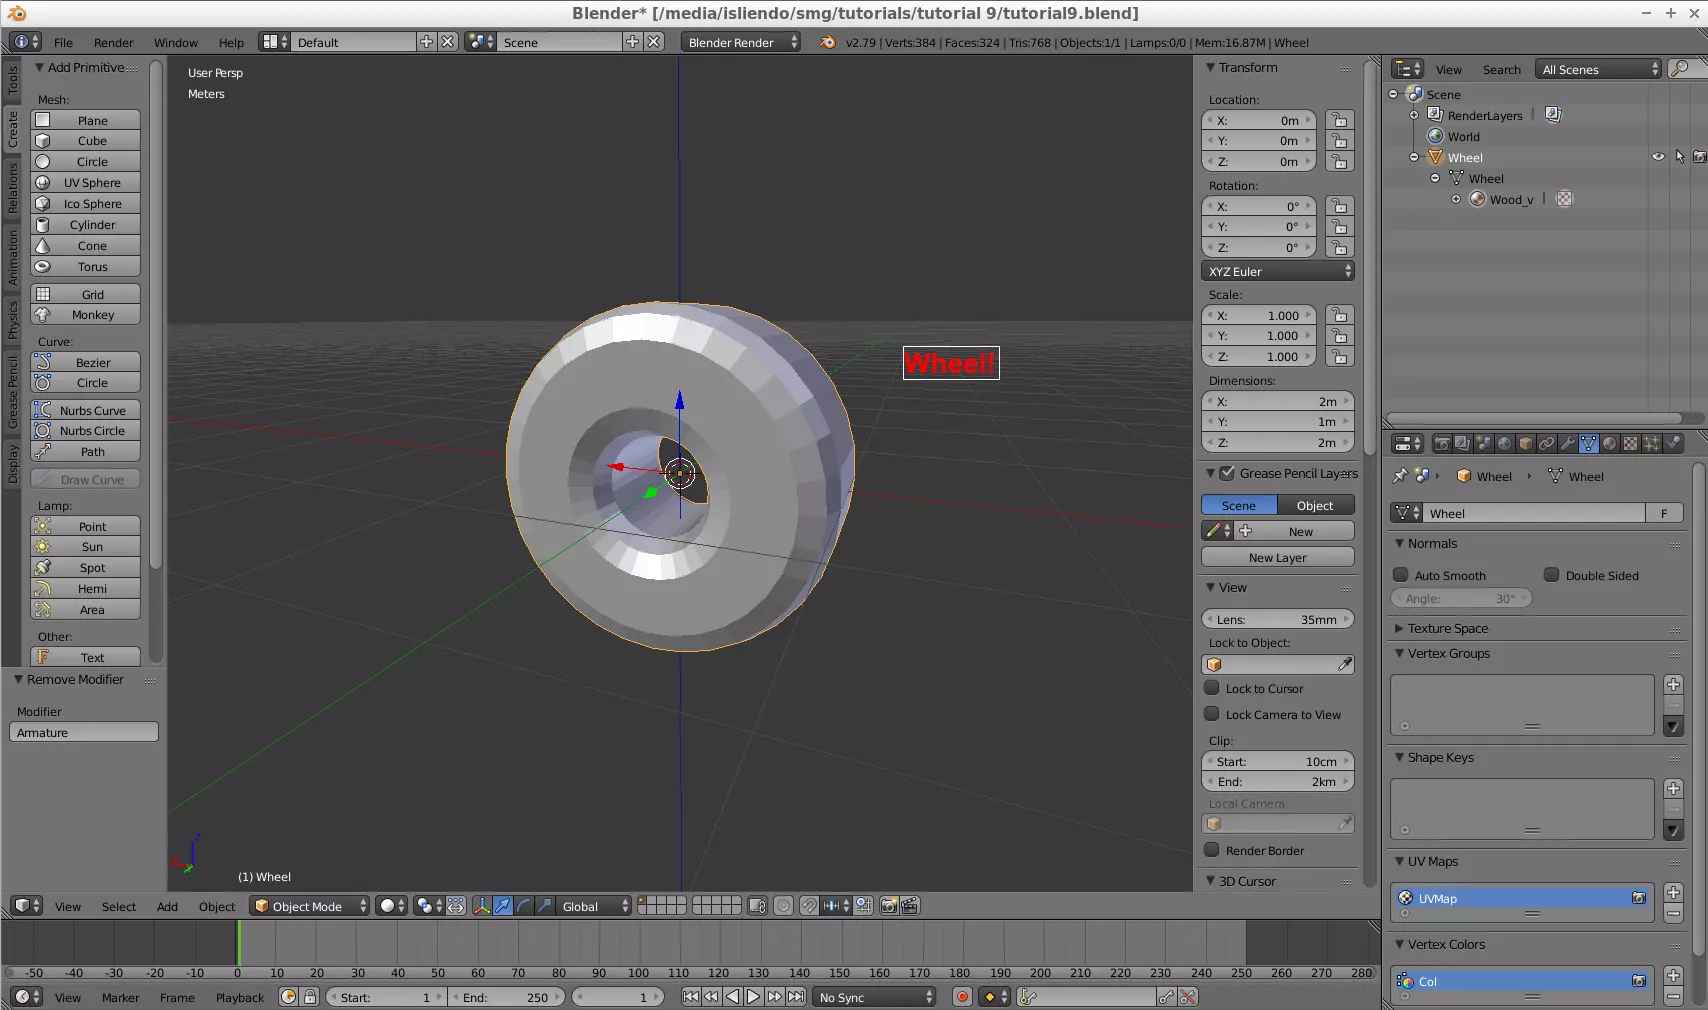
(Fig. 1 - Example model for tutorial 9)
NOTE 1: animations don’t apply/work with collision, collision is static. It can be changed with custom code but that’s something I don’t know how to do. Maybe in the future, when animation is a common thing on SMG modding, someone will be able to make this reality (it would be very fun, interactive animations!)
Add a new Armature object on scene (Fig. 2) and put it where you want to achieve the animation you want to create. In my case, as my model is a wheel, it needs to translate and rotate, so the center of it is the best place to put the bone.
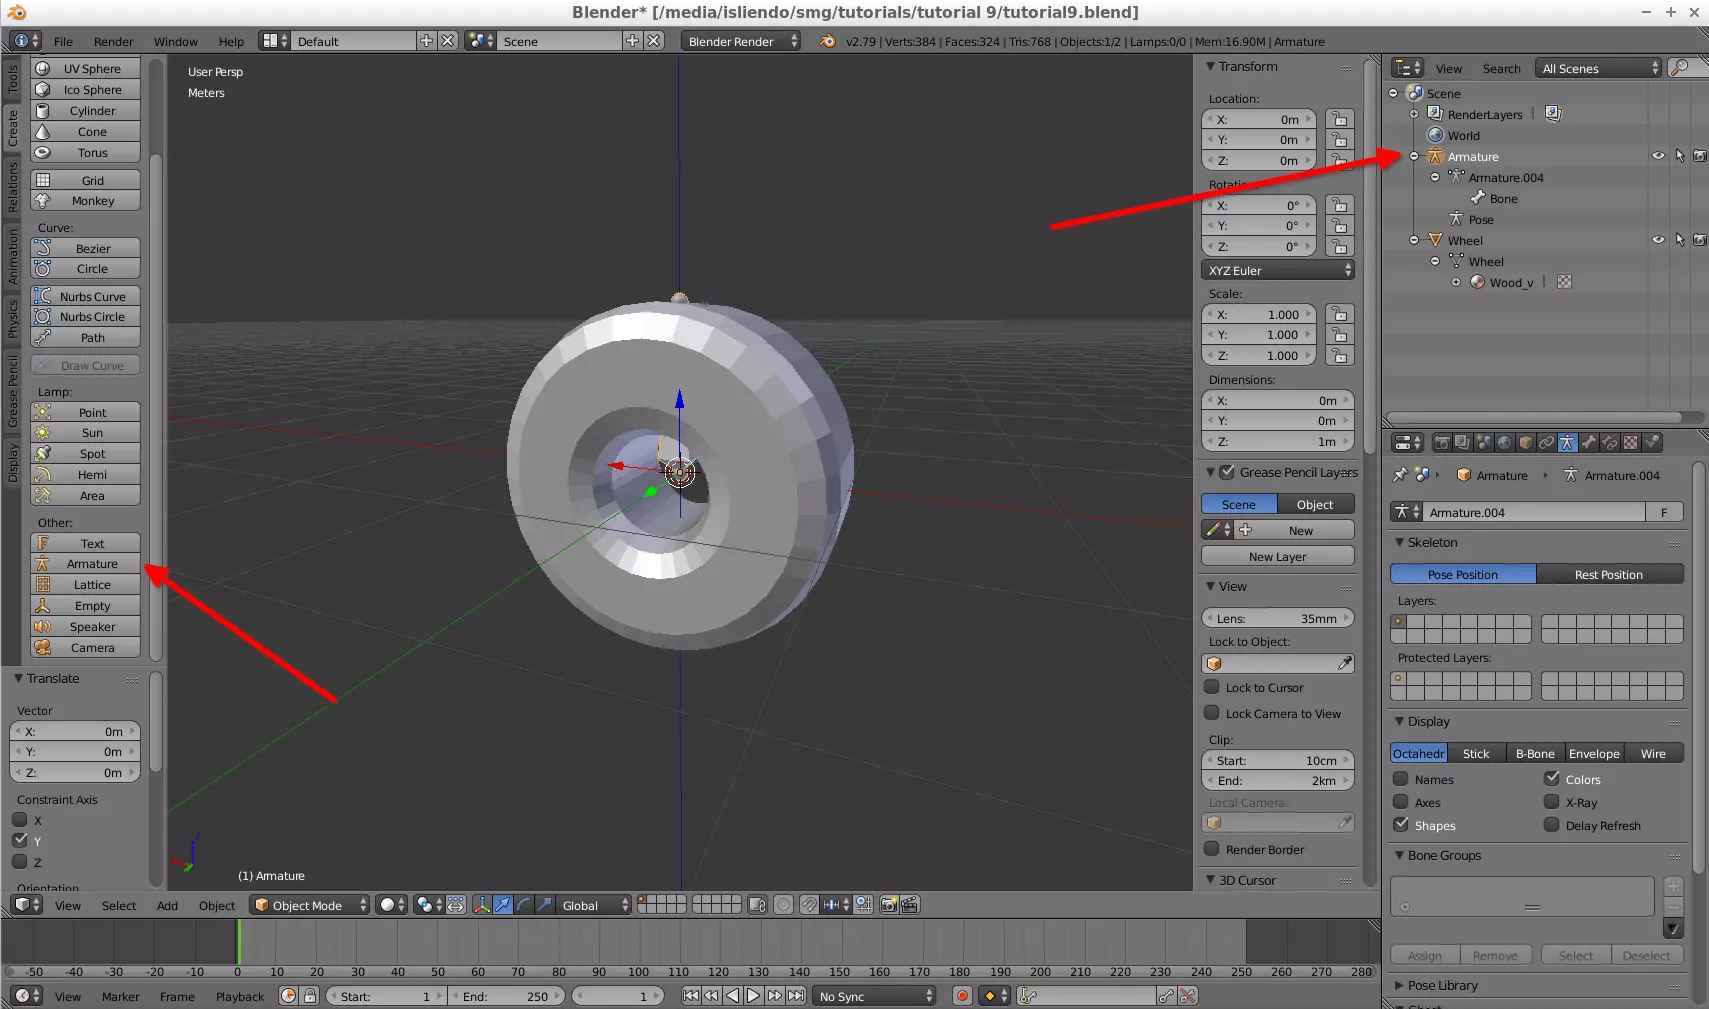
(Fig. 2 - Armature object creation)
- Go to the Object tab and set the parent object of the model as the Armature object already created (Fig. 3).
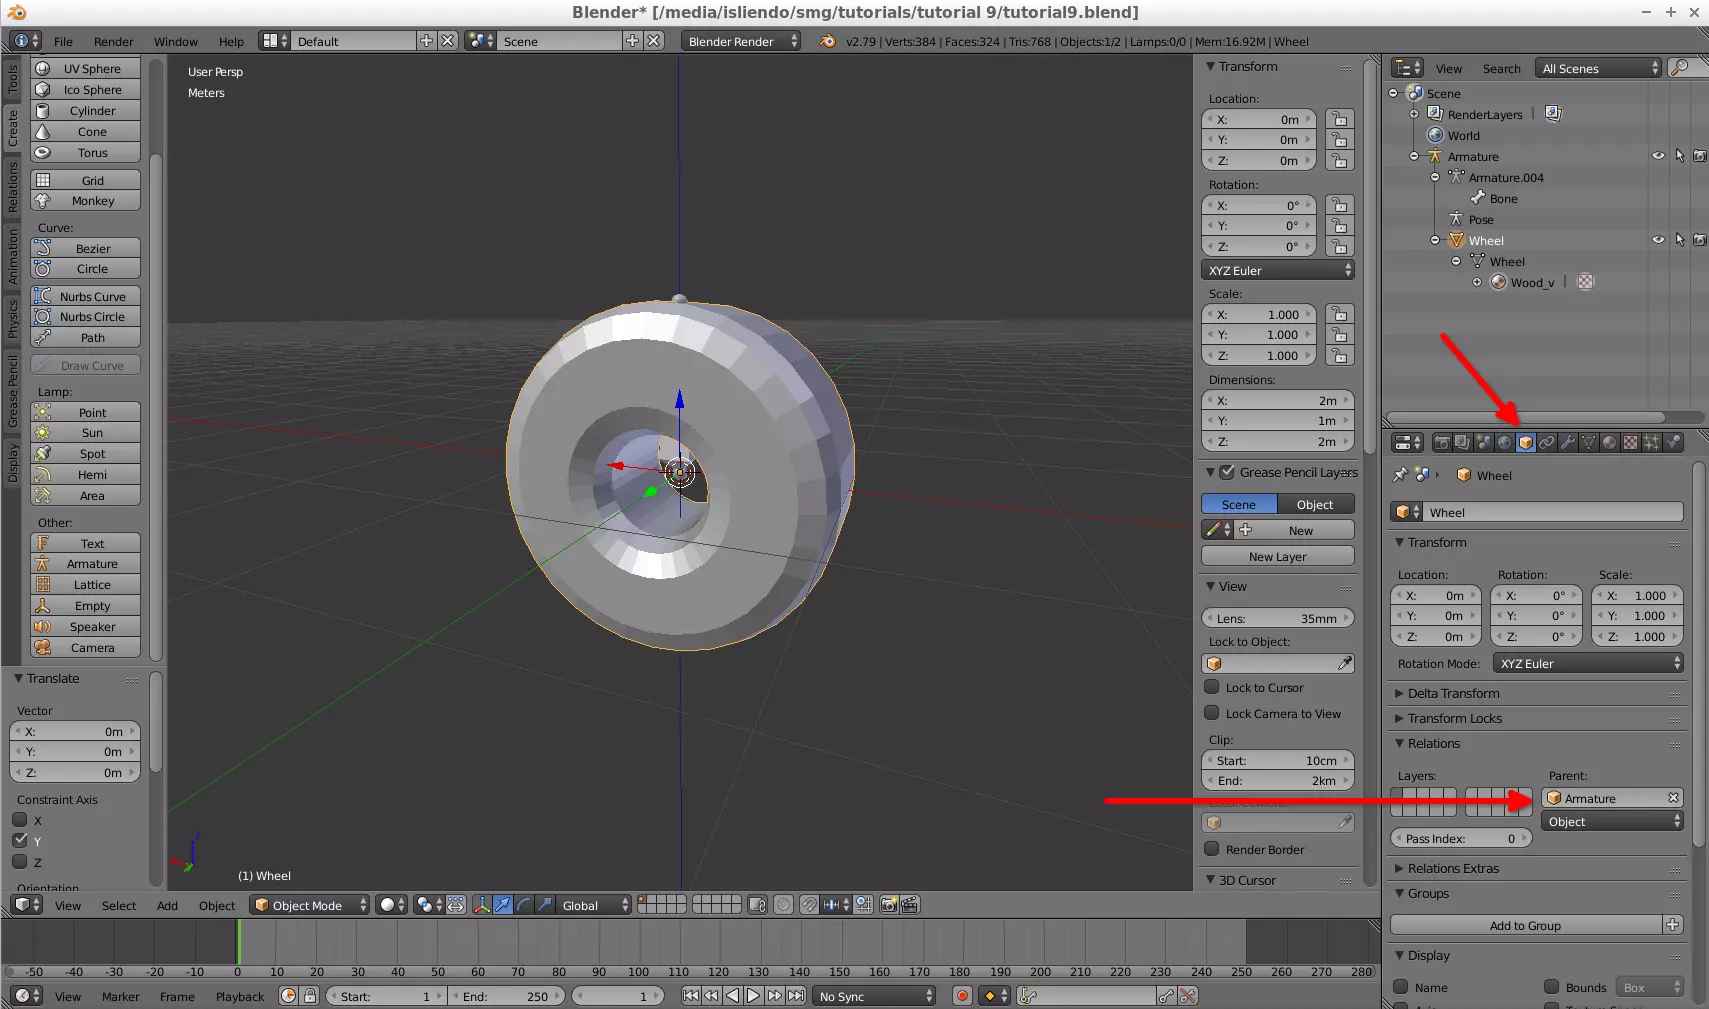
(Fig. 3 - Setting the parent object of the model)
Change the name of the Armature object to whatever name you want and also change the Bone name to what you want (be sure to remember them, Fig. 4).
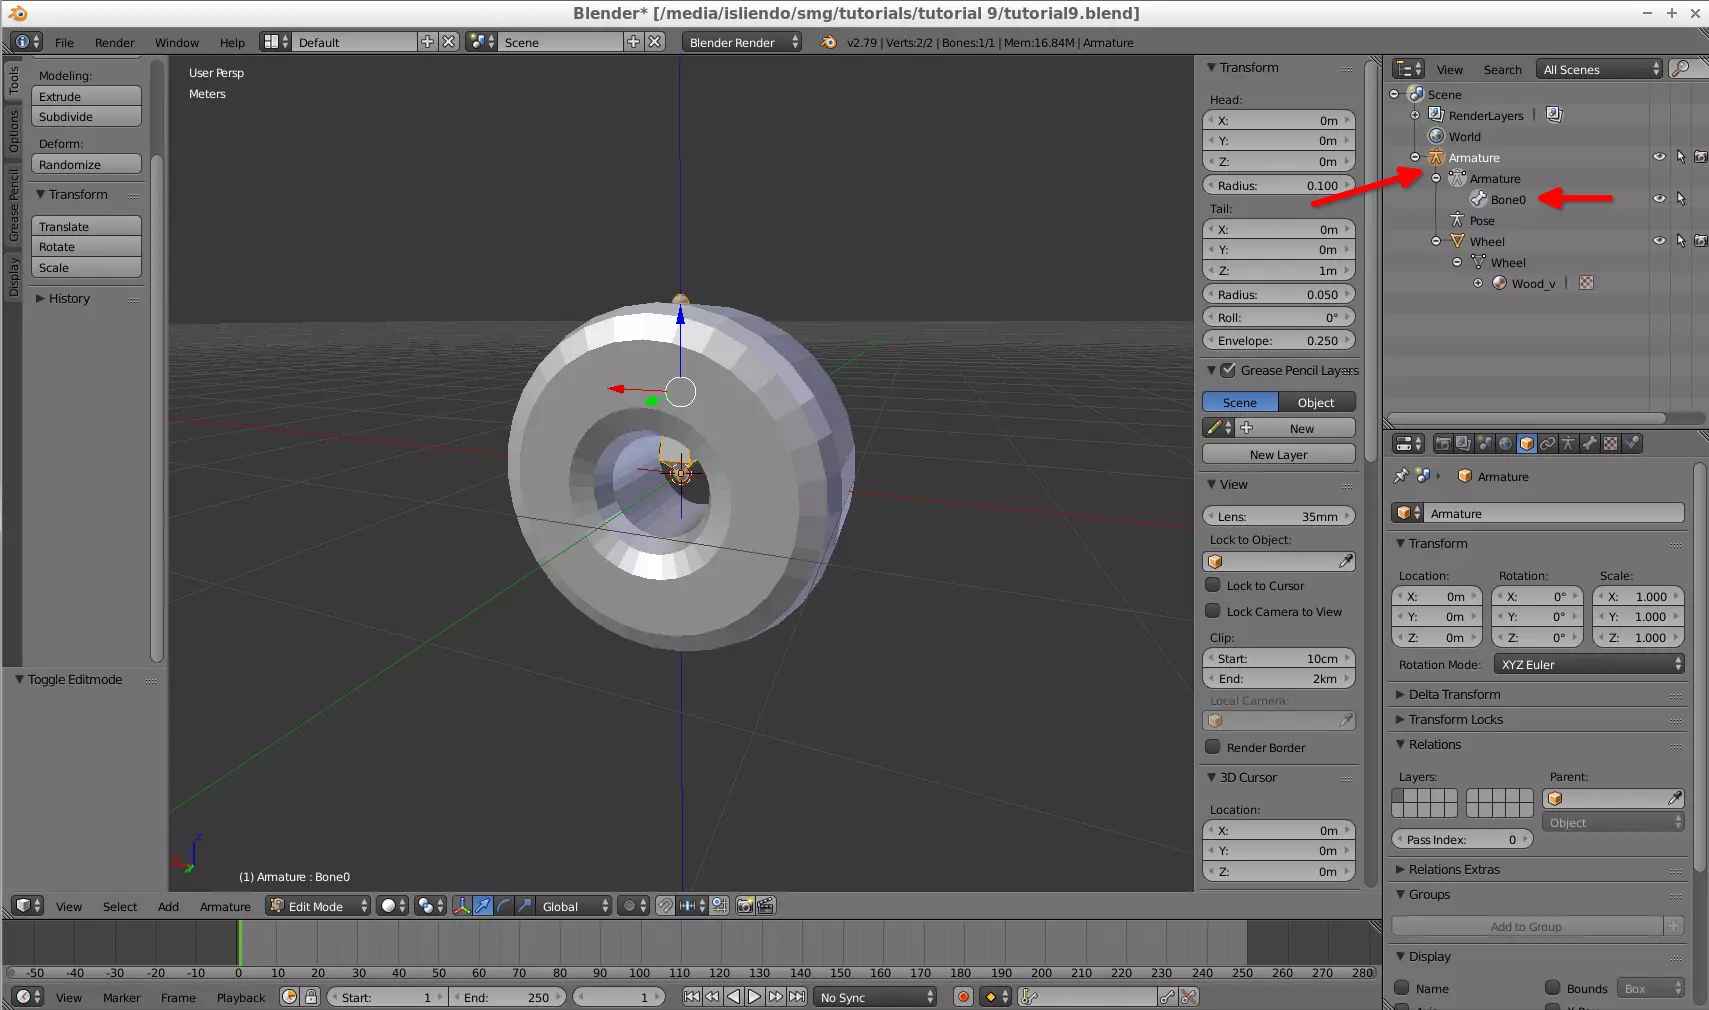
(Fig. 4 - Changing name of Armature and Bone)
With the model selected, go to the Modifiers tab and create an Armature Modifier for the model. Set its Object value to the Armature Object (Fig. 5) and don’t apply it.
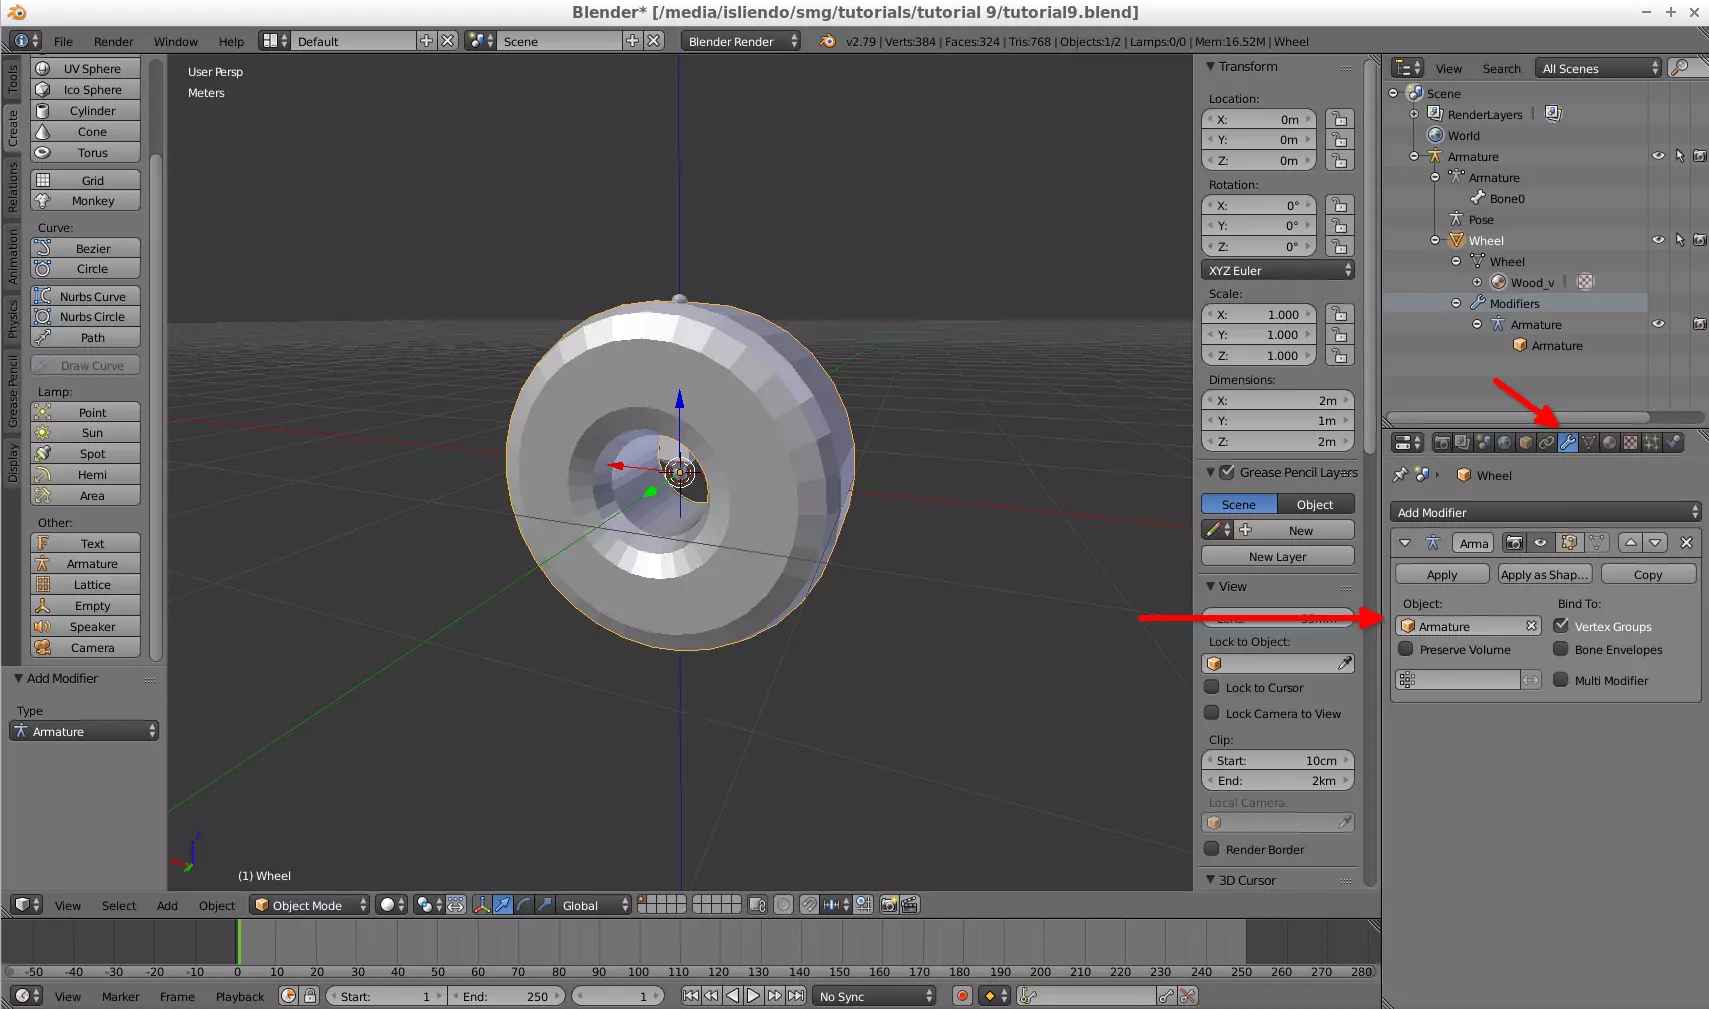
(Fig. 5 - Changing name of Armature and Bone)
Then, go to the Data tab and create a new vertex group. Set its name to match the name of the bone of the Armature object (Fig. 6). Change to Edit Mode (with the model selected), select all vertex, and then, click on the Assign button (with this you are assigning all vertex from the model to the vertex group, Fig. 7).
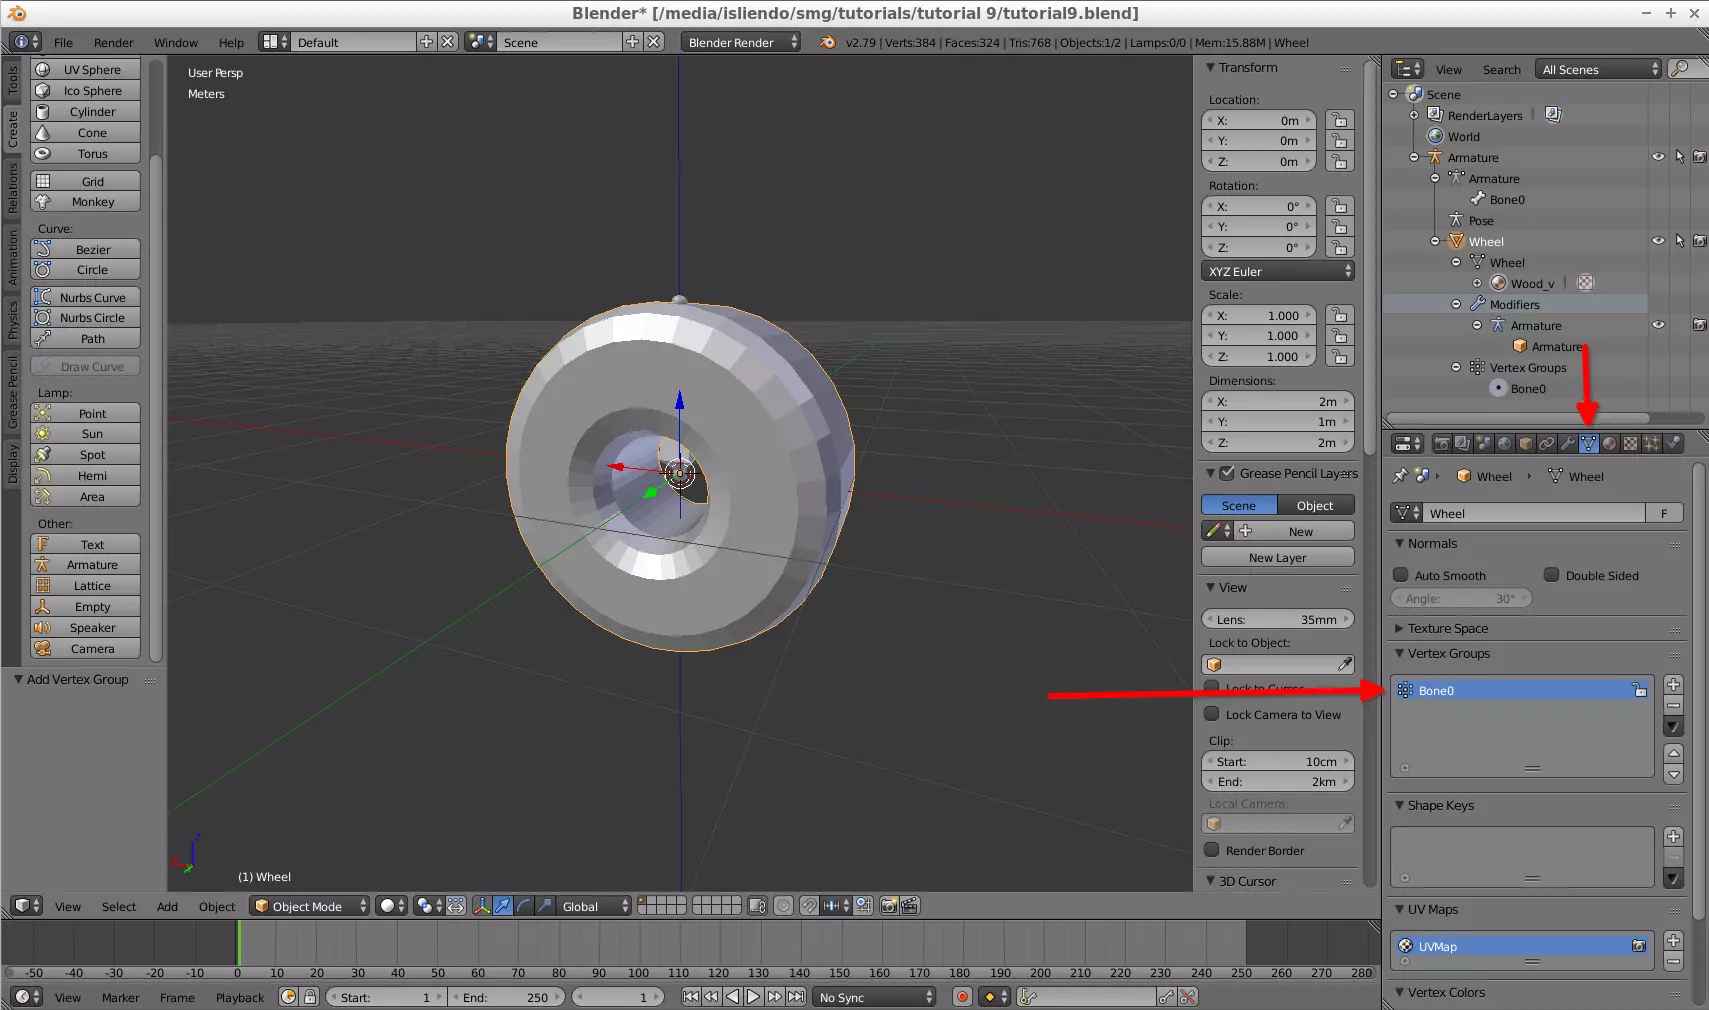
(Fig. 6 - Creating vertex group)
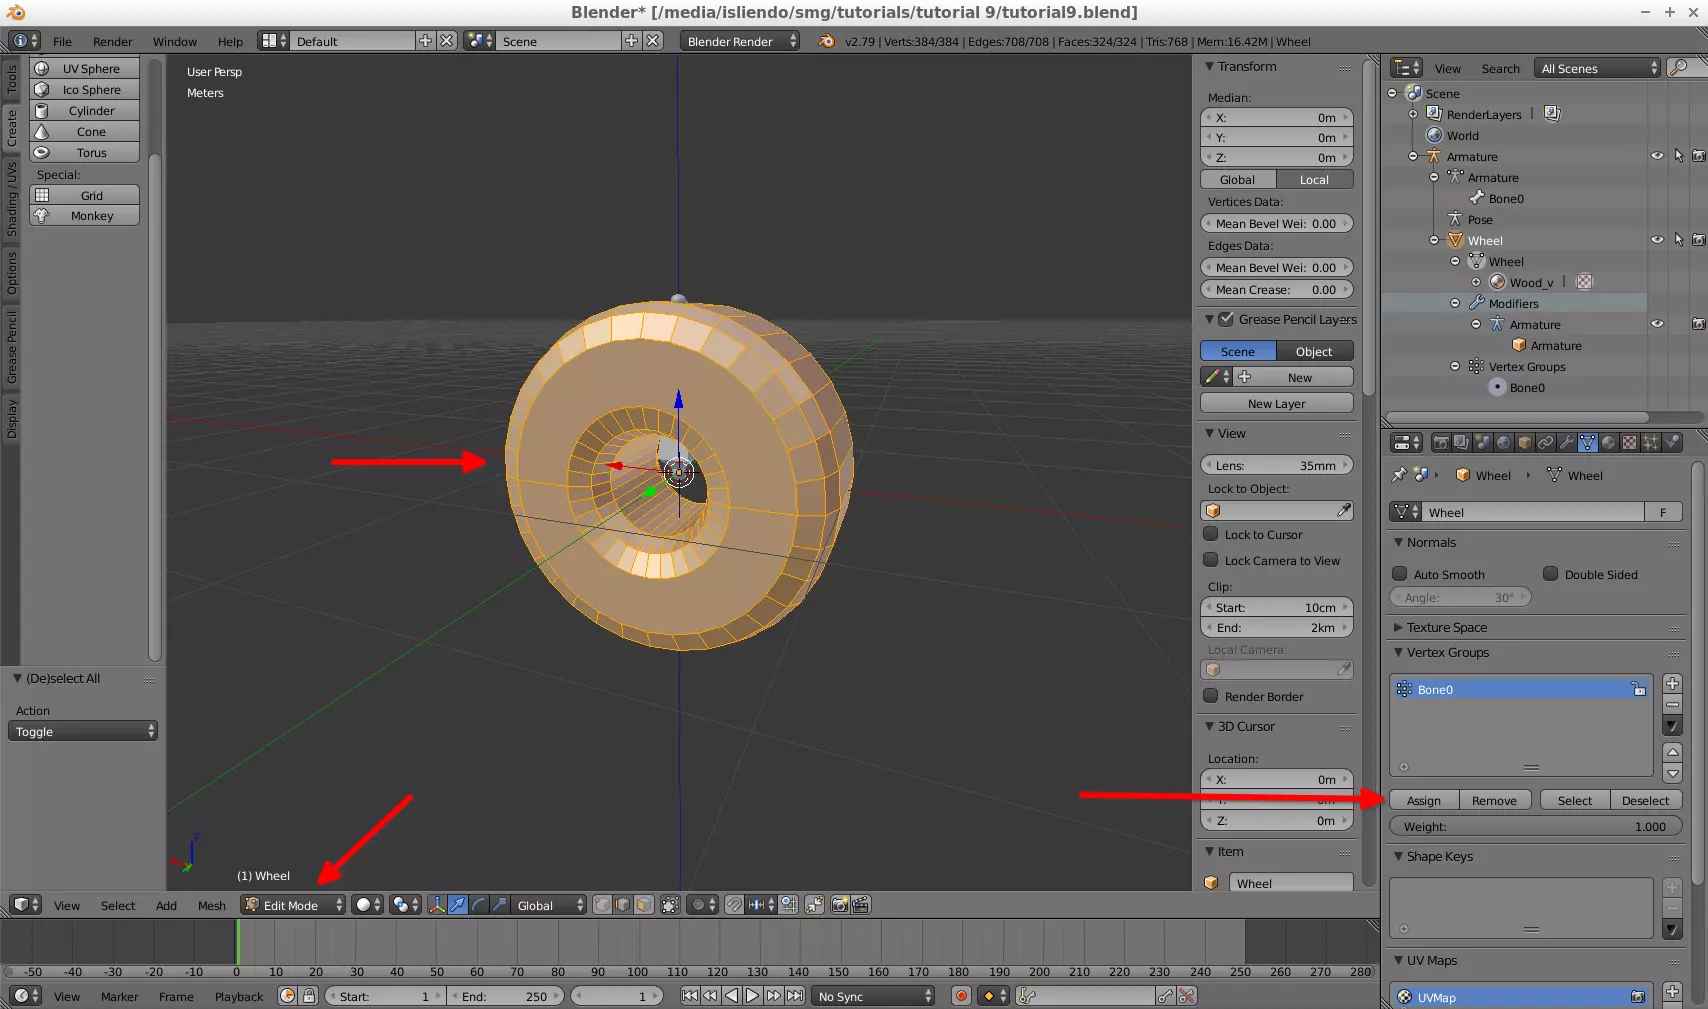
(Fig. 7 - Assigning all vertex to new vertex group)
Leave Edit Mode and enter Weight Paint (key shortcut Ctrl + Tab), your model should look blue (unweighted, Fig. 8).
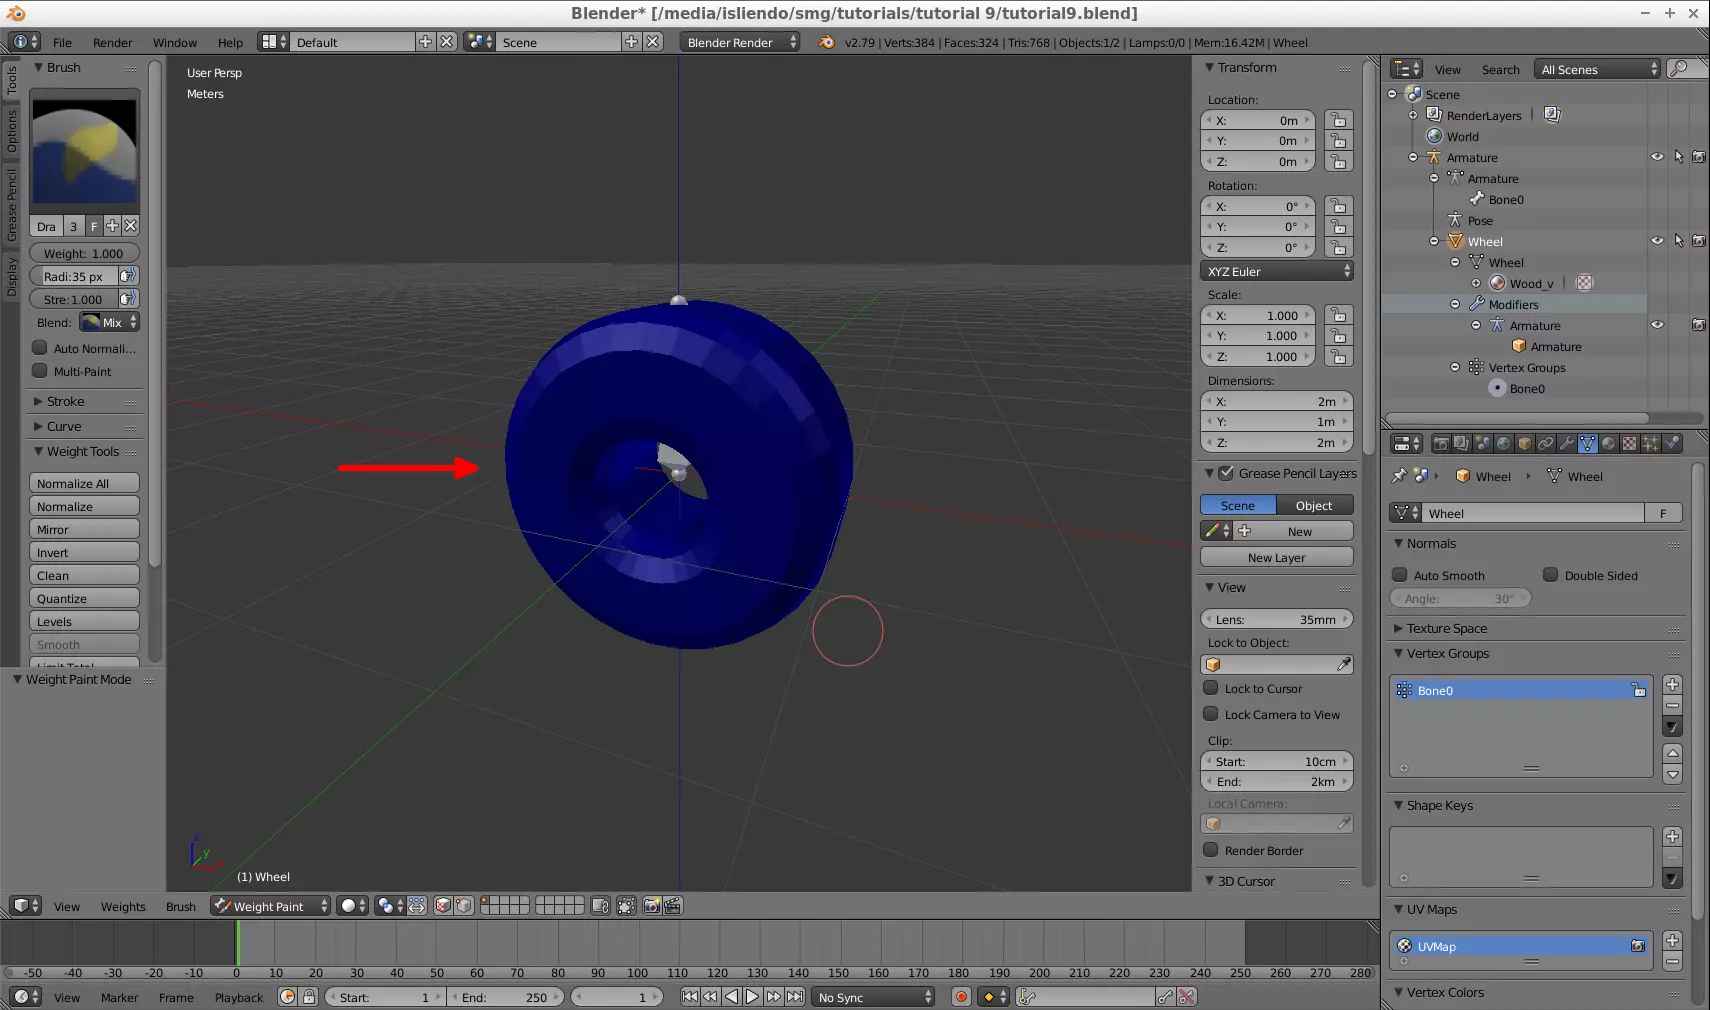
(Fig. 8 - Weight Paint mode)
Weight paint the model as you wish (process works like the vertex paint). I literally just painted it red completely (Fig. 9).
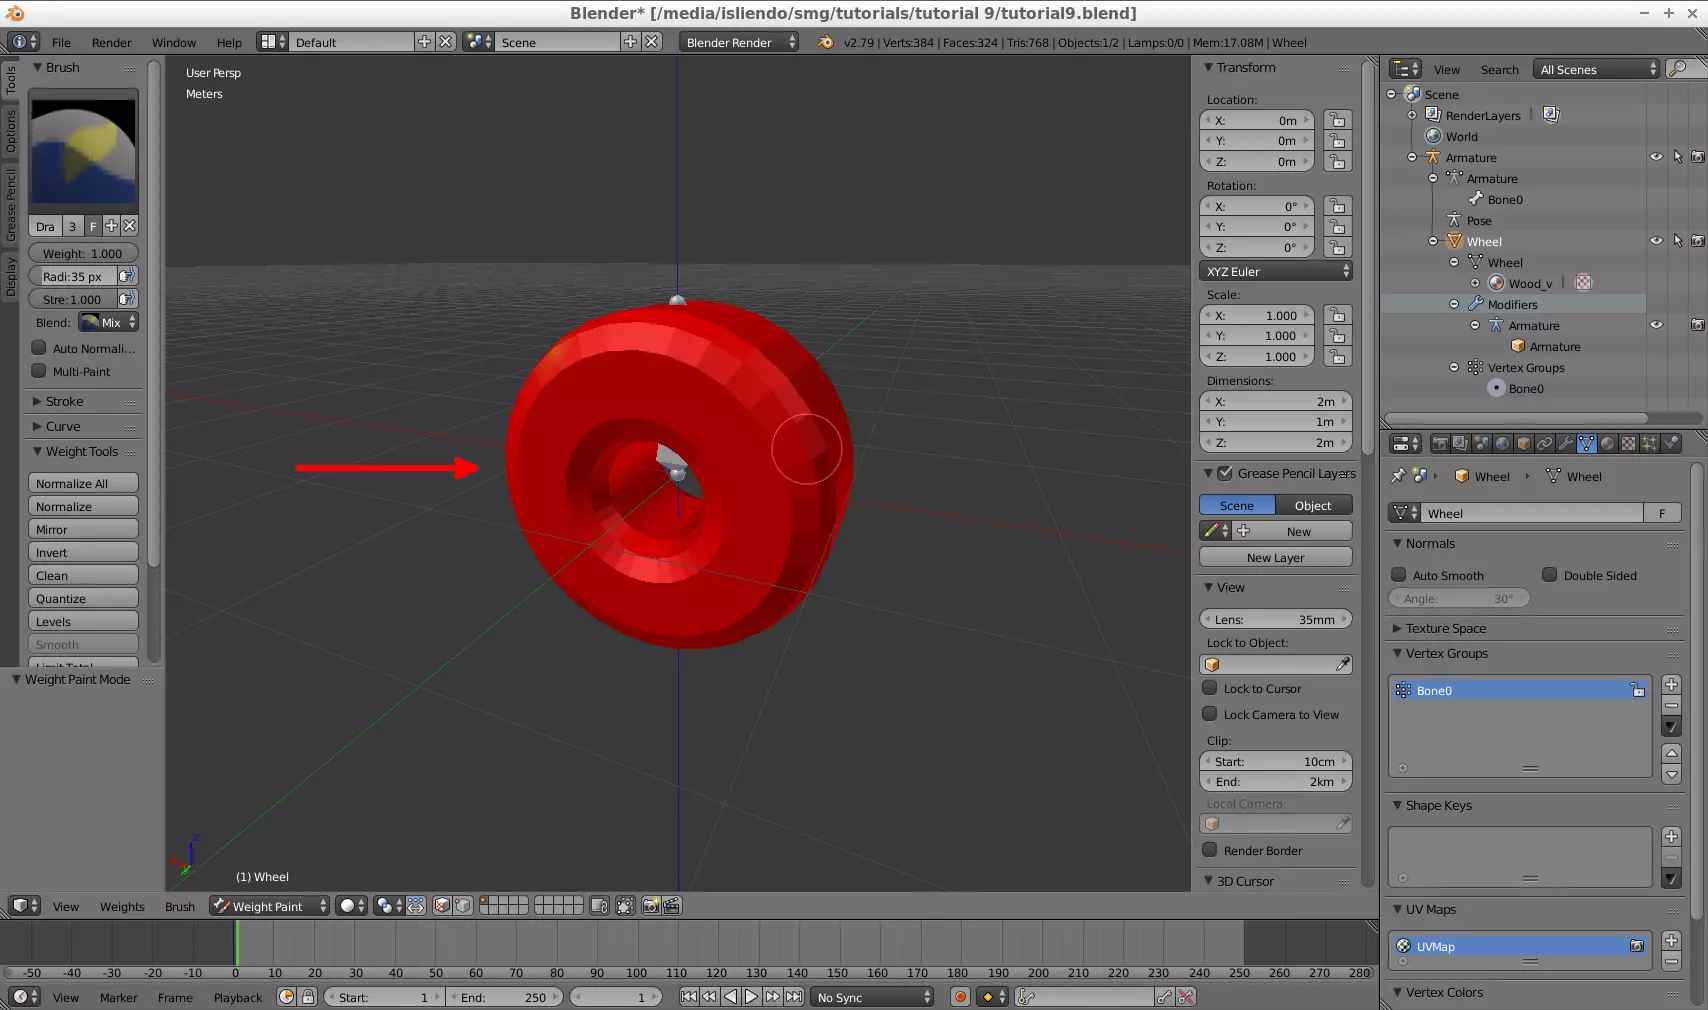
(Fig. 9 - Model weight painted)
NOTE 2: this is needed to avoid a SuperBMD crash when converting the model.
Your model is ready to abandon Blender. Export it as an FBX and be sure to uncheck the Add Leaf Bones option from the Armature tab before exporting it (Fig. 10). You can also export it as a DAE file and convert that with SuperBMD).
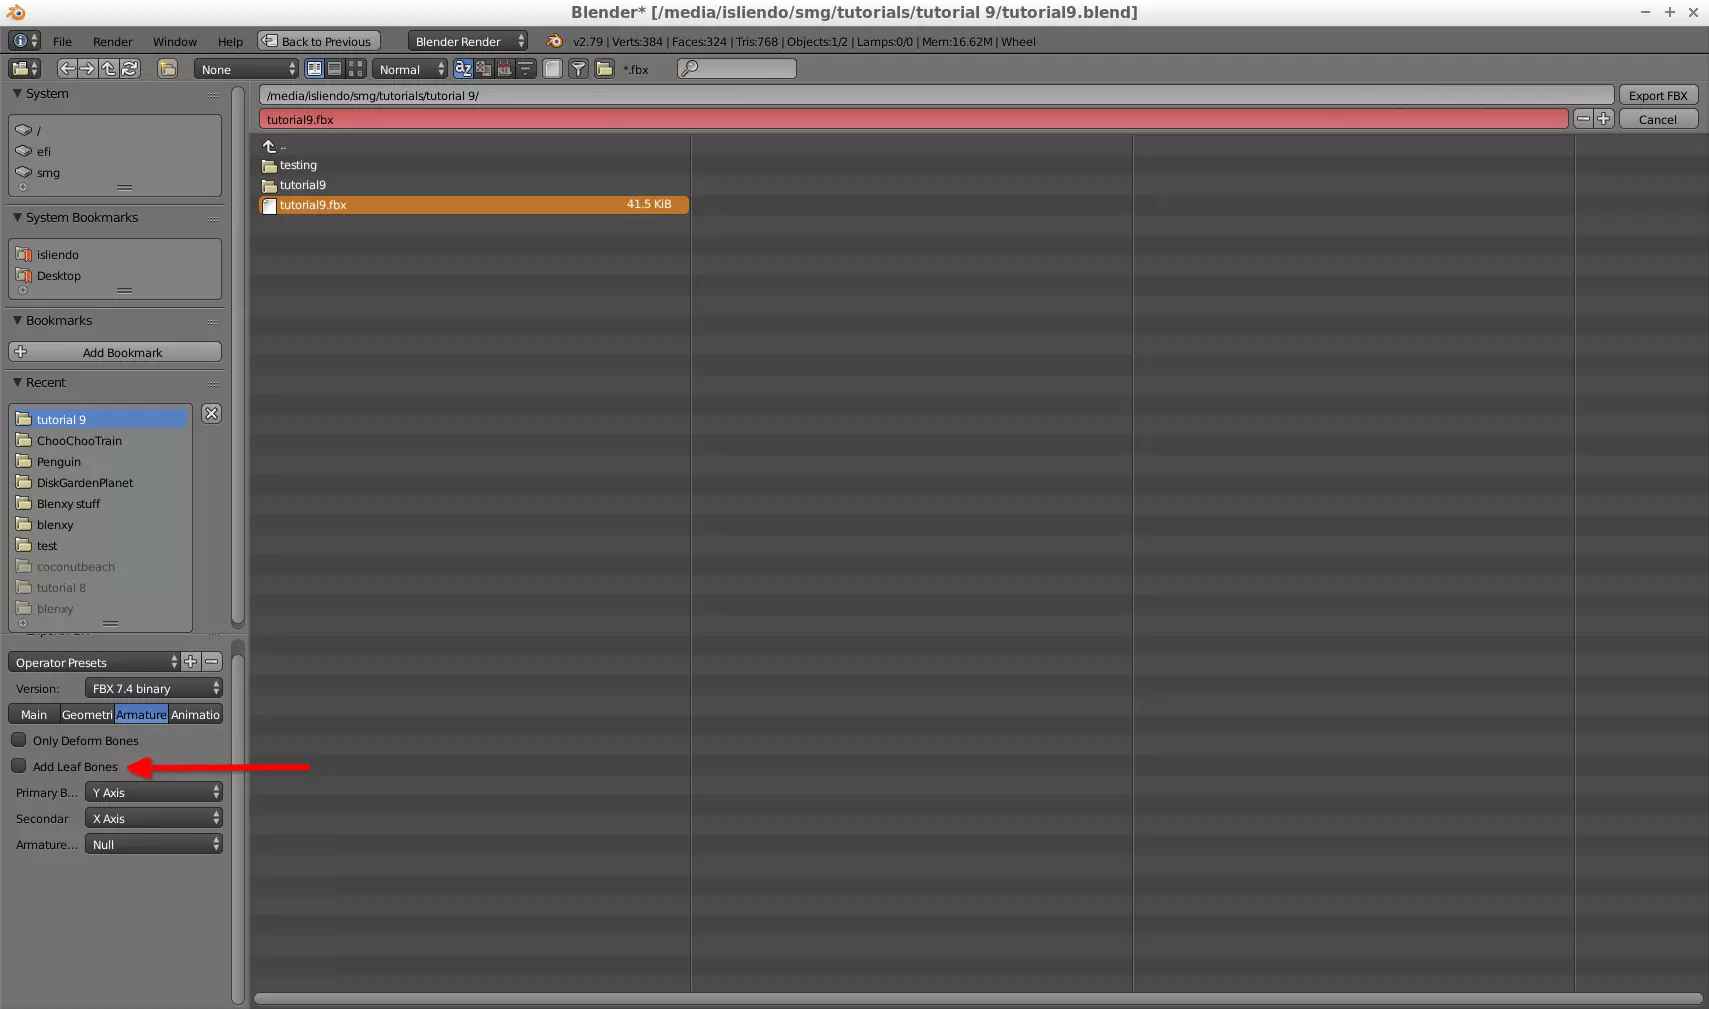
(Fig. 10 - Exporting model)
Build the model with SuperBMD using the following command (here you have to use the Armature name from before, in my case it was Armature):
path\to\SuperBMD.exe [FBX model] --mat [Material JSON] --texheader [Textures JSON] --rotate --root_marker [Armature name] --nosort
Linux users, remember to use a forward slash instead of a backslash for paths!
NOTE 3: the --root_marker flag is new in SuperBMD and it is used to help identify SuperBMD which is the main armature object of the model (in this case the one named Armature).
Then, open and save the model with j3dview.
NOTE 4: the model will appear not rotated on j3dview (it is an issue that can’t be avoided yet).
Open the j3d animation editor program, go to File > Create Animation, select .bck as animation type, set the filename to whatever you model is called (in my case it is tutorial9), set 1 as number of bones (as planned) and 1 as duration (convinience). Then, press the create button (Fig. 11 and 12).
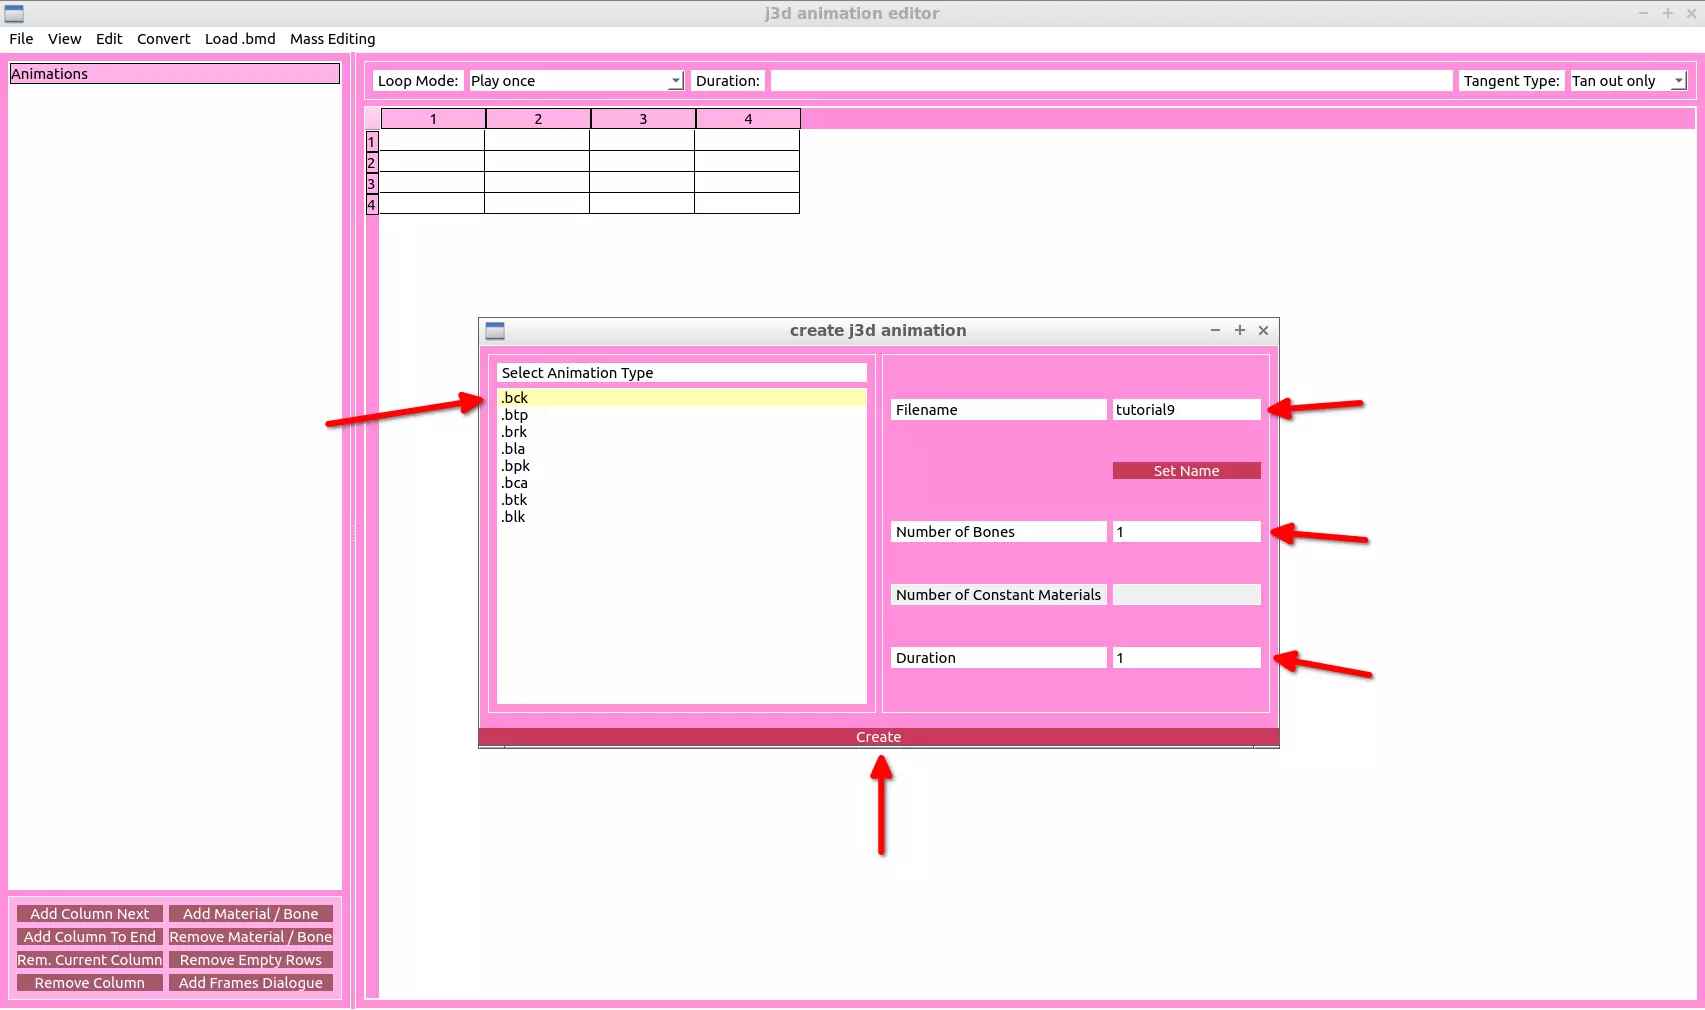
(Fig. 11 - Creating a new animation)
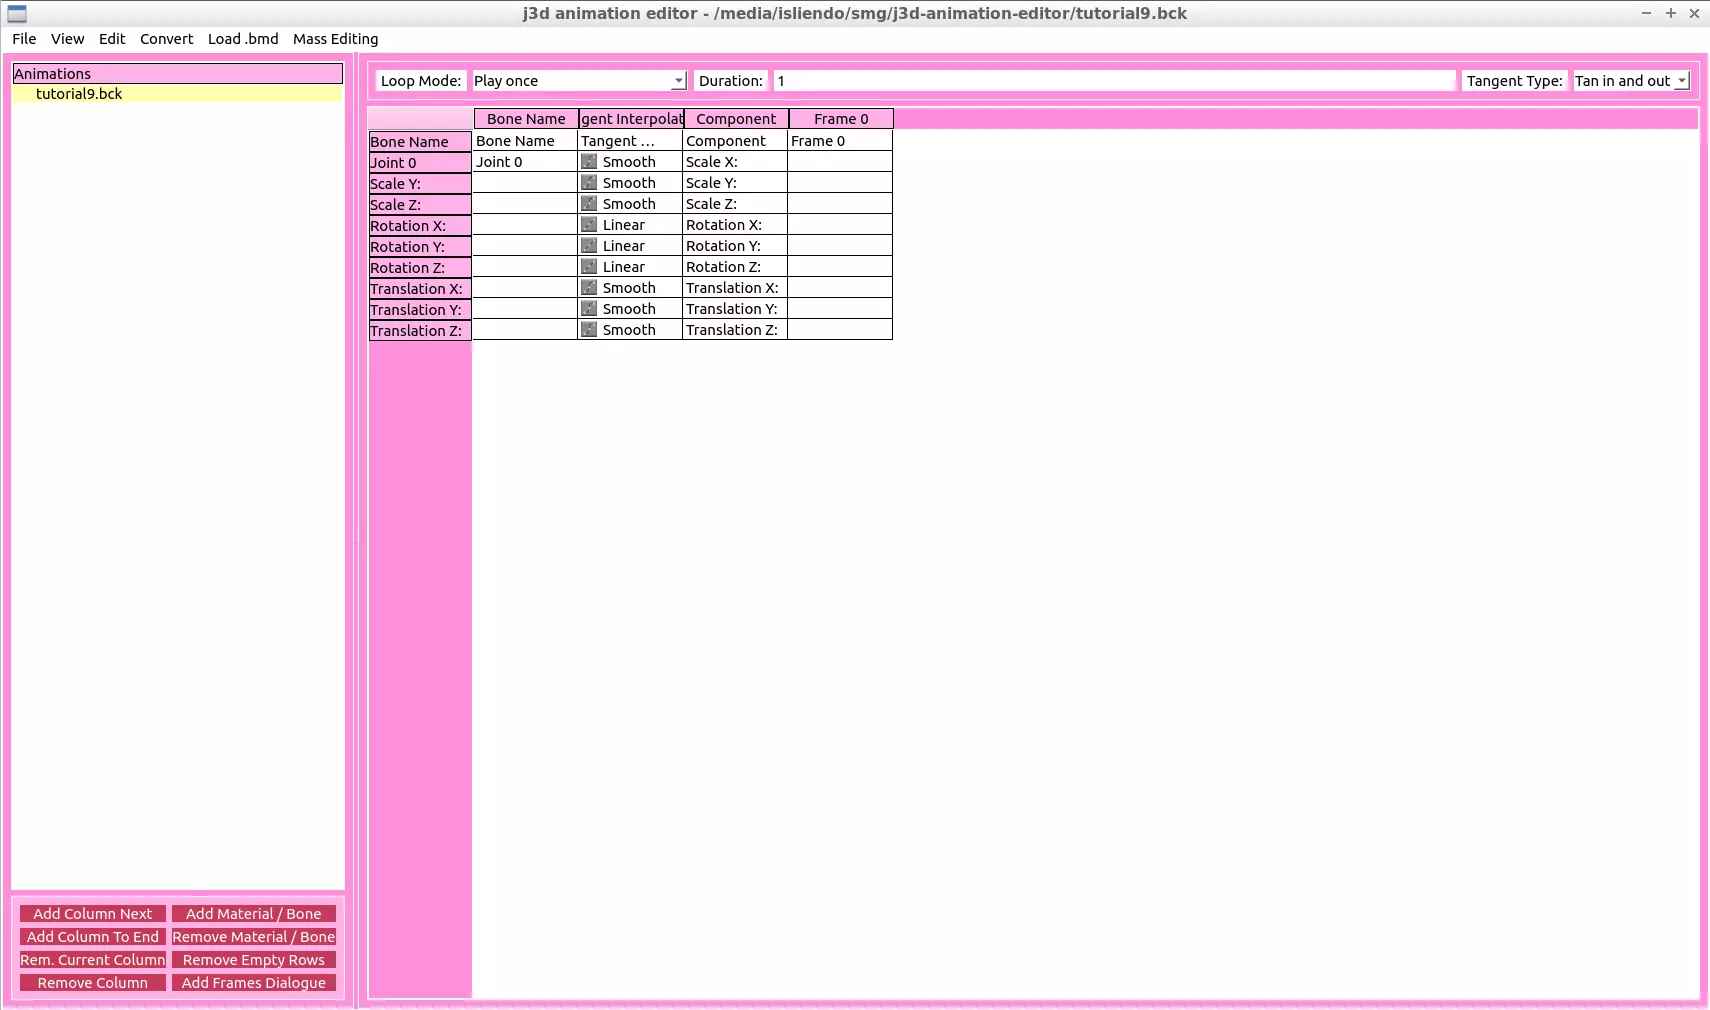
(Fig. 12 - General look of an animation project)
You will get something as shown on Fig. 12.
Quick explanation of some of the stuff shown in Fig. 12:
1) The duration field uses the Frame time unit (as a reference use 60 frames per second to convert frames to seconds).
2) The Loop Mode field has several options that define the looping nature of the animation (I smart :P).
3) The buttons on the bottom-left of the program create/delete rows and columns on the main animation table.
4) The first 3 columns of every animation table are related to the bones, the tangent interpolation thing (have absolutely no idea what that means, maybe how it is the animation timing) and the components of the animation respectively (position, rotation, scaling). The rest of columns are designed to input the data for each frame of the animation (a continuous set of frames or particular frames).
5) Each set of 10 rows correspond to all the animation data storage a single bone can hold, in other words, with those 10 rows you input the position, rotation and scaling of one bone of your animated model (for more bones you click on the Add Material/Bone button on the bottom-left).
6) The Joint 0 corresponds to the first bone of the animation (the outermost one on Blender - in this case, the single bone, Bone0).
- This program is amazing!
I want my animation to be 200 frames long and as it is a wheel, it will rotate around the Z axis and translate in the X direction (use the Nintendo reference system - Y axis is up) it will have a Mirror Loop mode. And, because I only need to set the values for 2 frames, at the end the animation table will look as shown on Fig. 13.
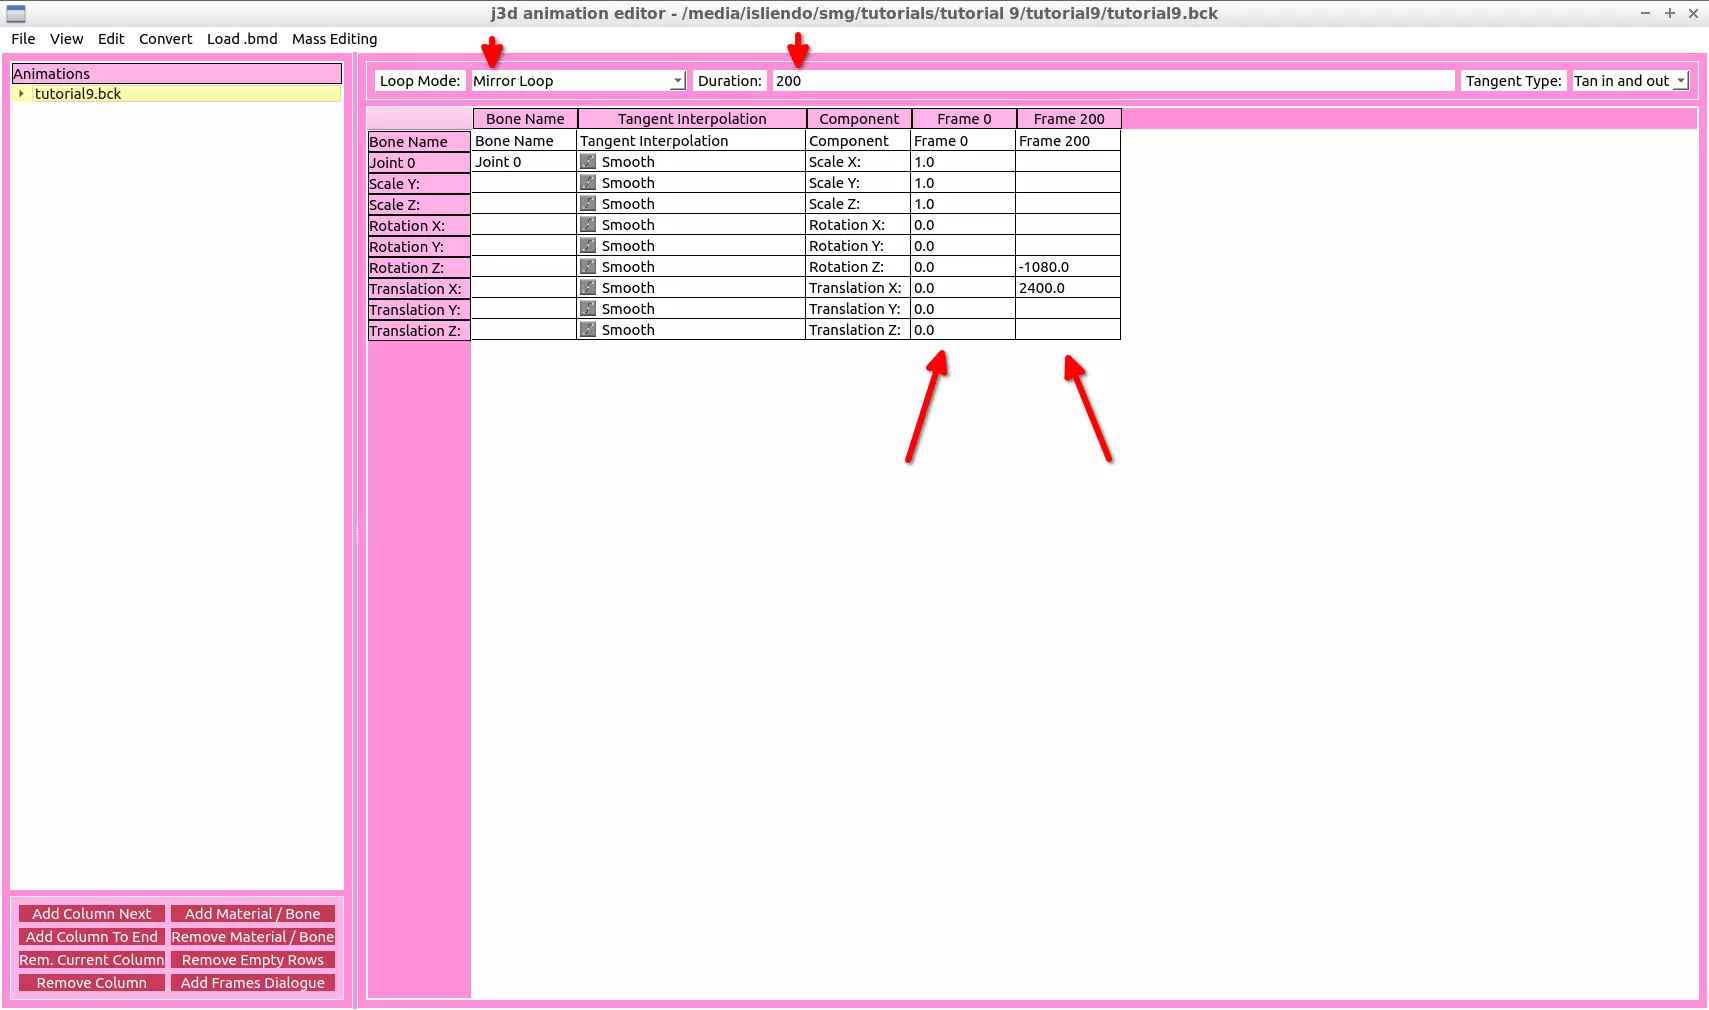
(Fig. 13 - Tutorial animation values)
NOTE 5: I can’t really explain how you should know which data is to be put in each frame as it is almost a blind process. Your best bet would be using Whitehole in conjunction with how your model looks on Blender to know how your animation might go and input the data in each frame as you like (j3dview can be used as well).
NOTE 6: You can leave some values on the frames that aren’t the first one in blank. This behavior is pretty nice as you only need to fill the fields that you want.
Then, save the animation in a location (go to File > Save... > Save As) and test it with your model on j3dview.
NOTE 7: your not rotated object will magically position itself correctly when the animation is applied to it on j3dview and on game.
NOTE 8: Mirror Loops don’t show for some reason on j3dview.
If everything shows correctly, pack your BCK and BDL files on an ARC file and test the animated model on game! (Vid. 1).
(Vid. 1 - Tutorial animated model on game)
NOTE 9: basically before making an animation to your model you have to already know which animation you want for your model (yikes).