Contents
Required tools
Go to Resources for download links.
- Whitehole Despag
- Whitehole for SMG1
- WiiExplorer
- Tomato
About Layers, Zones and Scenarios
Layers serve as a way to group objects so they can only be shown on a Zone of a Galaxy in a certain Scenario. They can also be used to categorize objects in a planet so you can edit objects separately from other objects. They have a name that starts with Layer and ends with a letter (examples are LayerA, LayerB, LayerC, etc.).
Zones are a higher level of object grouping. They are sections of a galaxy and can be placed anywhere inside of it. They work for the purpose of easing object placement around a Galaxy using an offset respect to the Galaxy origin. They also work for optimization purposes (loading/unloading objects, at least that's what I believe).
A Scenario is a combination of Zones and Layers with a Star that can be collected normally (end of the level) or when meeting a specific condition. It is basically a level/mission on a Galaxy. Their names are by default written in japanese but you can use latin characters to name them as well.
Required tutorials
Steps
To add a new Scenario to a Galaxy you have to do 2 things:
1) Add the pertinent Scenario data by using Whitehole for SMG1.
2) Add the Scenario name you are creating in the Message.arc file of the language folder you are using for your mod.
NOTE 1: 2) is done to avoid a game crash on a text related function.
First lets do 1). Open Whitehole for SMG1 and open the Scenario editor for the Galaxy you want to add a new Scenario. In my case I will add a new Scenario to FlipSwitch Galaxy (code name: FlipPanelExGalaxy, Fig. 1)
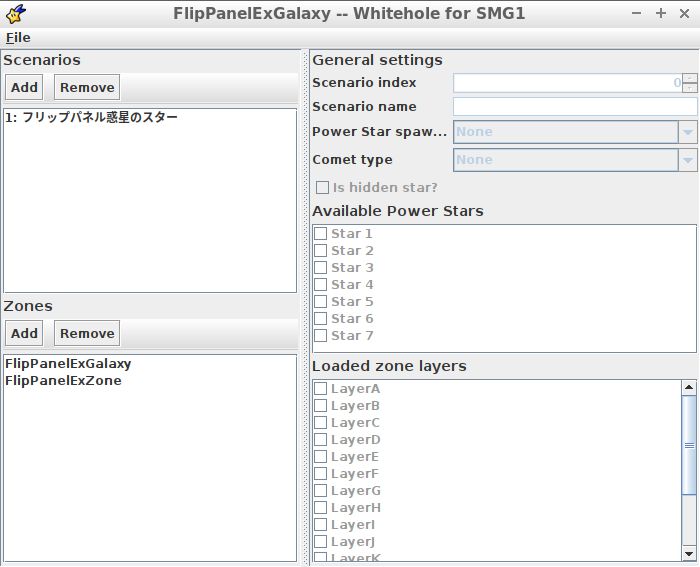
(Fig. 1 - Scenario editor opened for FlipSwitch Galaxy)
Click on the Scenario Add button and set the following fields with needed logic (Figs. 2 and 3):
- Scenario index: Star number. Be sure that it is different to the other scenario's IDs.
- Scenario name: Name of the scenario :P. You can write stuff in English on it.
- Power Star Spawner: Condition used to make the star appear. None is to make the star available right away.
- Comet type: Prankster Comet to use (Purple coins, Speedy, etc.).
- Is hidden star?: Star can be collected from another scenario. Check the star in that other scenario.
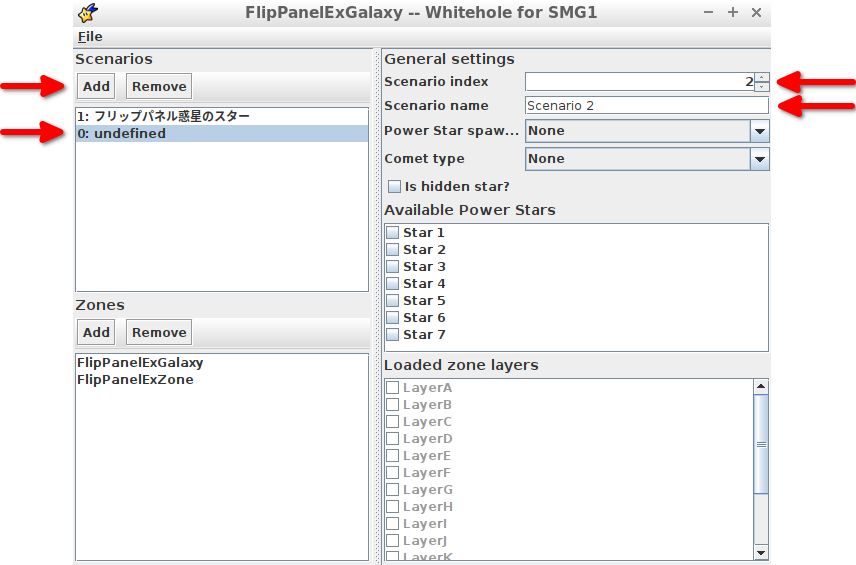
(Fig. 2)
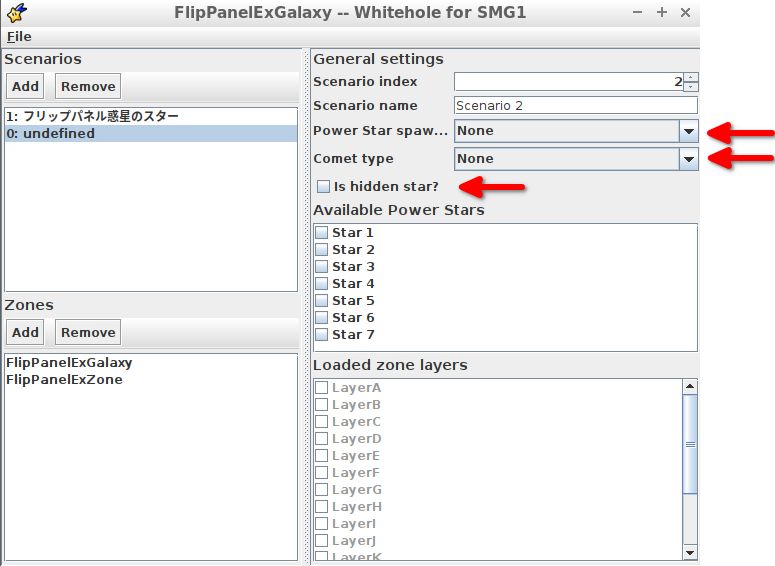
(Fig. 3)
NOTE 2: In my case I left the last 3 fields mentioned above in None, None and Unchecked.
Set the Available Power Stars for the scenario (just one in my case). Usually you would use the Scenario index number as the star number (Fig. 4). And the layers each zone will display for that scenario (Fig. 5).
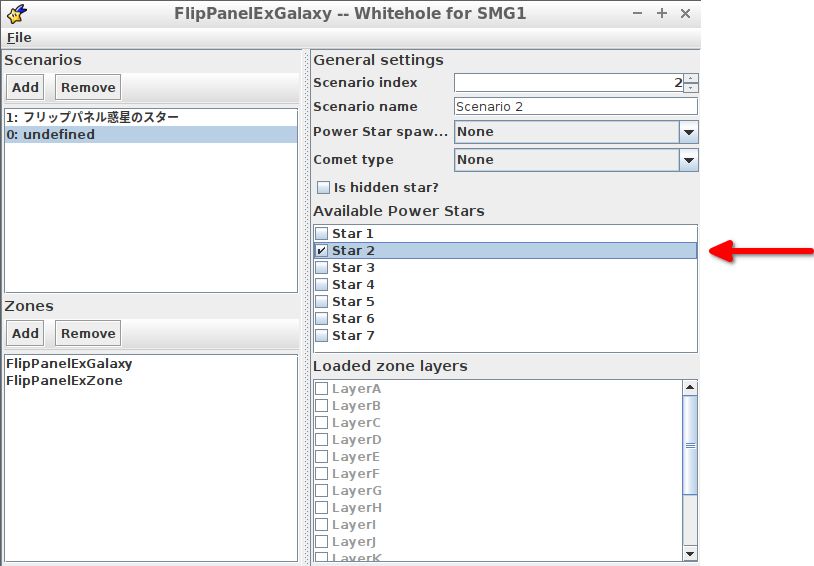
(Fig. 4)
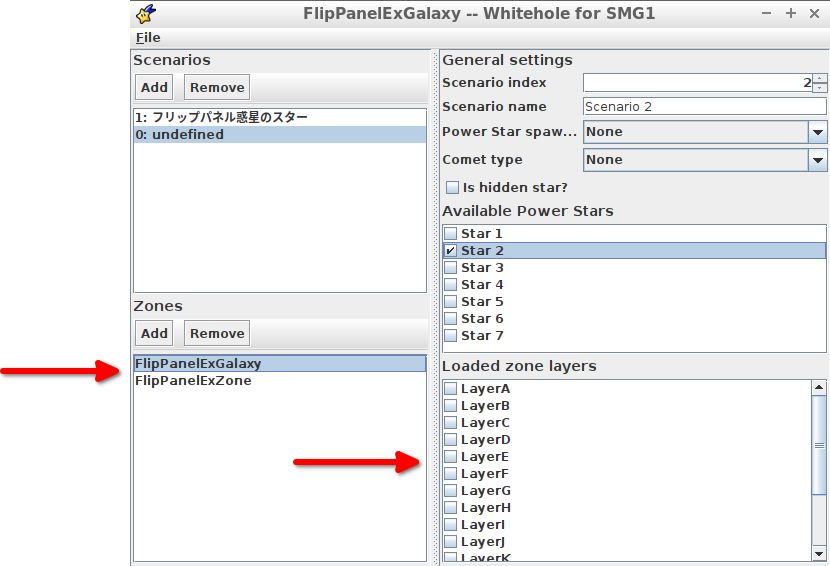
(Fig. 5)
NOTE 3: In my case I did not use any layers of the available zones, that means I am using the Common layer.
Save and now you can open the edited Galaxy on Whitehole to check if the new scenario was added (Fig. 6).

(Fig. 6 - New Scenario created for FlipSwitch Galaxy)
Add a Power Star object into the Galaxy that has a Power Star ID number equal to the star number you checked on the Available Power Stars section of the scenario editor (Fig. 7).
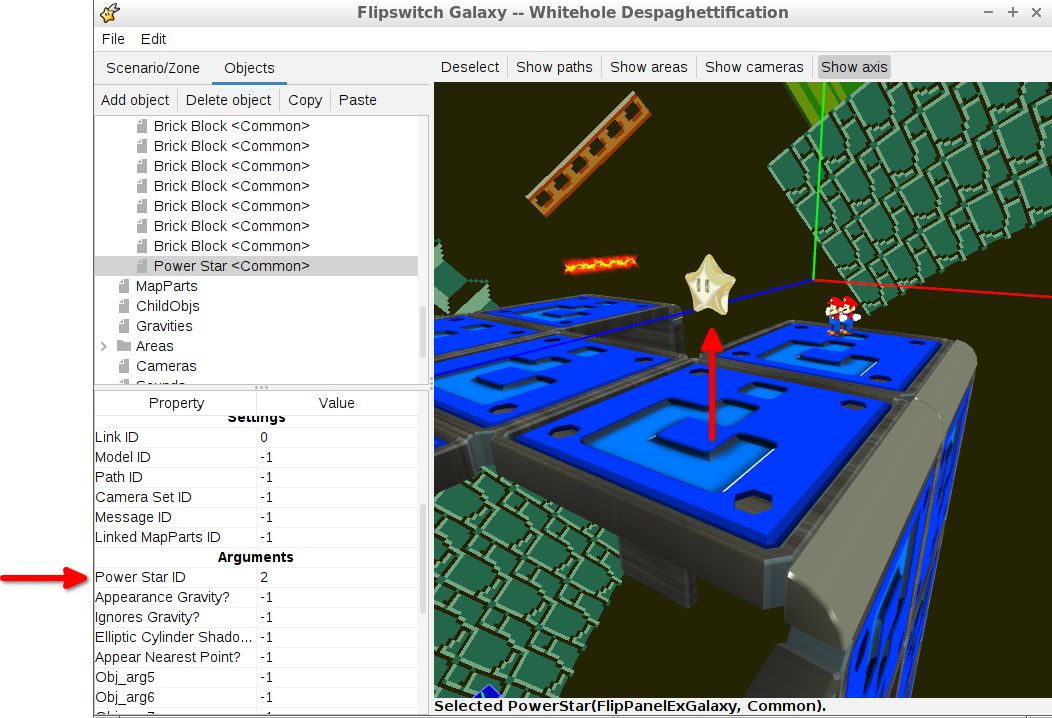
(Fig. 7 - Power Star ID change to Scenario number)
You can now save and close Whitehole. The next thing to do is 2).
Use WiiExplorer to extract the message.bmg and messageid.tbl files out if the Message.arc file of your SMG1 language folder and use Tomato to convert the BMG and TBL files into a XML (check Edit text in SMG1, Figs. 8 and 9).
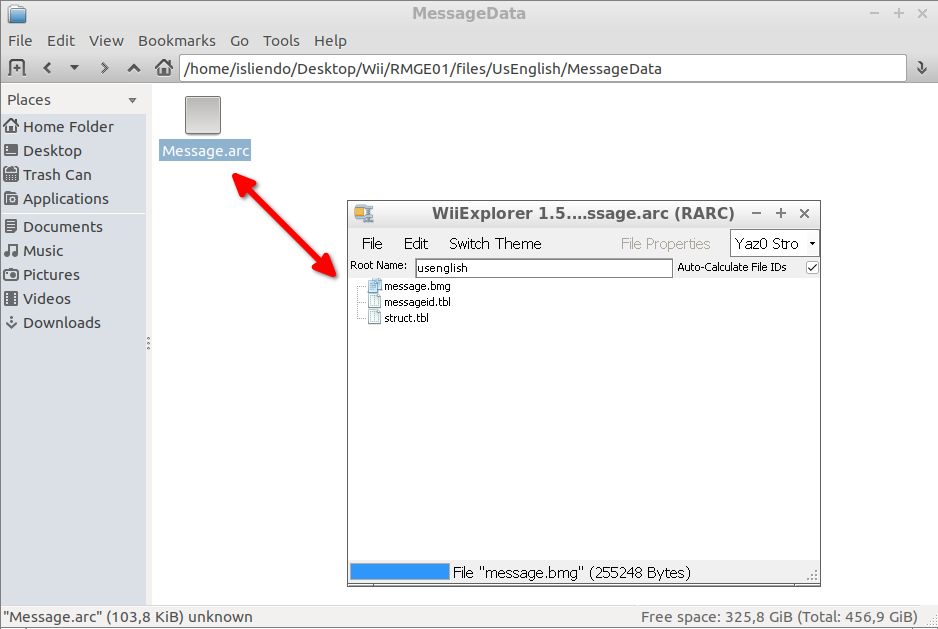
(Fig. 8 - Message.arc file opened with WiiExplorer)
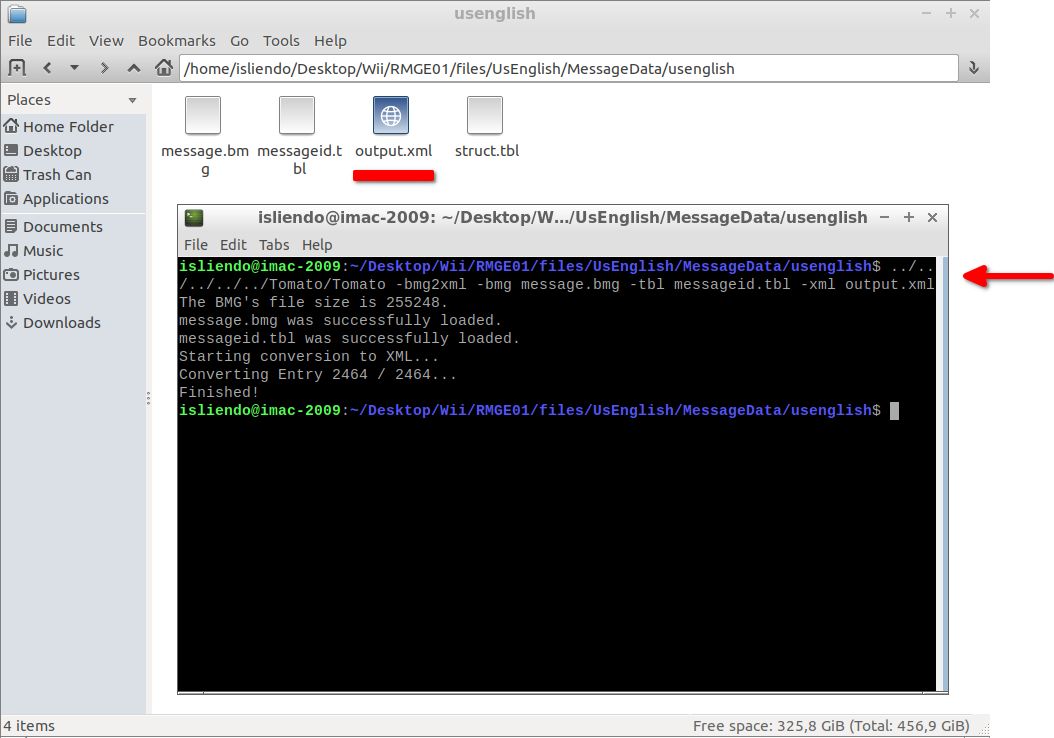
(Fig. 9 - XML file created by Tomato)
Now, locate the scenario name section of your Galaxy on the XML. Search for a known scenario name of the Galaxy (Fig. 10).
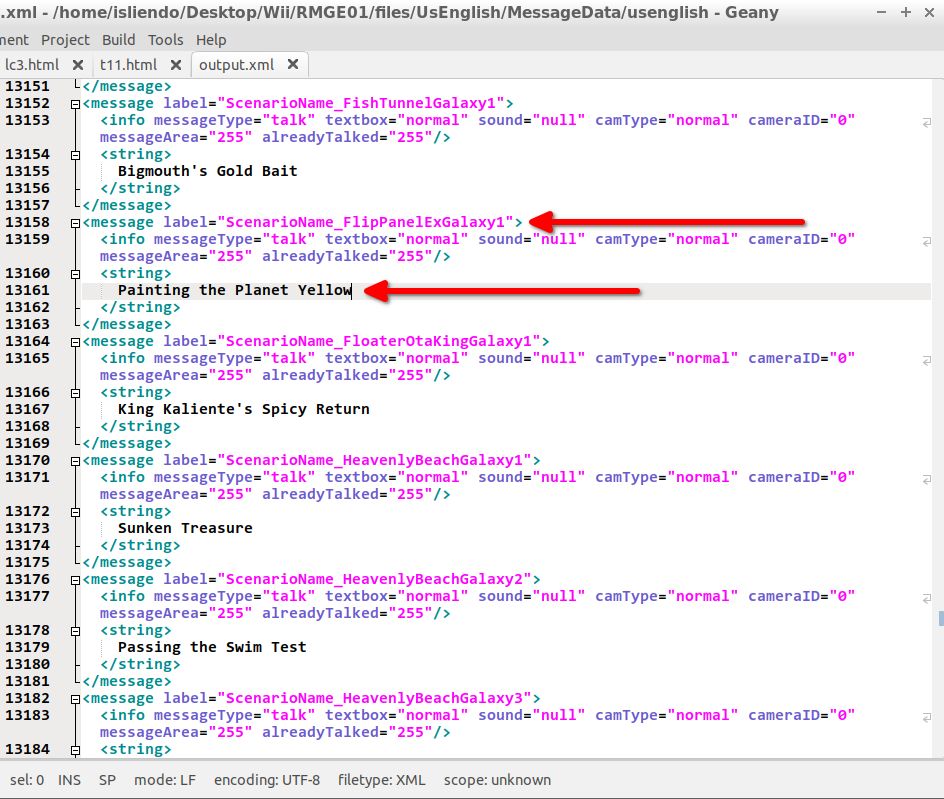
(Fig. 10 - Scenario name search for the target Galaxy)
As it is a new scenario for this Galaxy we must create a message tag for our scenario below the last one for said Galaxy (Fig. 11). You can do that by changing the ScenarioName_[Galaxy Name][Number] to the target Galaxy code name ([Galaxy Name]) and the target scenario number ([Number]).
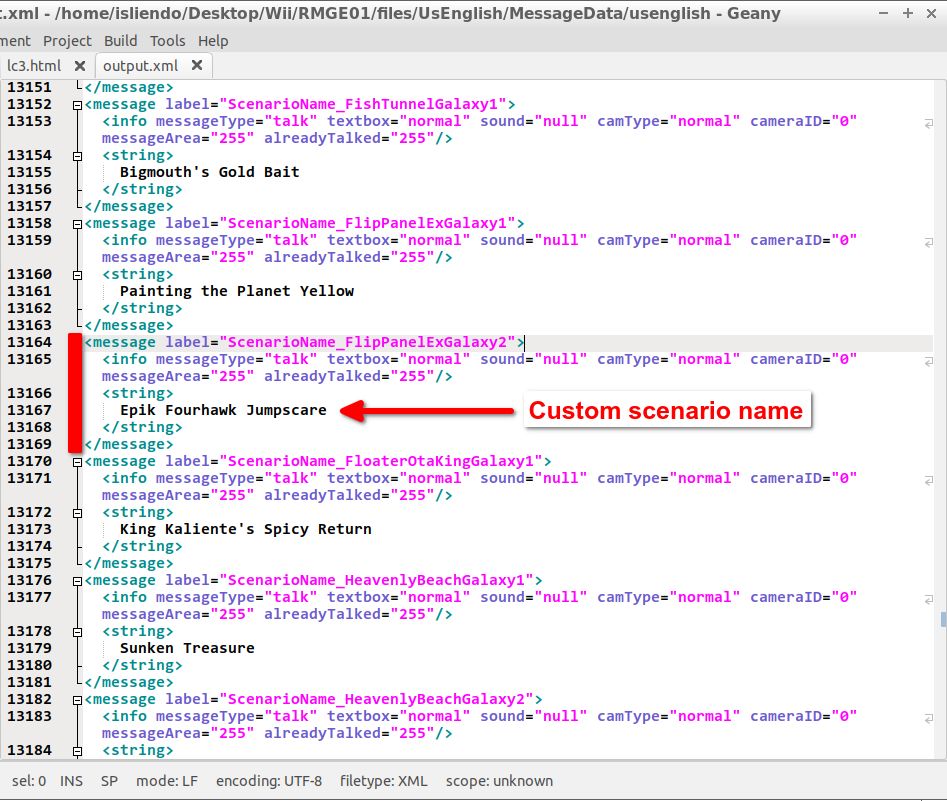
(Fig. 11 - Adding a name for the new scenario)
NOTE 4: in my case the target galaxy is FlipPanelExGalaxy and the target scenario number is 2.
After that you can save the XML file, pack it back to a BMG and TBL with Tomato, replace the pertinent message.bmg and messageid.tbl of the Message.arc file with them (check Edit text in SMG1) and you will be ready to test your new scenario on game >:]
NOTE 5: the maximun number of stars in a Galaxy on SMG1 are 7 stars by default. 3 normal stars, 1 hidden star and 2 prankster comet ones and 1 Luigi event one. If you put all 7 stars to be normal ones the game will show them weirdly placed on the star select menu. With custom code that can be fixed. Will post it below when I can get it.
NOTE 6: I hope that the Epik Fourhawk Jumpscare did not scare you too much :]