Contents
Required tools
Go to Resources for download links.
- Whitehole Despag
- Whitehole for SMG1
- WiiExplorer
- Wiimm's ISO Tools (to get your SMG1 dump)
About Layers, Zones and Scenarios
Layers serve as a way to group objects so they can only be shown on a Zone of a Galaxy in a certain Scenario. They can also be used to categorize objects in a planet so you can edit objects separately from other objects. They have a name that starts with Layer and ends with a letter (examples are LayerA, LayerB, LayerC, etc.).
Zones are a higher level of object grouping. They are sections of a galaxy and can be placed anywhere inside of it. They work for the purpose of easing object placement around a Galaxy using an offset respect to the Galaxy origin. They also work for optimization purposes (loading/unloading objects, at least that's what I believe).
A Scenario is a combination of Zones and Layers with a Star that can be collected normally (end of the level) or when meeting a specific condition. It is basically a level/mission on a Galaxy. Their names are by default written in japanese but you can use latin characters to name them as well.
Steps
First you need to know the Zones your target Galaxy has. If we take for example the Comet Observatory Galaxy, the Zones the galaxy has by default are 2, as follows (Fig. 1a)
   Galaxy:
     Comet Observatory
       Zones:
          AstroGalaxy
          TridentZone
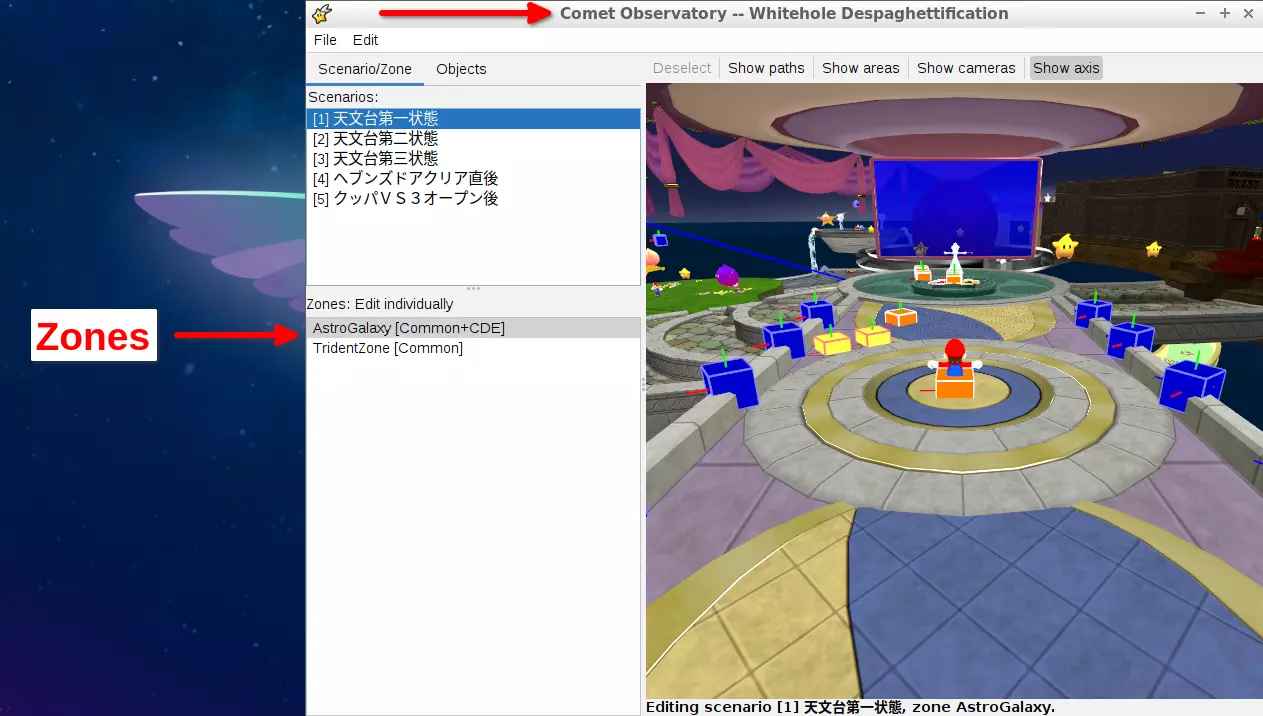
(Fig. 1a - Comet Observatory opened in Whitehole)
Each Zone has its own group of Layers available. By default, both Zones (AstroGalaxy and TridentZone), have the following Layers assigned under the first Scenario of the Galaxy, "天文台第一状態" (Fig. 1b):
   Galaxy:
     Comet Observatory
       Zones:
          AstroGalaxy
            Layers:
              Common
              LayerC
              LayerD
              LayerE
          TridentZone
            Layers:
              Common
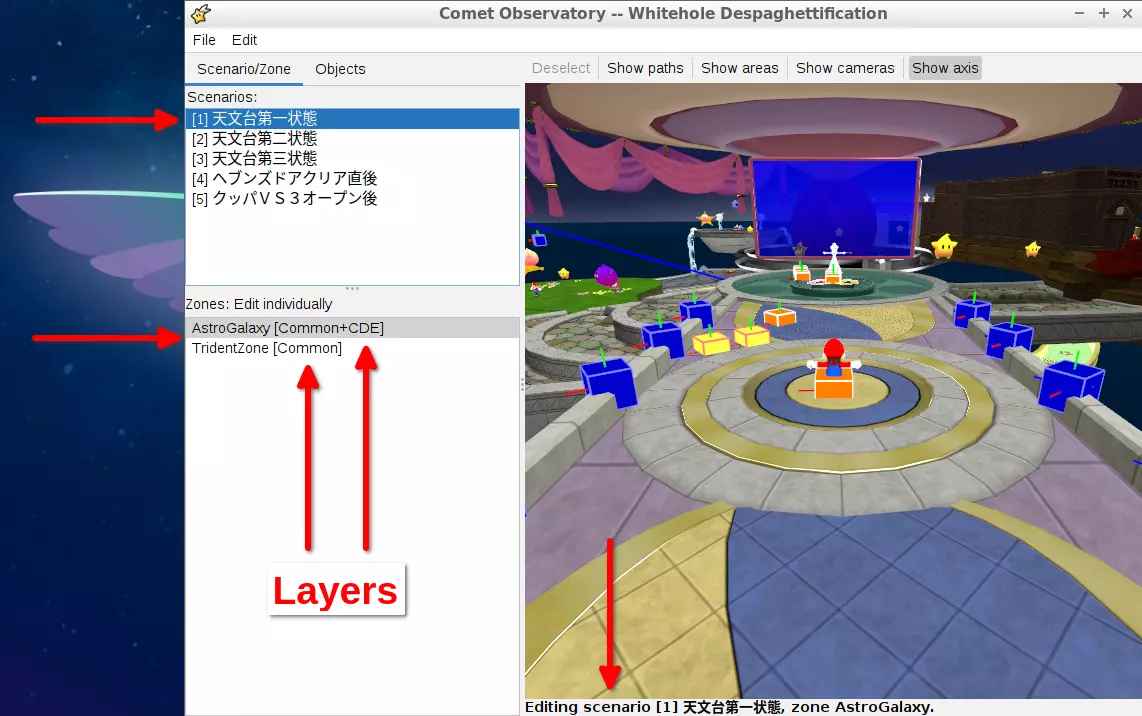
(Fig. 1b - Layers of each Zone for Scenario 1 in Comet Observatory)
NOTE 1: the "Common" layer is a default layer present in all Zones.
Across Scenarios you can see that the AstroGalaxy Zone already includes a few Layers on it (Figs. 2, 3, 4 and 5) by default it has LayerA, LayerB, LayerC, LayerD, LayerE, LayerF, LayerG, and LayerH.
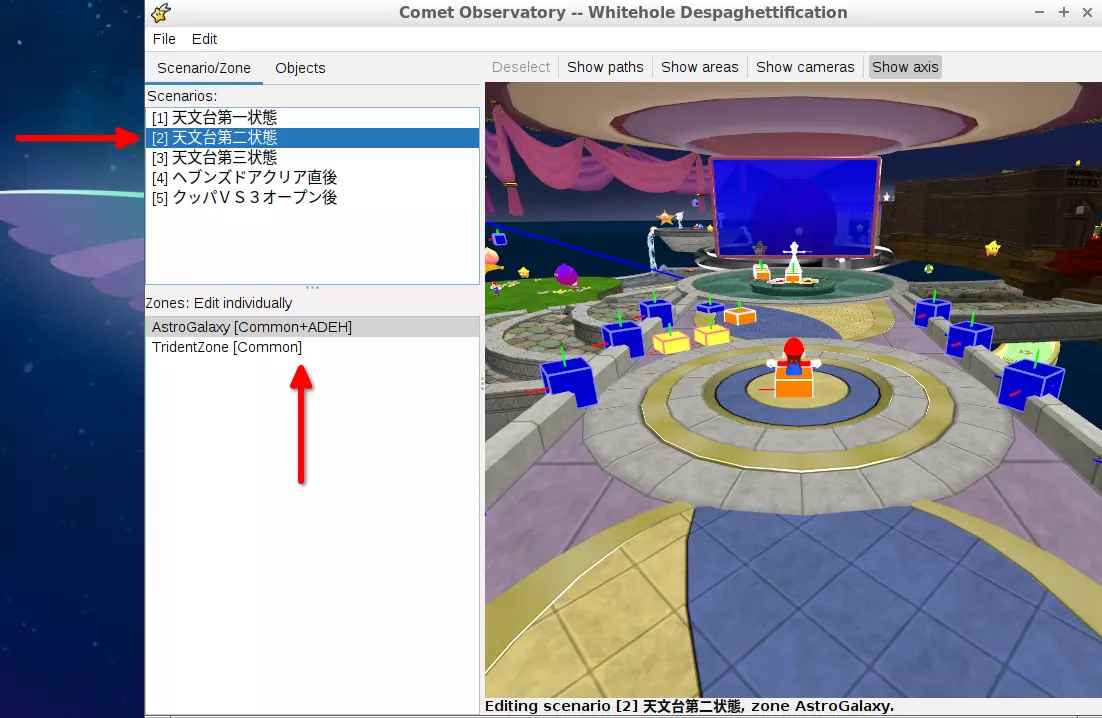
(Fig. 2 - Layers of AstroGalaxy Zone for Scenario 2)
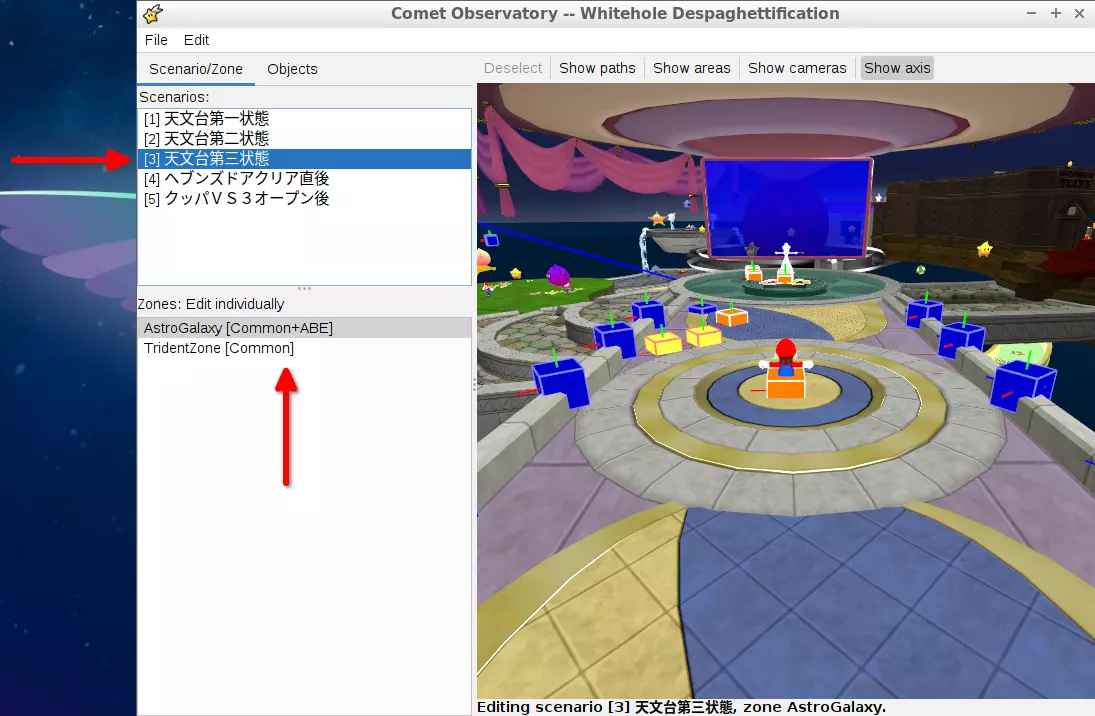
(Fig. 3 - Layers of AstroGalaxy Zone for Scenario 3)
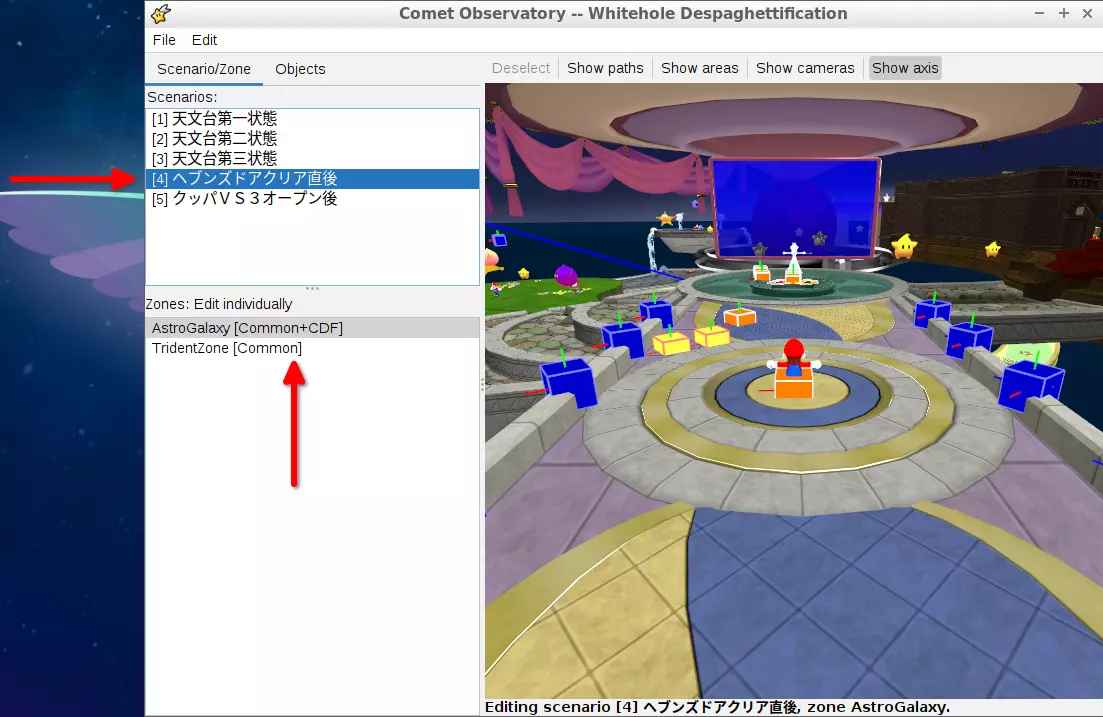
(Fig. 4 - Layers of AstroGalaxy Zone for Scenario 4)
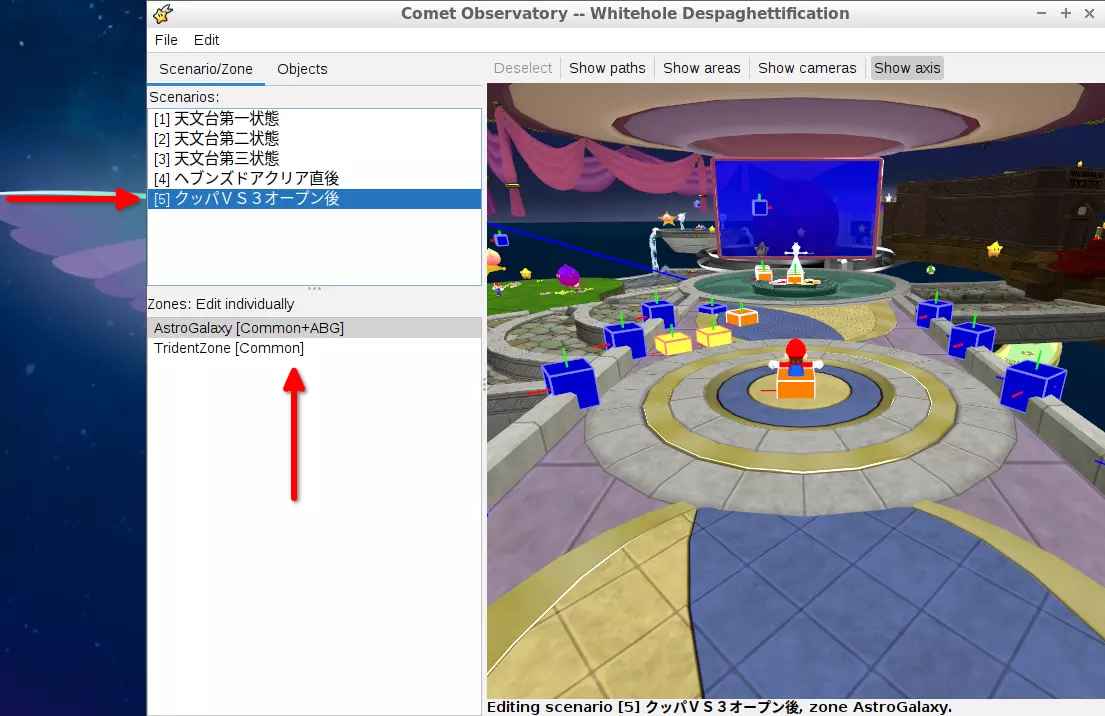
(Fig. 5 - Layers of AstroGalaxy Zone for Scenario 5)
To add a new Layer to this Zone, for example LayerI, open the file AstroGalaxy.arc located in the StageData folder with WiiExplorer and open the jmp folder (Fig. 6).
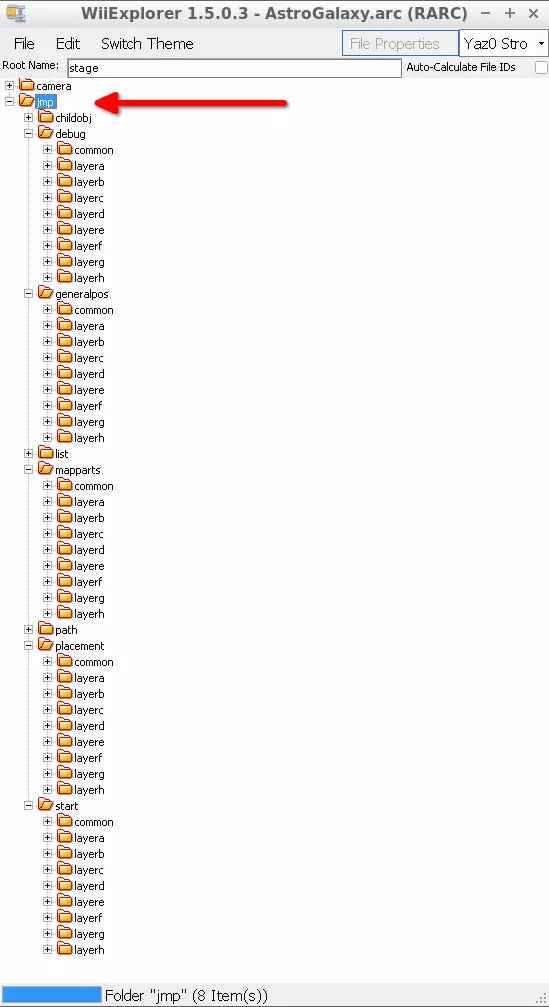
(Fig. 6 - Layers of AstroGalaxy Zone for Scenario 5)
NOTE 2: [Some Name]Galaxy.arc ARC files contain configurations of the [Some Name] Galaxy.
NOTE 3: [Some Name]Zone.arc ARC files contain configurations of the [Some Name] Zone.
Then, create an empty folder called layeri inside the Debug, GeneralPos, MapParts, Placement and Start folders (Right click on folder > Create Empty Folder - Fig. 7). After that, save the file (File > Save) and close the program.
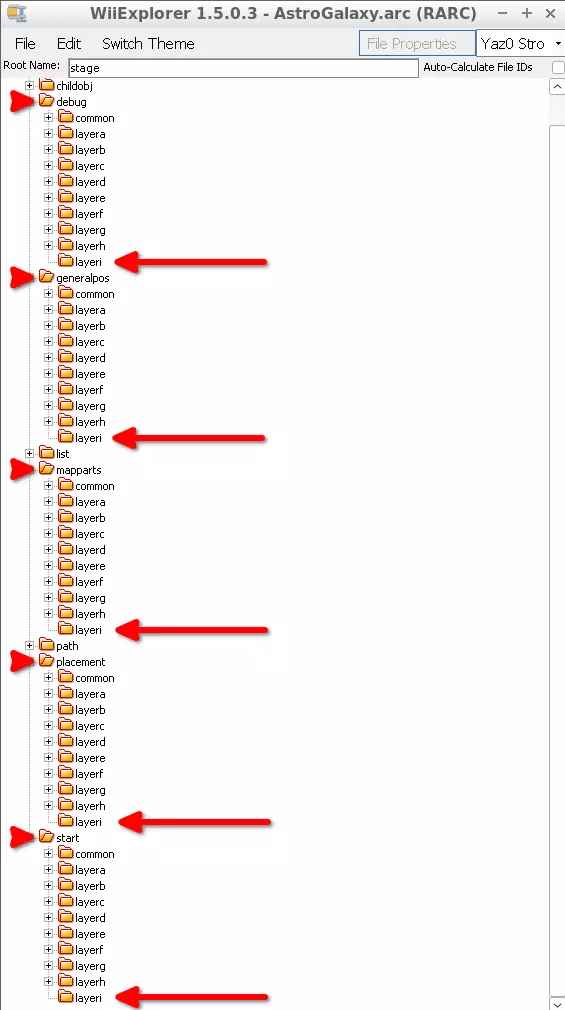
(Fig. 7 - layeri folder added to AstroGalaxy.arc file)
Now open Whitehole for SMG1 and open the Comet Observatory Scenario (Fig. 8). Then, in the window that opens, select an Scenario to use LayerI and then go to File > Save (I checked it for the first Scenario, "天文台第一状態" - Fig. 9). You can now close Whitehole for SMG1.
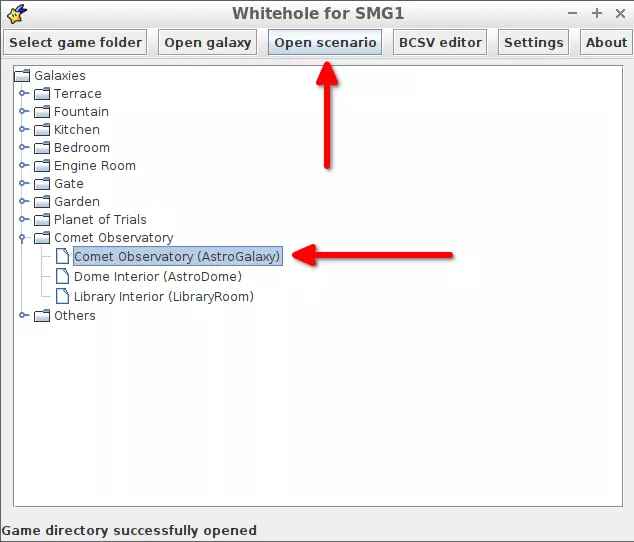
(Fig. 8 - Opening Whitehole for SMG1's Scenario editor for Comet Observatory)
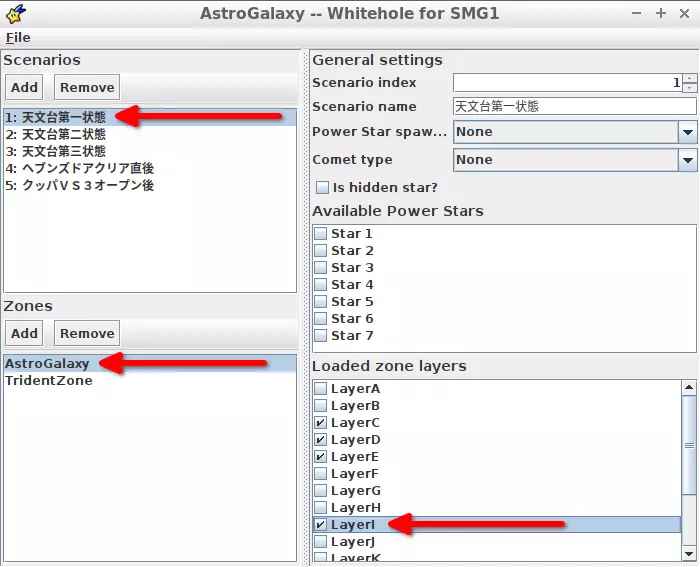
(Fig. 9 - Adding LayerI to AstroGalaxy Zone for Scenario 1)
NOTE 4: [Some Name]Scenario.arc ARC files contain the Scenario data of the [Some Name] Galaxy. These kind of files are always inside a folder named [Some Name] in the StageData folder.
NOTE 5: In this case, AstroGalaxy is itself the name of a Zone and a Galaxy in SMG1. All Galaxies will have a Zone named exactly as the Galaxy. In that case, that Zone is the main Zone of the Galaxy.
NOTE 6: The only Scenario editor available for SMG1 is on Whitehole for SMG1. Scenaristar does not work with SMG1.
Open the Comet Observatory Galaxy on Whitehole, you should see that for the Zone we edited (AstroGalaxy) there is an option for the LayerI Layer on the Zone (Fig. 10).
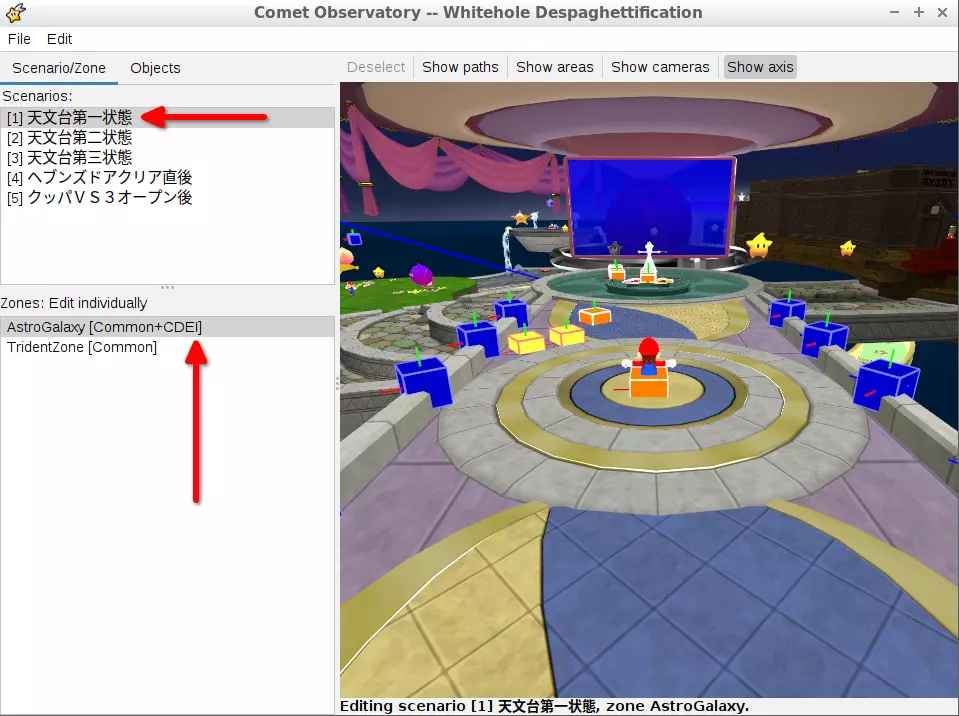
(Fig. 10 - LayerI added to the AstroGalaxy Zone for Scenario 1)
This will allow you to add objects to LayerI on the AstroGalaxy Zone in the first Scenario of the Comet Observatory Galaxy.
NOTE 7: Now that you know how to add Layers (to a Zone on a Scenario of a Galaxy) you can apply the same principle to delete/edit them. Remember to use WiiExplorer and Whitehole for SMG1!